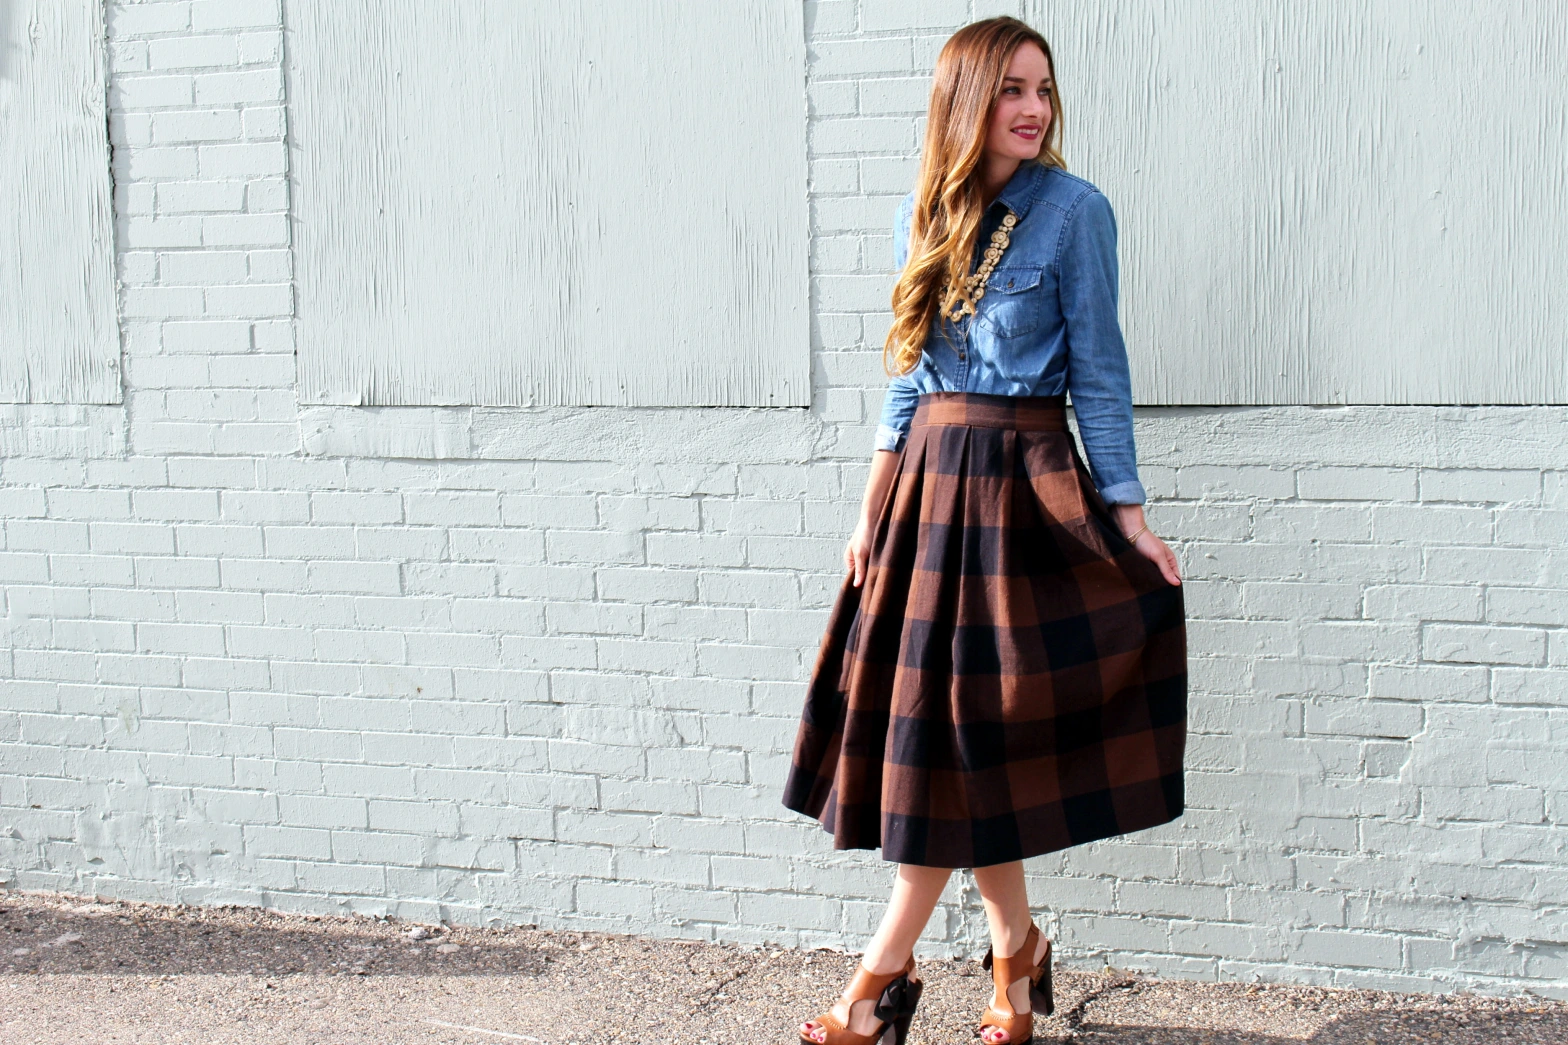


A few months ago I pinned this Anthropologie skirt, and I’ve been on the hunt for a great buffalo check fabric ever since in attempt to recreate it! Last week I came across a great brown + black buffalo check cotton fabric at Hancock fabrics that was just perfect for this project. I decided to make my skirt with pleats instead of gathers because I really like the constructed look pleats add to a garment. I chose to go for a midi length skirt (a big thing for Fall this year), just like the Anthro skirt.
You guys, this skirt is SOOO easy! I discovered a new method for pleating with just pins (no chalk, pens, etc.), and it’s so fast- I whipped this skirt up in one night. Let’s get started!
HOW TO CALCULATE YOUR PLEATED SKIRT:
- Measure your waist. Mine is 28.5″
- Waist/# of desired pleats= pleat width (28.5 waist/10 pleats=2.85″ pleats)
- Waist X 3 (box pleats need 3x the width of pleat to make)= fabric needed
- My equation looked like this: 28.5 x 3 = 87.5″
- add 2″ for seam allowance
- total fabric needed 87.5″ + 2″ = 89.5″ of fabric
- I added 1/4 yd. more for my waistband so all together I needed 2 1/2 yards. (I ended up with 3 yards, I always play it safe a grab a little extra).
HOW TO MAKE YOUR PATTERN:
(I’m apologizing for my tutorial photos in advance, unfortunately I am only able to sew at night which makes for bad lighting).
-Measure out a piece of pattern paper that measures HALF of your needed width. This will give you a front and back piece, so you will cut 2 of these out of your fabric. (You can buy this pattern paper at the Doctors office, its the same paper they lay on the exam table!). So my needed width was 89.5″ then divided by 2 came out to 44.75″. After you measure out your width, draw out your pleats. On each end of the paper, mark your 1/2″ seam allowance. For each pleat you will need your pleat length to the right and left of it. I drew dotted lines to represent the fold lines. You fold every line to the left of the pleat to the right, and every line to the right of the pleat to the left.

When you’re done it will look like this:


Next you need to cut out your fabric. Lay your pattern out on the WRONG SIDE of the fabric. Place a pin on EVERY line drawn on your pattern (but not the dotted lines). Your pattern will not reach your needed length, so make sure to cut your fabric to your desired skirt length (adding 2″ for seam allowance on the hem). You will need 2 of these. Mine looked like this when I was done:

While keeping your pattern pinned to your fabric, flip the whole rectangle over so you are now looking at the RIGHT SIDE of your fabric. It should look like this:

Now for the fun part! Before you start pleating, don’t forget the added 1/2″ on each end for your seam allowance. Simply match each pin to pin, remembering that the left side of the pleat face folds to the right, and the right side of the pleat face folds to the left. As you match your pins, make sure to repin pleats in place. As you do each pleat, gently slide your pattern paper out of place -eventually it will be completely unpinned from your fabric once you have pleated the entire piece of fabric.


When you have finished this step on BOTH front and back pieces, it will look like this:

(NOT PICTURED: Baste 1/2″ on each waistline edge on both your pleated front and back skirt pieces).
(NOT PICTURED: Sew side seams together at 1/2″, decide which side you would like your zipper to be on and make sure to stop about 5-6″ from the top to leave room for where your zipper will go, back stitch. Iron and finish your seam allowances (I just used a zig zag stitch).
Now you need to create your waistband: I didn’t create a pattern for this piece, its just a rectangle so it’s super easy to cut out just by measuring. To figure out how your waistband should measure start by taking your waist measurement (this will be your width), and decide how thick you would like your waist band to be, multiply it by 2 and add 1″ for seam allowance. So all together my waistband length measured 5 1/2″ in length. Cut your rectangle. (Mine was 29″ X 5 1/2″). Iron in half, WST.
**UPDATE: I would highly suggest cutting out a piece of fusible interfacing at this point when creating your waistband. Cut it to attach to the size of half of your waistband piece. So when folded in half long ways, half of your waist band piece has interfacing ironed onto it. This will give you more stability. I didn’t originally add interfacing to my waistband piece.
Once your waistband is cut out, pin ONE edge **(interfaced edge- the top folded edge of the waistband pictured below should be interfaced) RST to your skirt waistline, leaving a loose edge. Make sure to line up and pin centers and edges first. Sew at 1/2″.
Next Iron the loose side of your waistband at 1/2″. It will look like this:

 \
\
Flip the waistband over to the inside of your skirt, and pin in place. It should just barely cover the unfinished seam allowance.


Now, grab a needle and matching thread. Whip stitch along the edge of your waist band end to end. (You can also stitch in the ditch). I always prefer to hand stitch. Once you are finished, iron waistband.

Now you need to insert your invisible zipper. You will need a 7-9″ invisible zipper in a coordinating color. I just followed the instructions included with my zipper, very simple. I finished the top of my zipper/ seam allowance edge with a zig zag stitch. It will look like this:

Finish off your zipper edge by pinning your loose zipper tape sticking over the top of your skirt to the back of the seam allowance.


Fold your seam allowance back over, and hand tack along the edges of your zipper edge.

Once you have done this, it will look like this:

And lastly, finish by hemming your skirt. I folded and ironed the bottom edge at 1/2″, and then folded and ironed again at 1 1/2″. Pin in place, and hand tack your hemline in place using a blind hem stitch. You can also do this on your machine, I just really enjoy doing it by hand. Thats all there is to it!


Sara you are the cutest, most talented thing!!!! I love watching you do all this!!!
LikeLike
Hi! I used your pattern and at the end of it the skirt was able to fit two of me in it. The fabric I used was not high quality so little strings constantly unravel from the skirt because I didn’t know to hem (this was my first sewing project). Otherwise I love the skirt and will continue to use this pattern for other skirts using my own modifications. Thank you!!
LikeLike
Would love to know what amazing things you’d make if you could sew all day too! Thanks, brilliant tutorial!
LikeLike
This is fabulous, thanks for sharing! PInning now.
LikeLike
I’m a little confused about how wide to make the pleats. They are 2.85 inches wide? That gets tough (for me) to calculate on either side of the dotted line. Suggestions?
LikeLike
Let me take a look, I’ll respond to your email in a bit!
LikeLike
Thank You SO much foro this tutorial excellent
LikeLike
Excelente tutorial. me encanta
LikeLike
What type of fabric did you use? Sorry if I missed that in the tutorial. Hoping for a plaid other than flannel 😊
LikeLike
Thanks for this great, easy tutorial! I want to make a box pleated skirt for myself, but I am plus sized. This makes calculation of the fabric much easier.
LikeLike
Thank you for sharing. I’m going to line the skirt for extra warmth.
LikeLike
Holaa sara!
Estoy un poco confundida con las medidas. Tu hiciste las partes de delantero y espalda por separados o usaste una sola tela? Porque las medidas no me dan. Haciendo como explicas solo me da para el delantero
LikeLike
I made this skirt as a full length skirt and cannot thank you enough for how clear your instructions are and how beautiful the pattern is! I am so happy with how mine turned out and will be using it again with new fabric ASAP. Thanks!
LikeLike
Hello! So sorry for my late reply! Thank you for the kind comment! I’m so glad it worked well for you!! Congrats! Happy sewing!
LikeLike
That is a beautiful skirt!
I’m so impressed with how quickly you were able to finish it. I think I’m still at the stage that I will need to have a pattern, but dying to try this in a maxi length, I’m 5’10, so I need to make this myself, store bought will never be long enough! Beautiful job!
LikeLike
So sorry for my late reply!! Isn’t sewing so great that way!? You can make things exactly how you like, especially when it comes to length! Thank you for the kind comment! Happy sewing!
LikeLike
OMG – I love this! What a fabulous skirt.
LikeLike