


With my daughter being Tinkerbell for Halloween this year, it was a no brainer that my baby would be Peter Pan. This is by no means an original idea, there are tons of tutorials online for pretty much his whole costume. It’s very simple to put together.
I’ll break it up into the hat, the shirt, and the pants.
The Hat:
For the hat you will need 2 sheets of green craft felt, and 1 sheet of red.
To make your pattern, measure the length of the child’s head from the middle top of the forehead to mid back (or yours, depending on who its for). Add about 1 1/2″ for ease and seam allowance. Draw a straight line with this measurement. This is the bottom of your hat. Hand draw the shape below to complete the pattern, based off of the straight line measurement. Pin your pattern to two pieces of green felt. Cut it out.

2. Pin the two side edges of your hat, and sew together at 1/2″ seam allowance.

3. Flip your hat inside out, and fold up the brim (about 2- 2 1/2″). Use your finger to push the top point out.

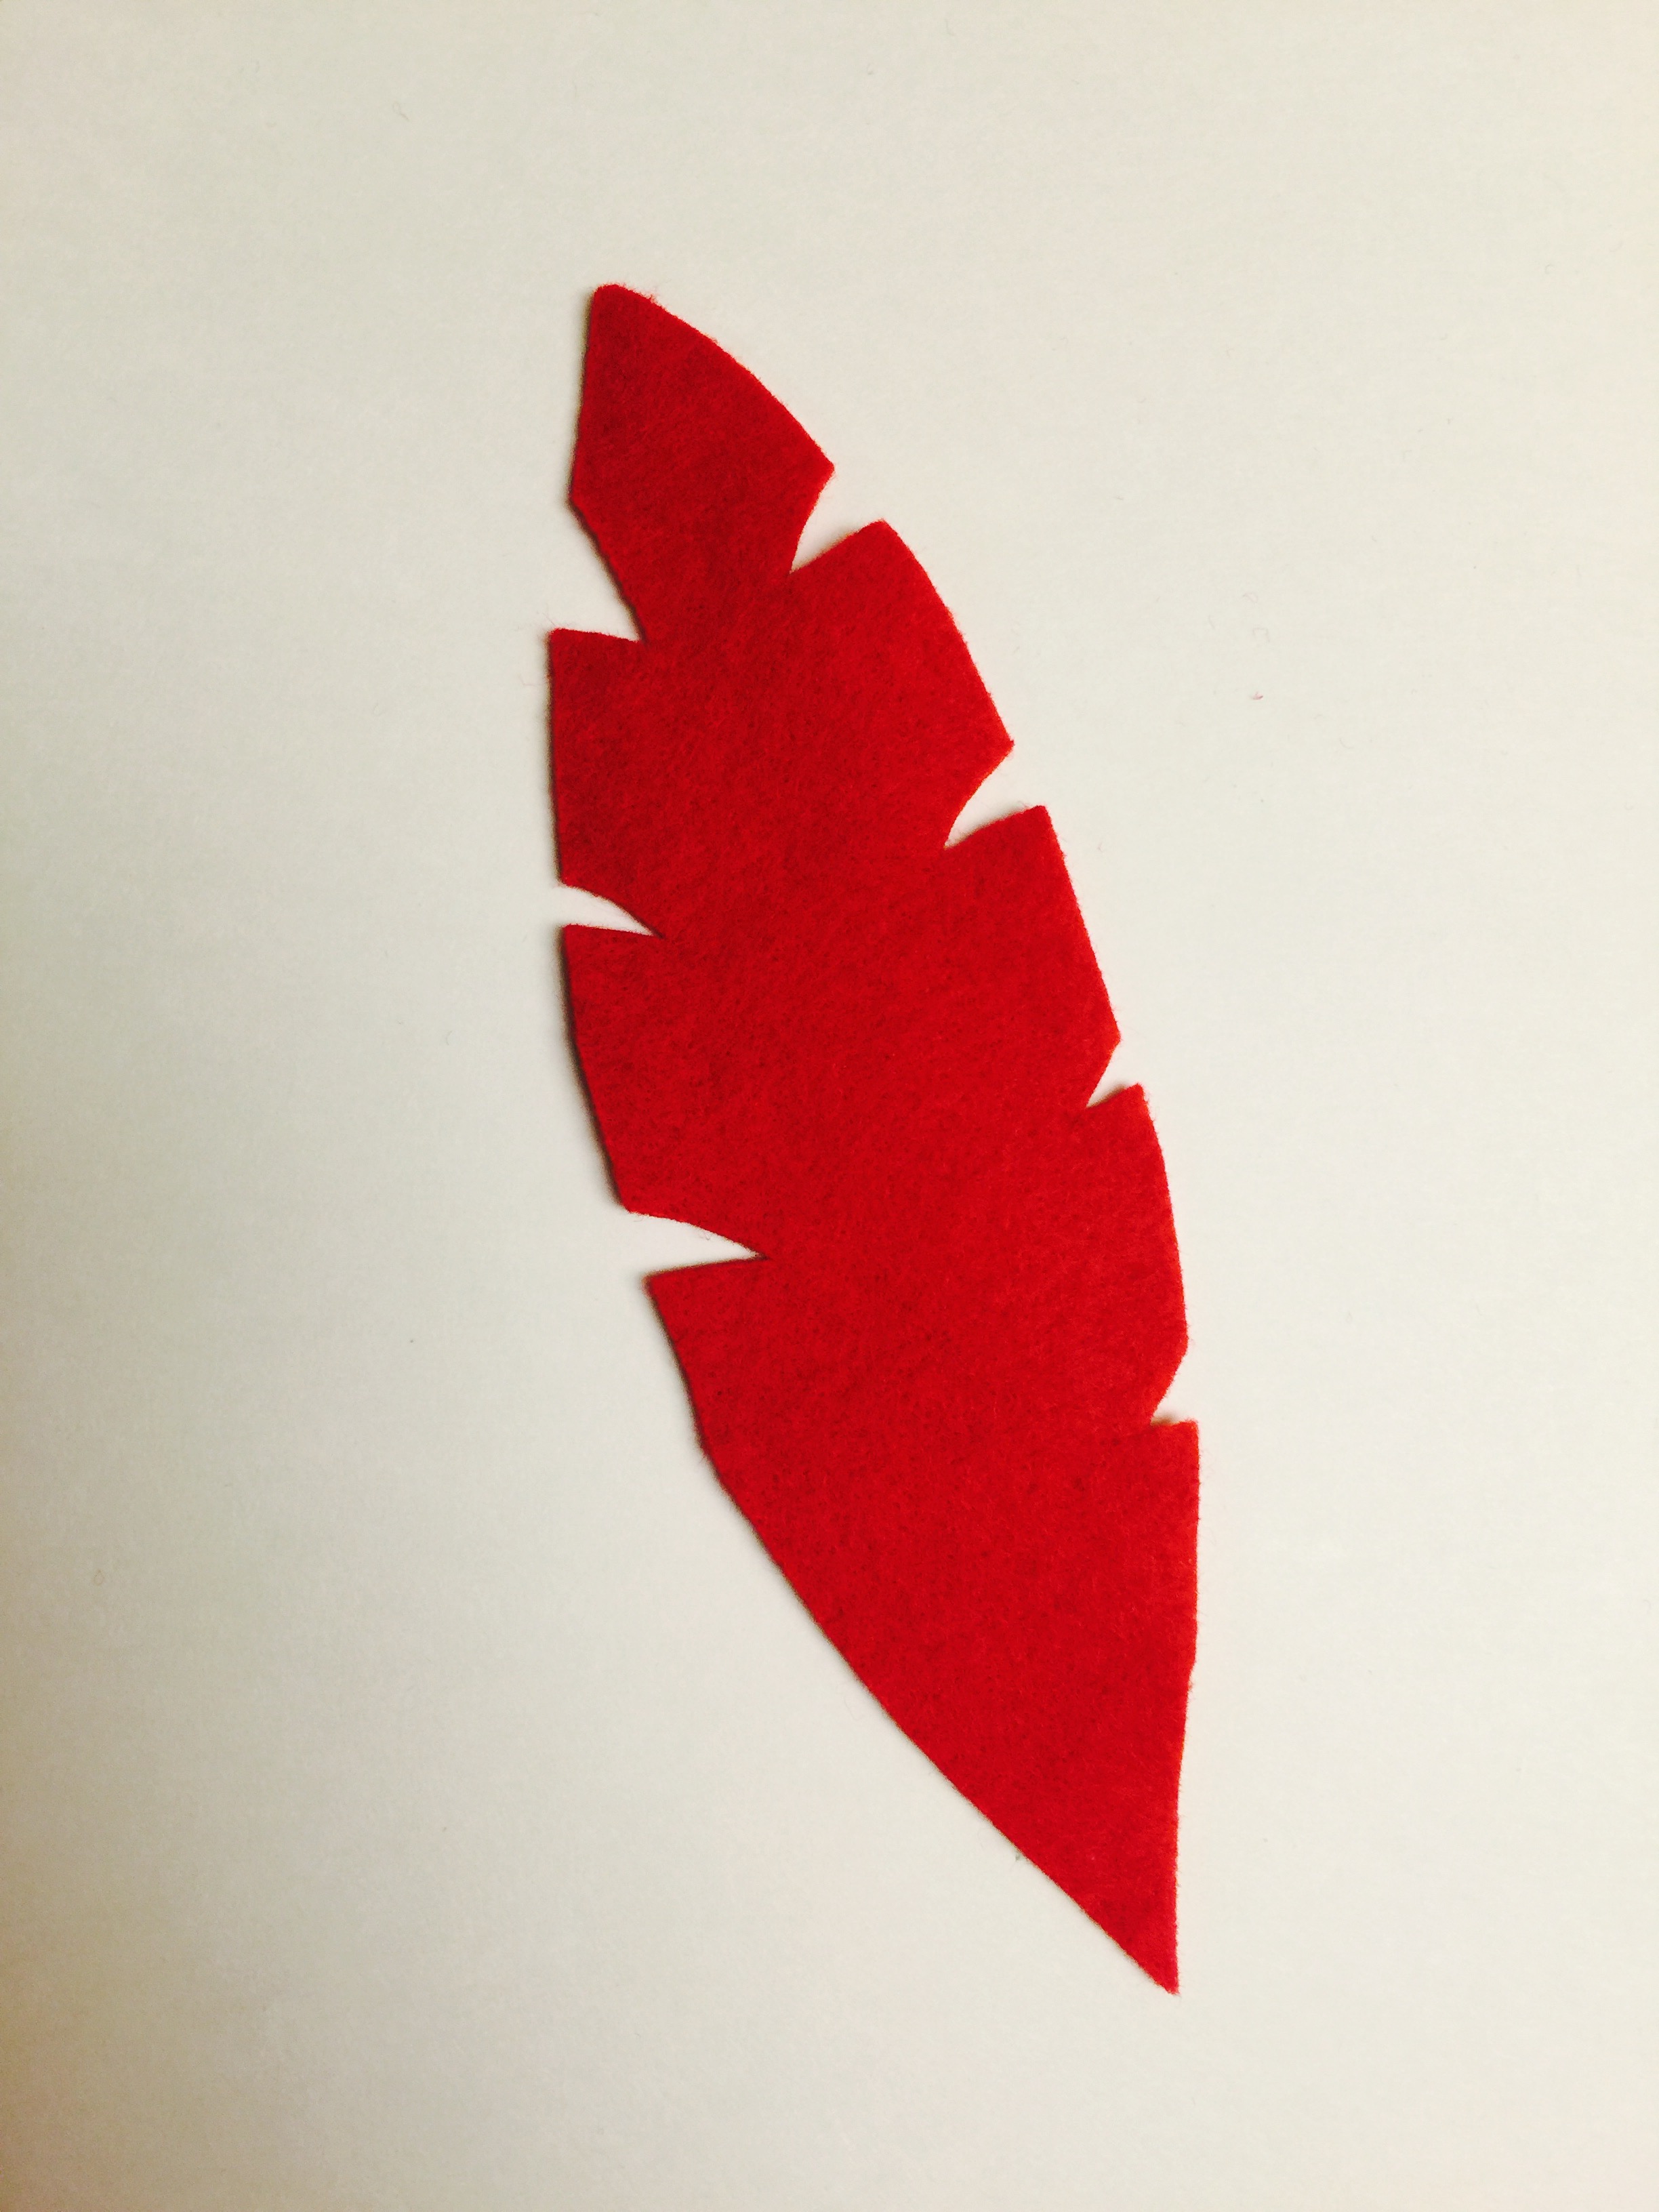
4. Draw a feather pattern. Cut out one feather. Cut out little notches along the edge of your feather.
5. Using a hot glue gun and a thin wire, glue the wire to the middle of the feather.
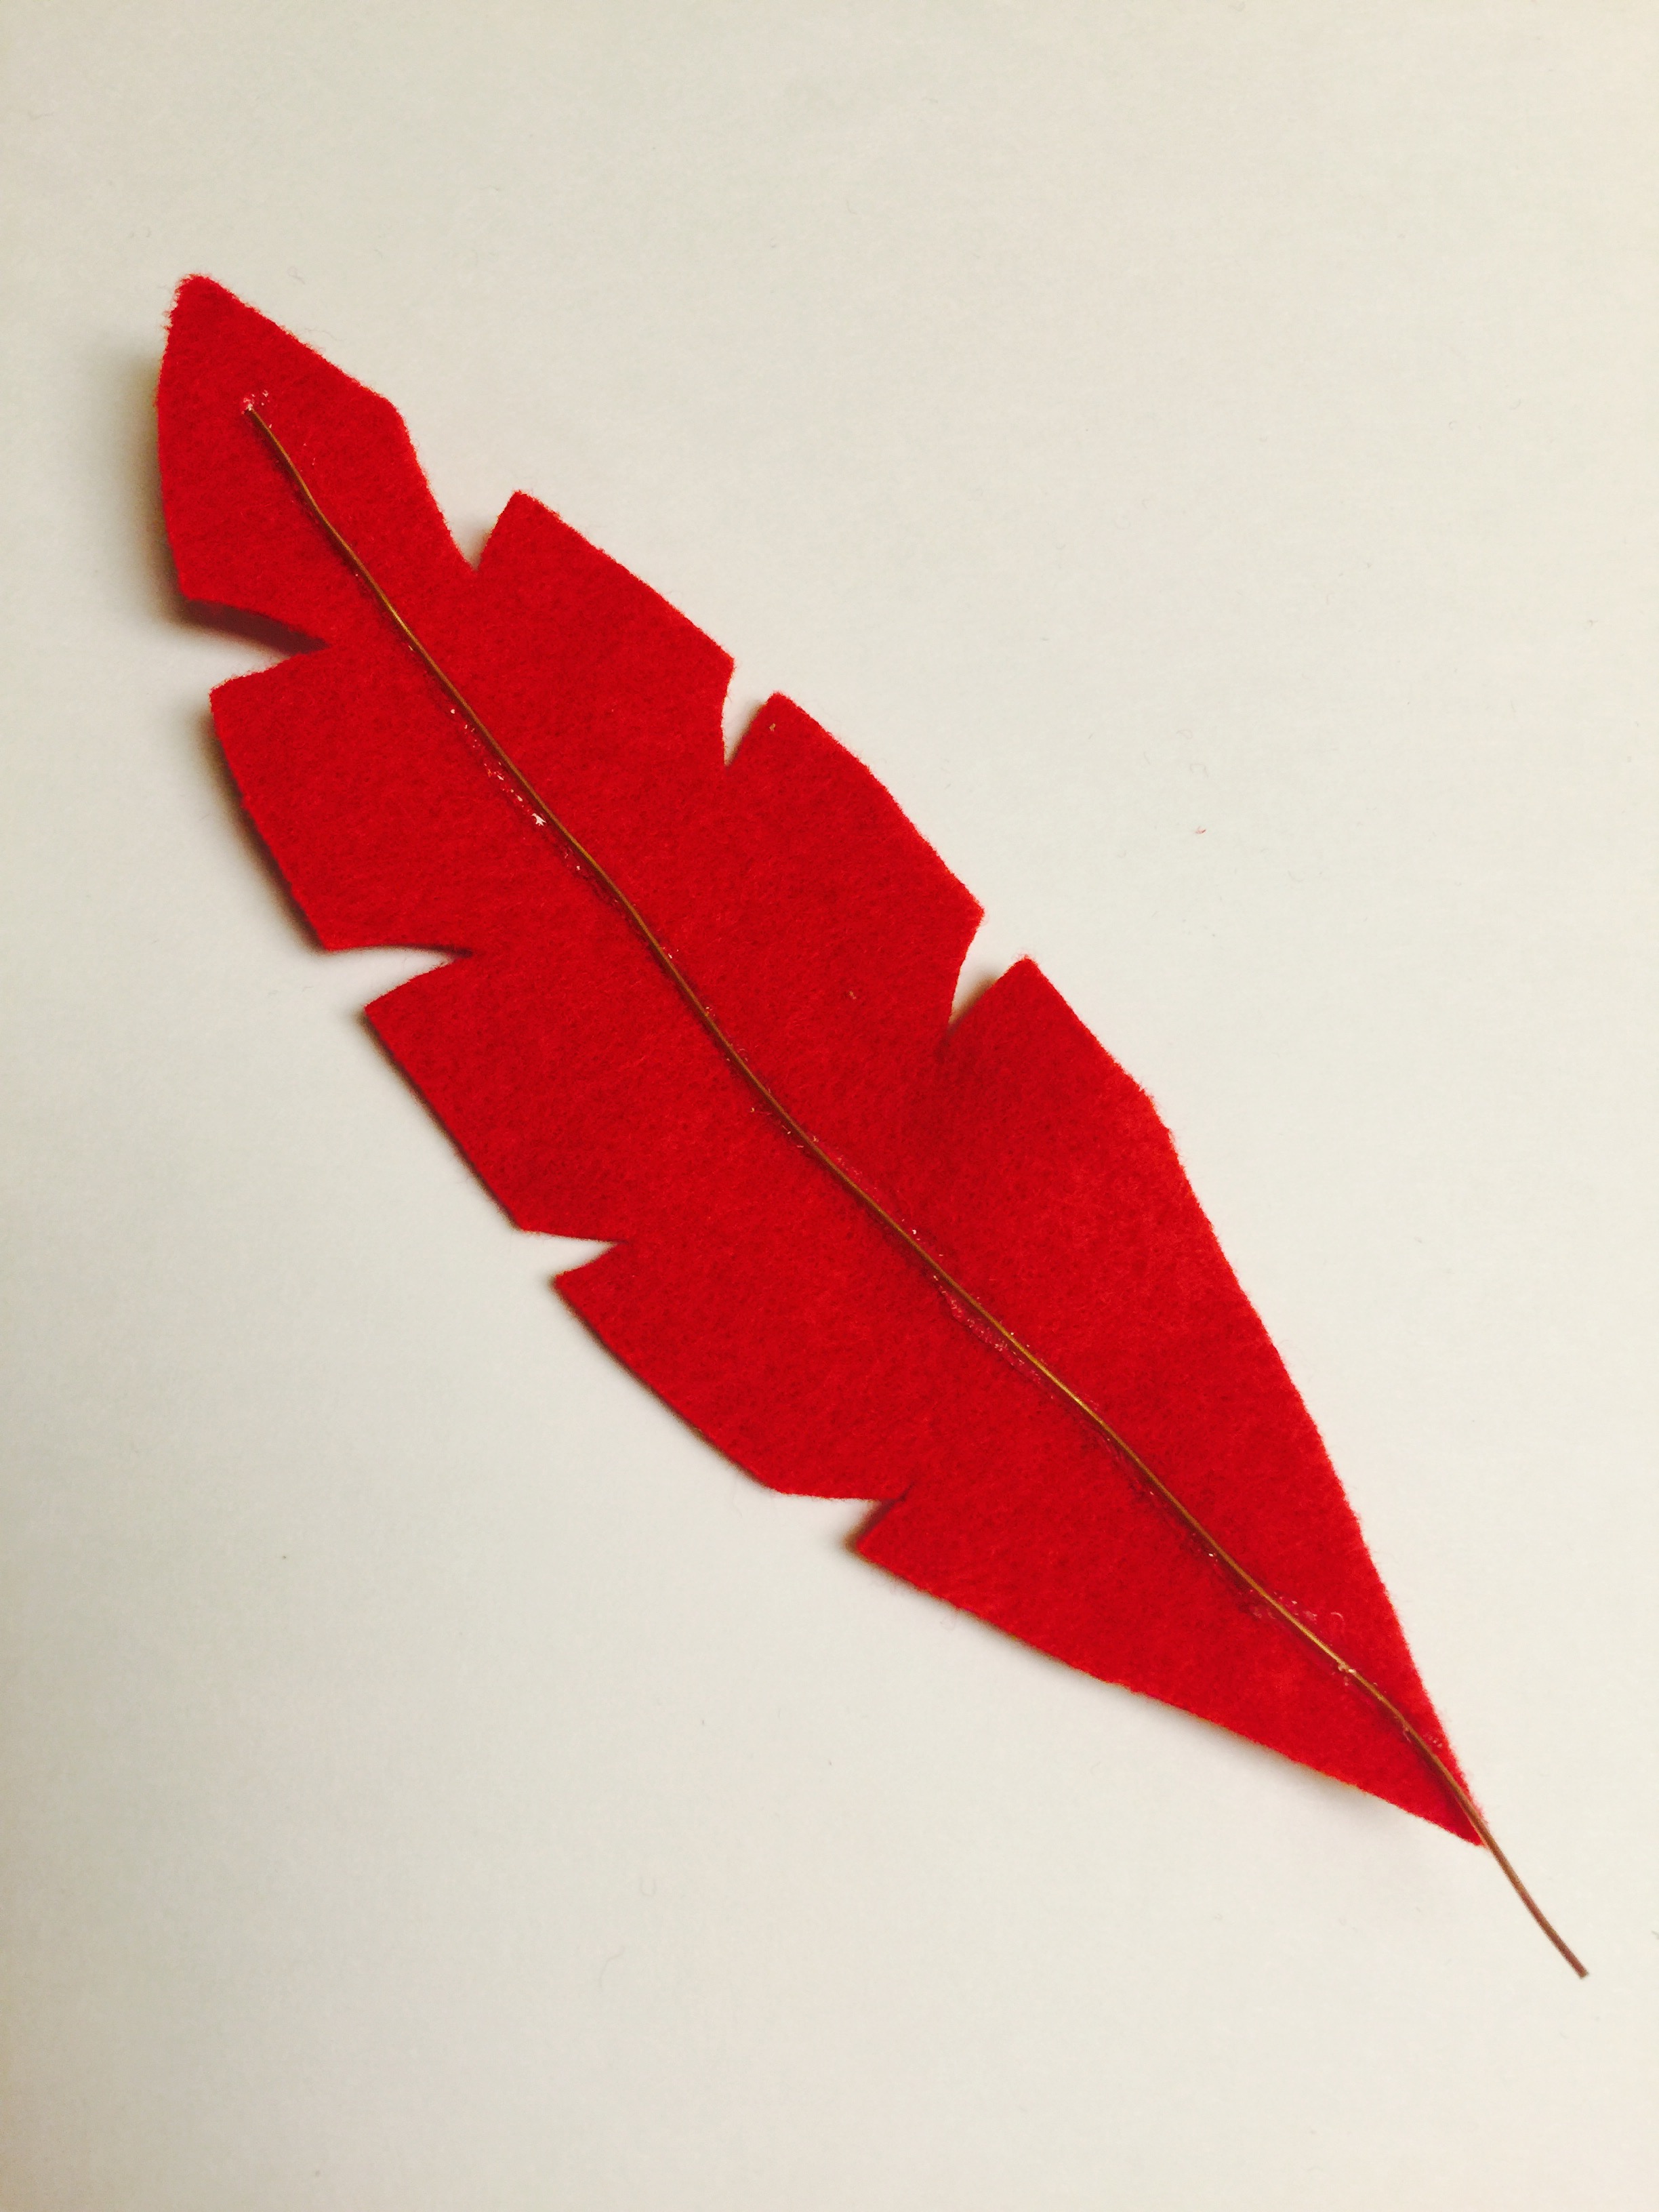
6. Hot glue the feather to the hat. I also hot glued a few areas of the brim of the hat to the side of the hat so it would stay in place how I wanted. You have a hat!

The Shirt:
You will need a shirt to use as a template to trace your pattern, and 3/4 yard light green knit. The fabric I used was from another project, and that color is no longer available.
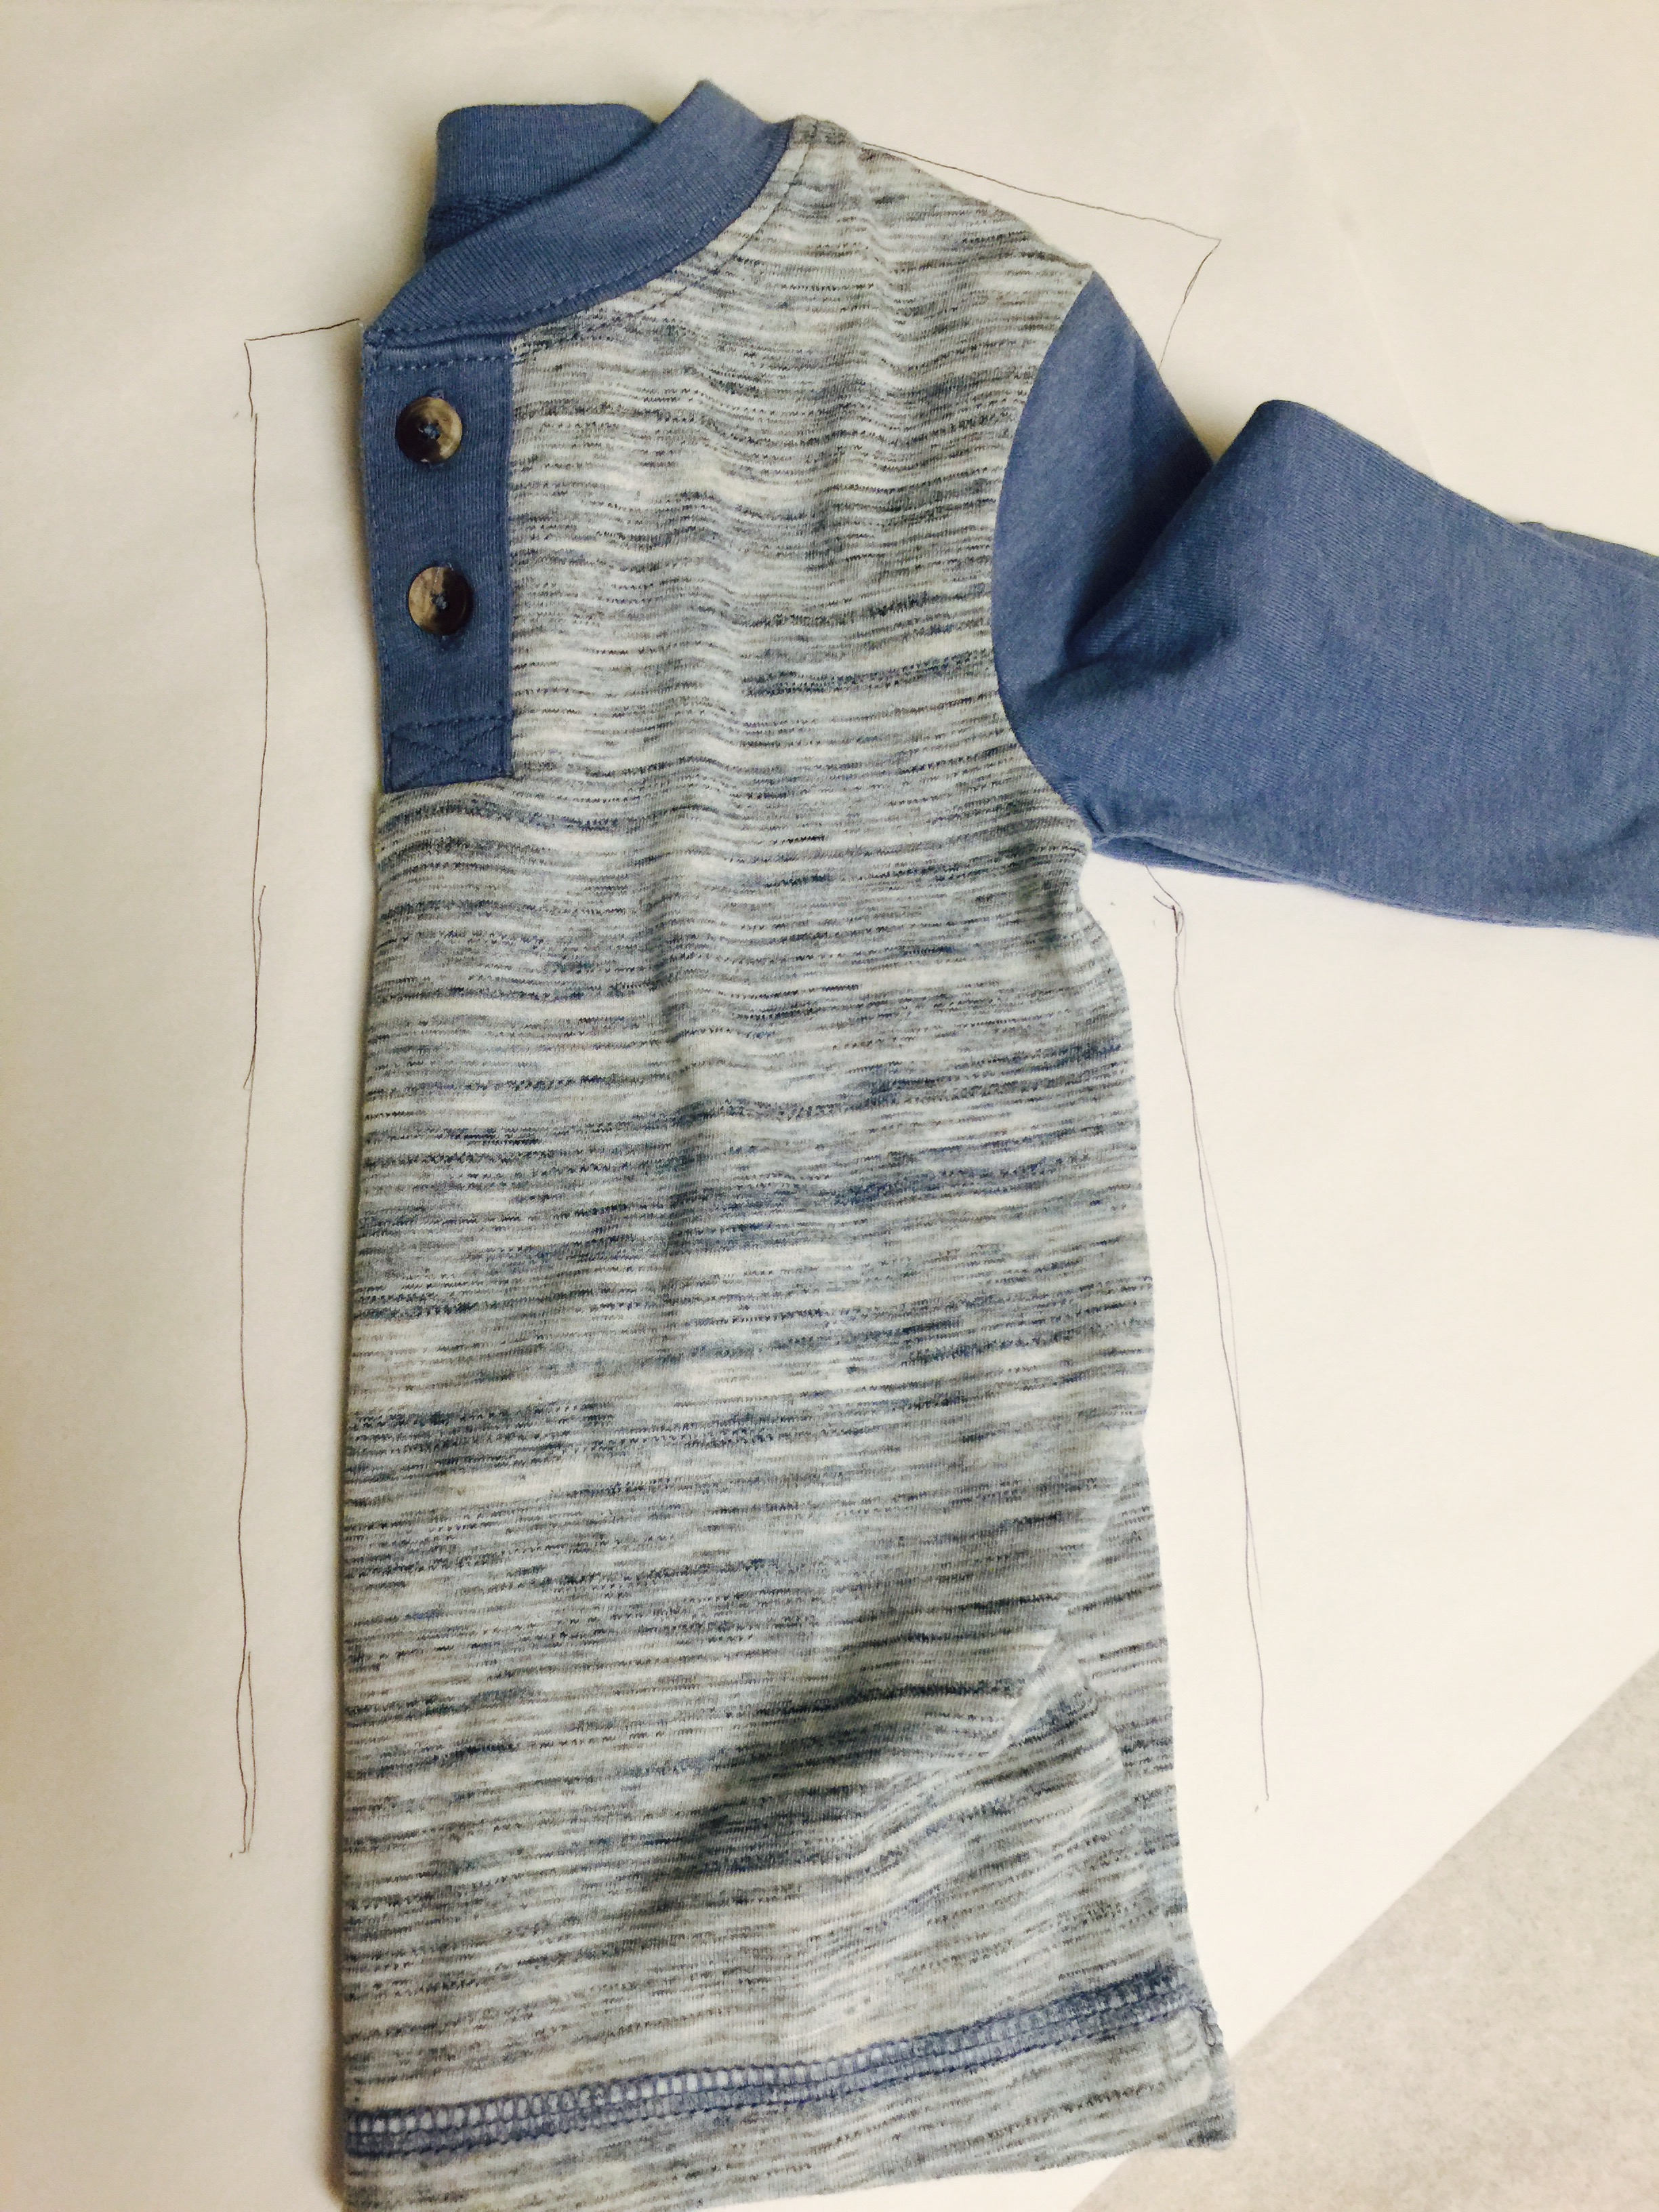
- Using a shirt that fits well, trace a simple bodice front, back and sleeve pattern, as pictured below:

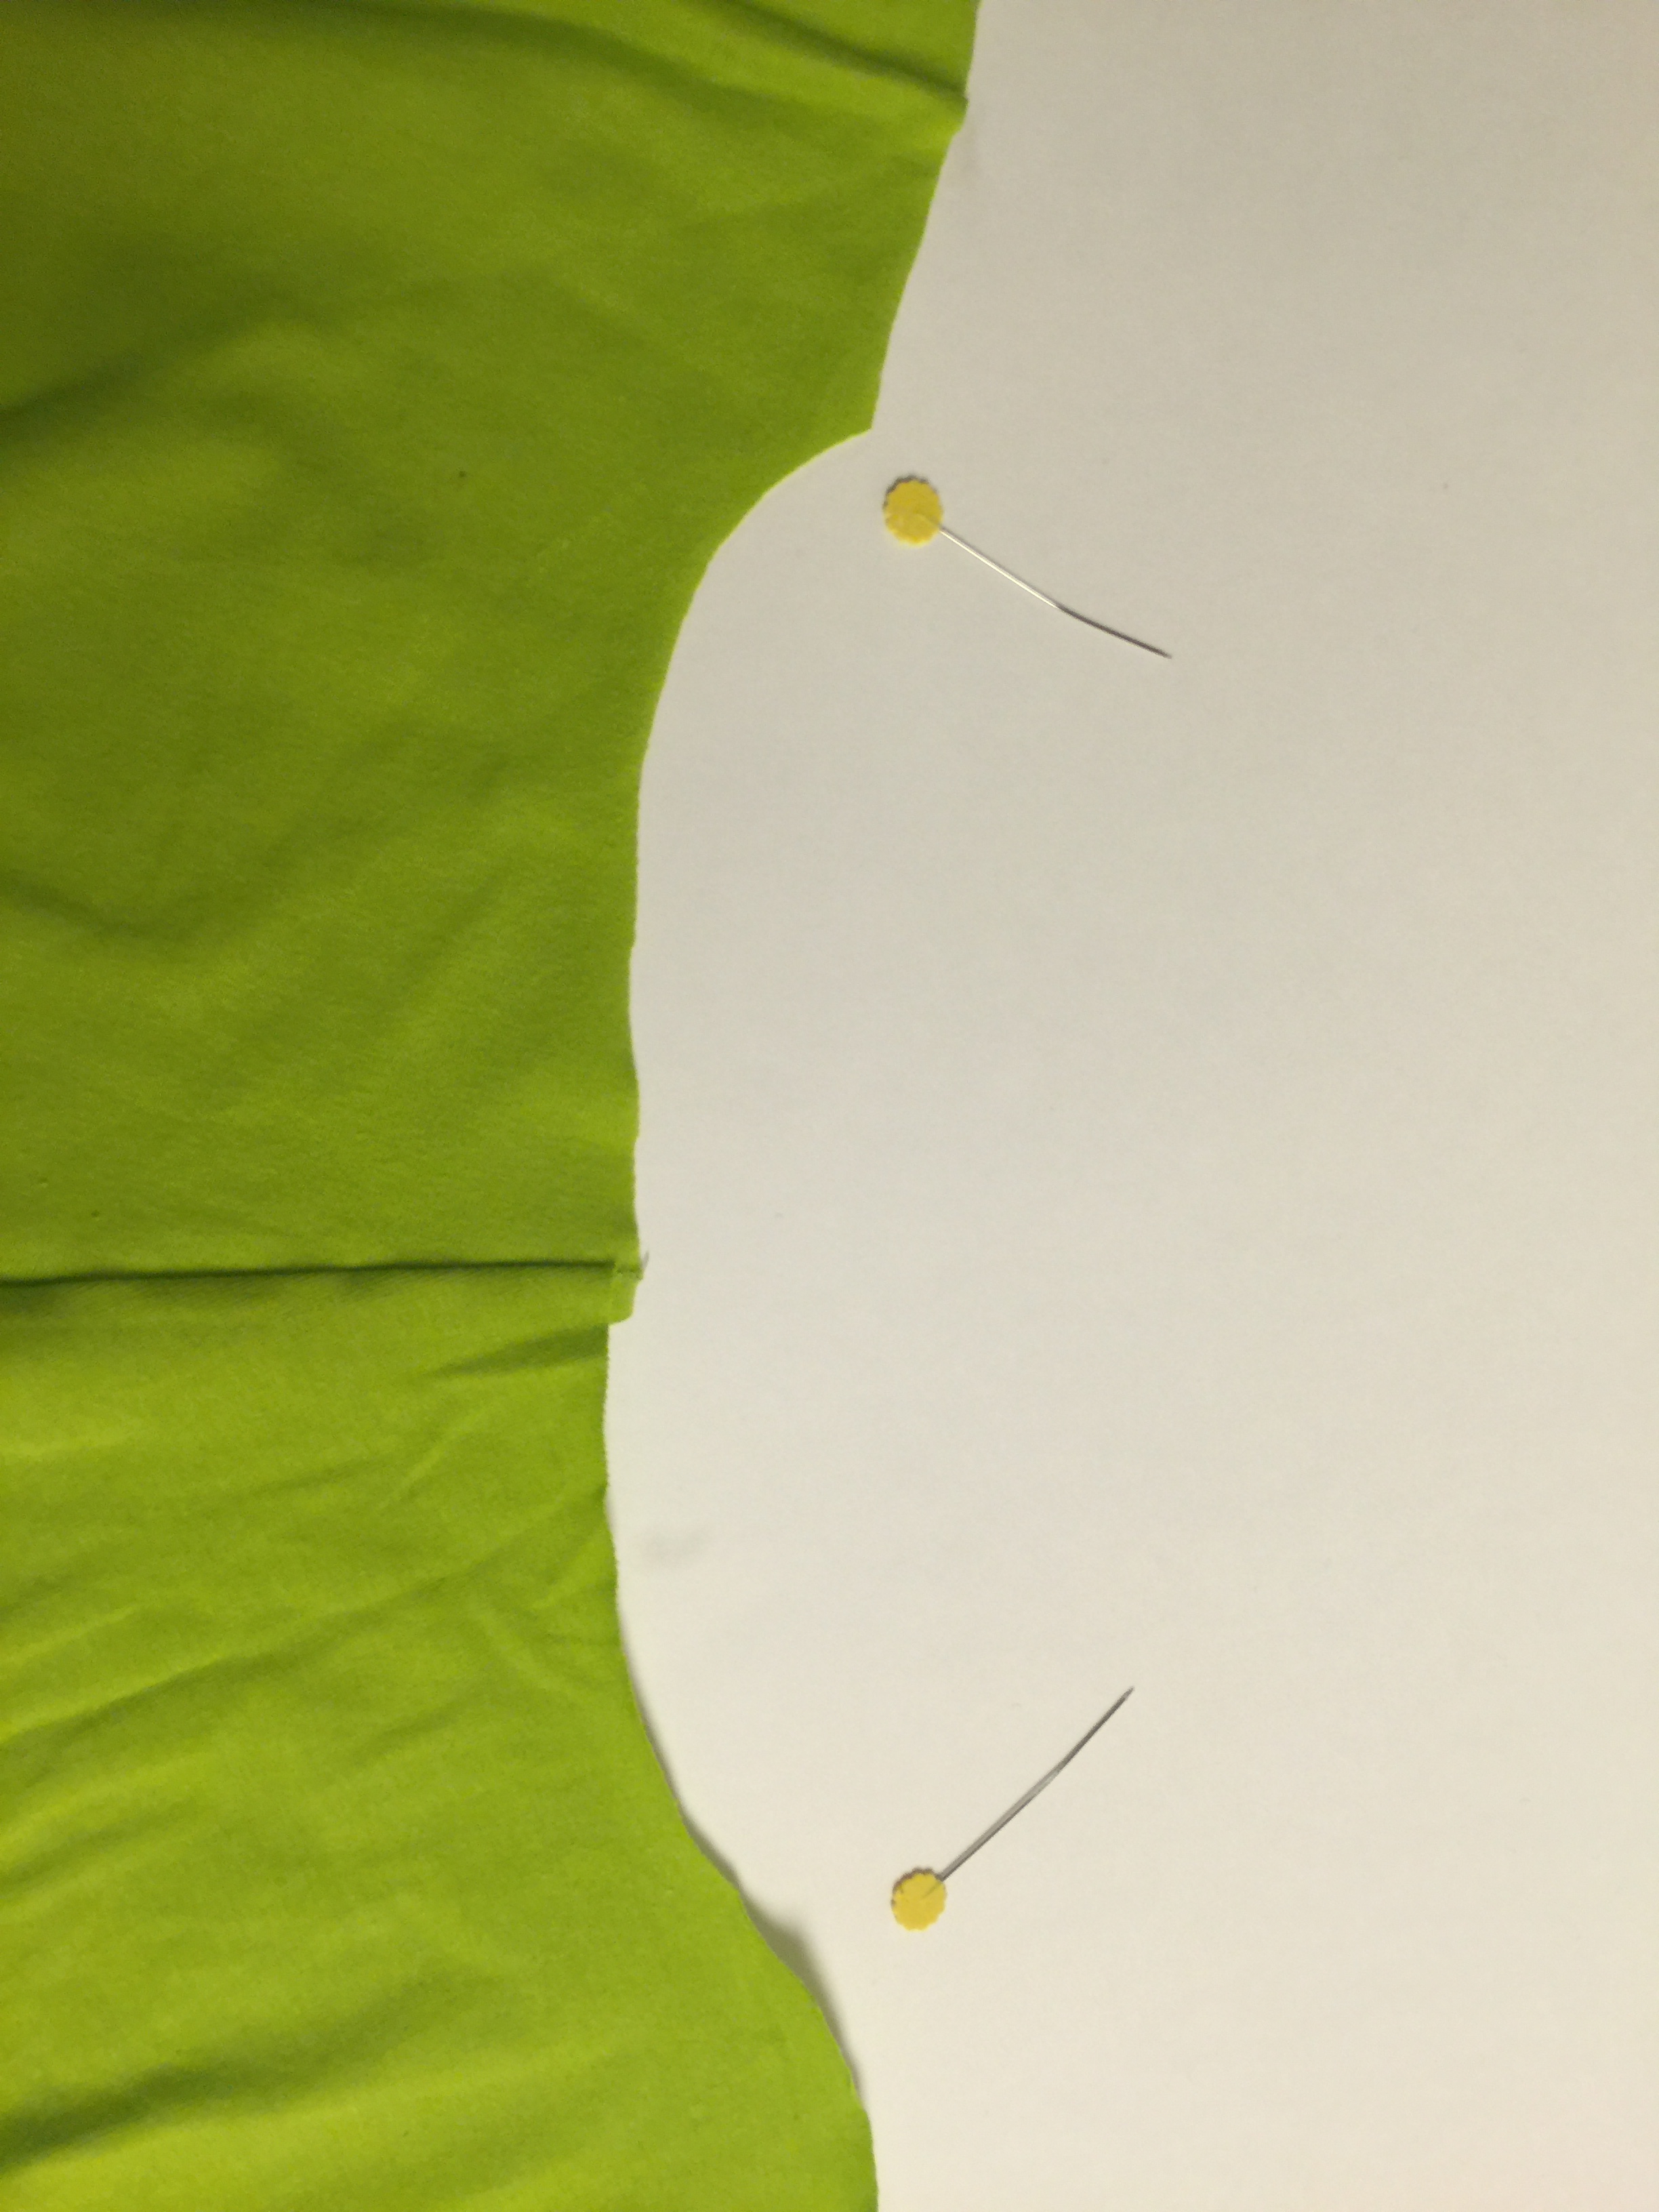
2. Pin shoulders RST, sew 1/2″ seam allowance.

3. Pin sleeve to underarm edge, make sure to start and stop at the corners as shown below:

4. Sew both side seams RST.

5. Your shirt is now finished. Lets add some little peter pan touches. Trace a zig zag pattern on sleeve and hem edges, and cut.
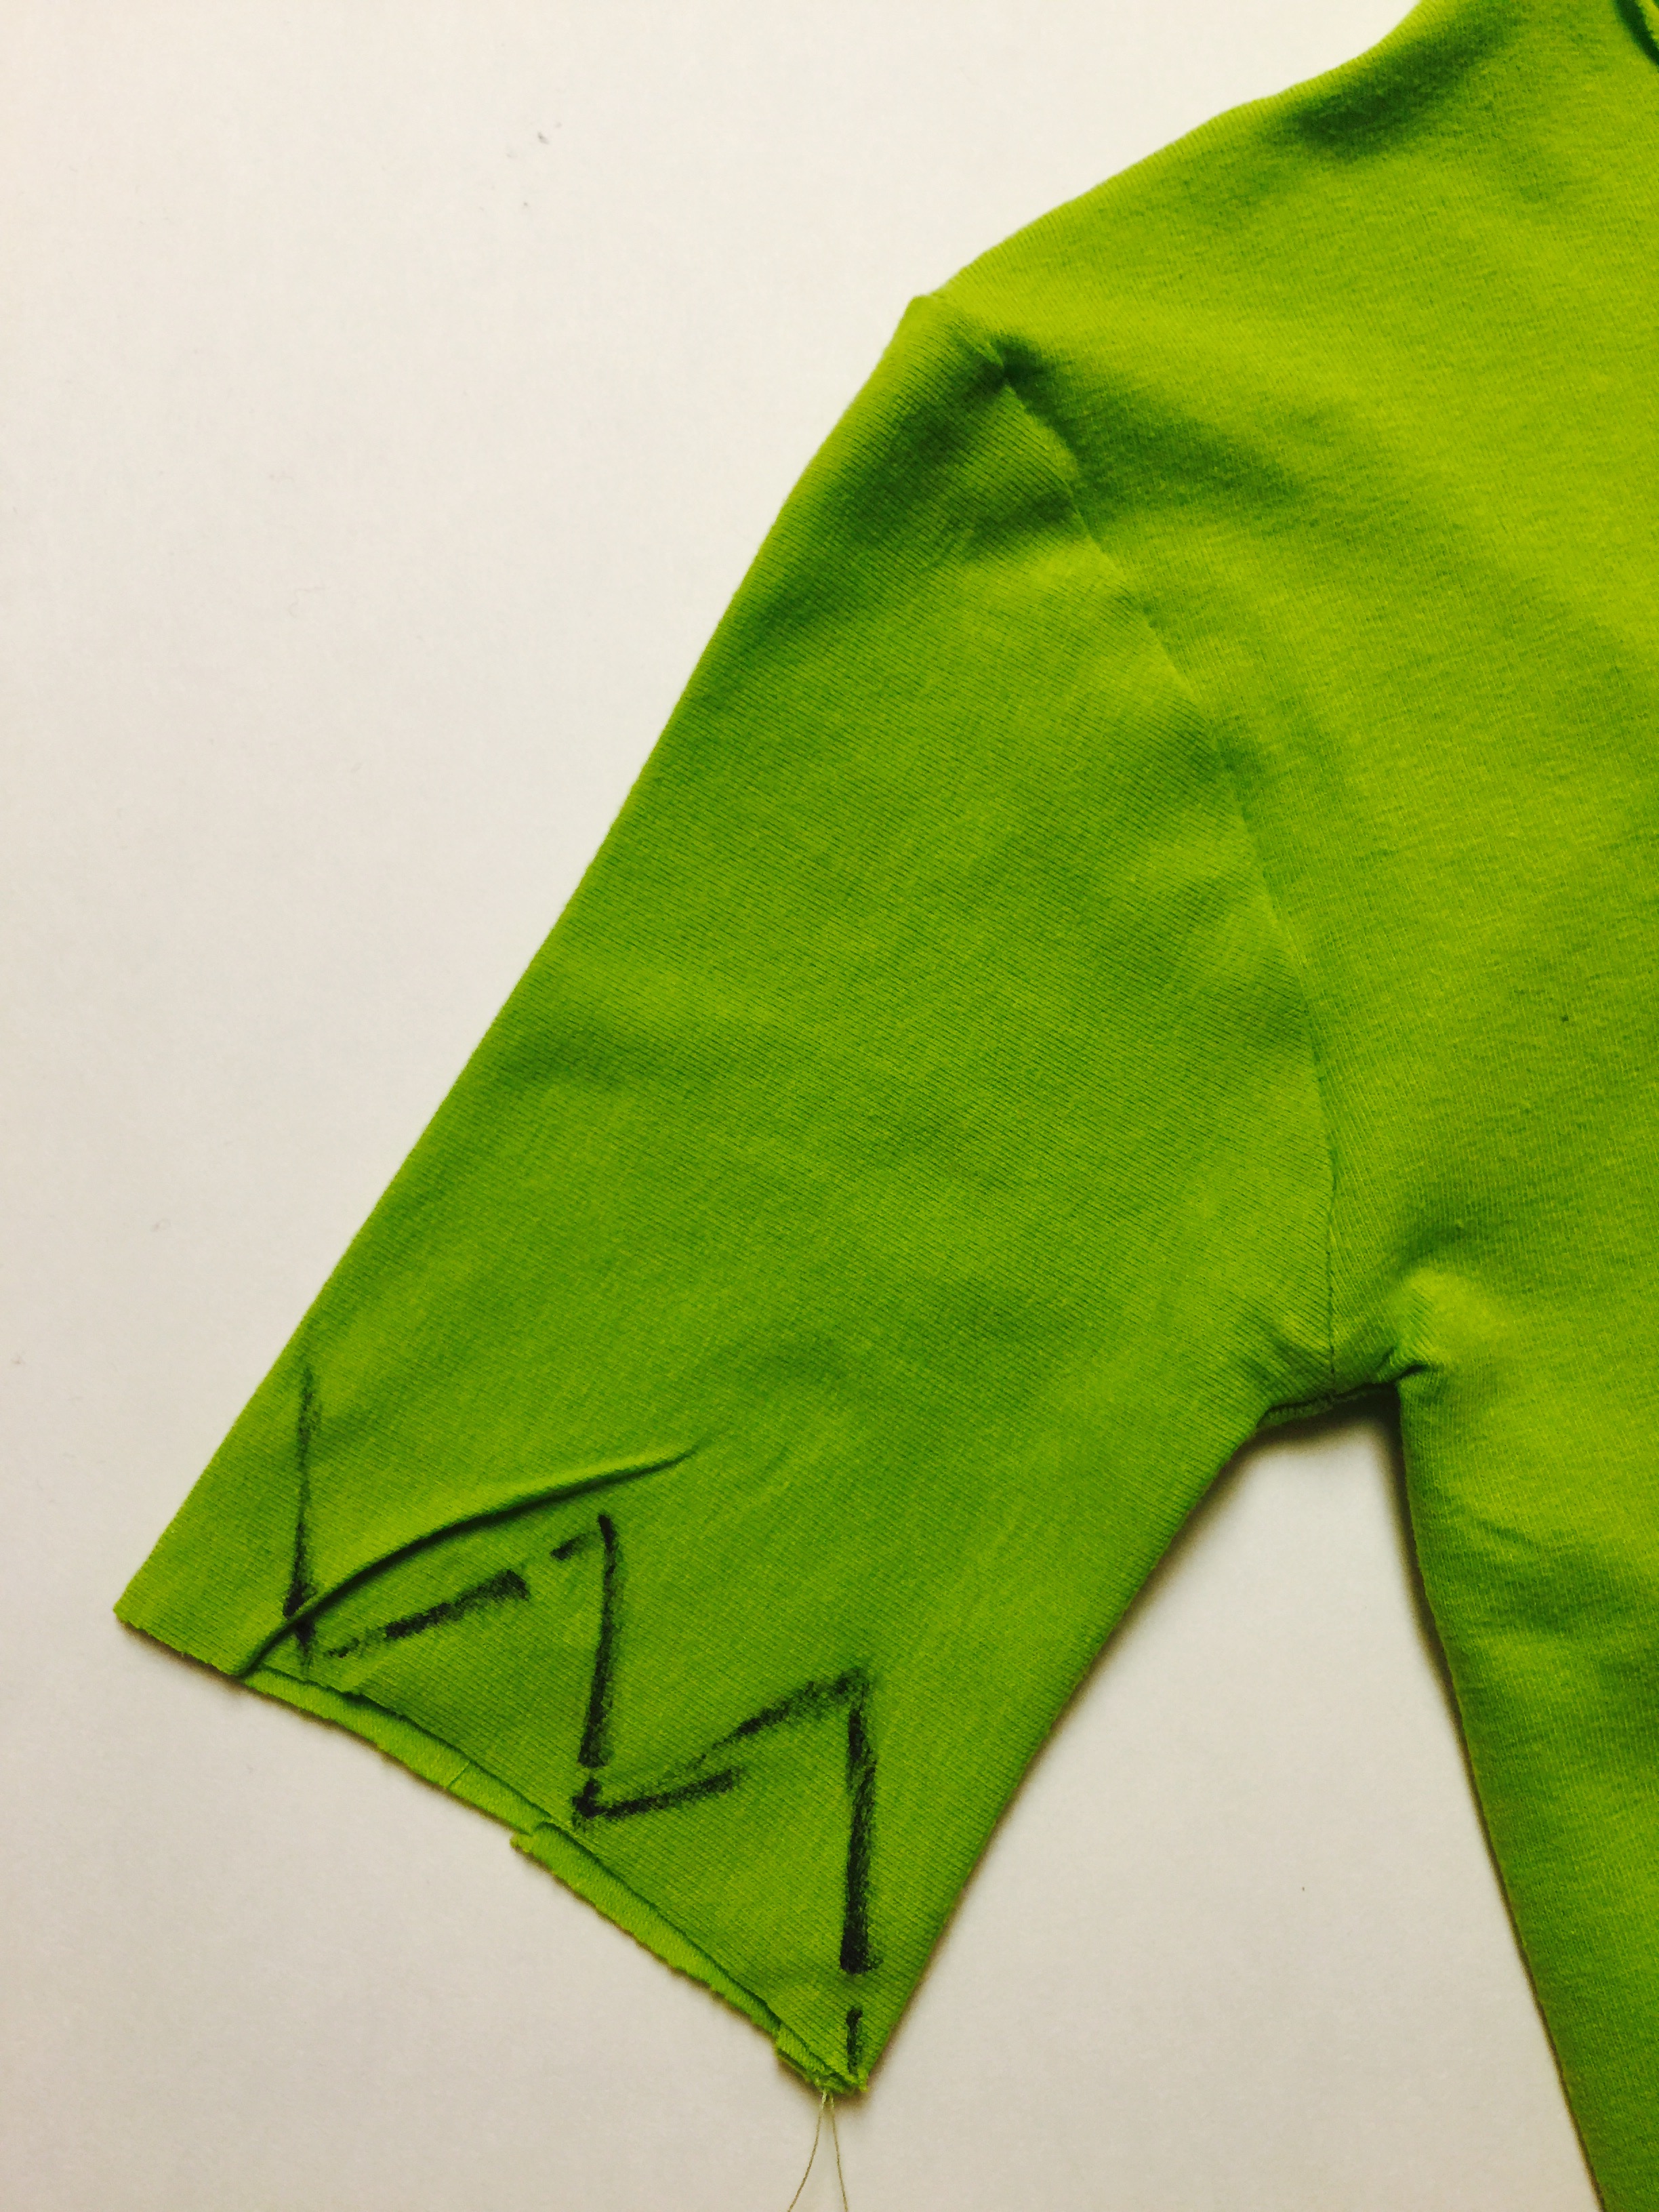
6. cut a slit along the center front of the front of your shirt.

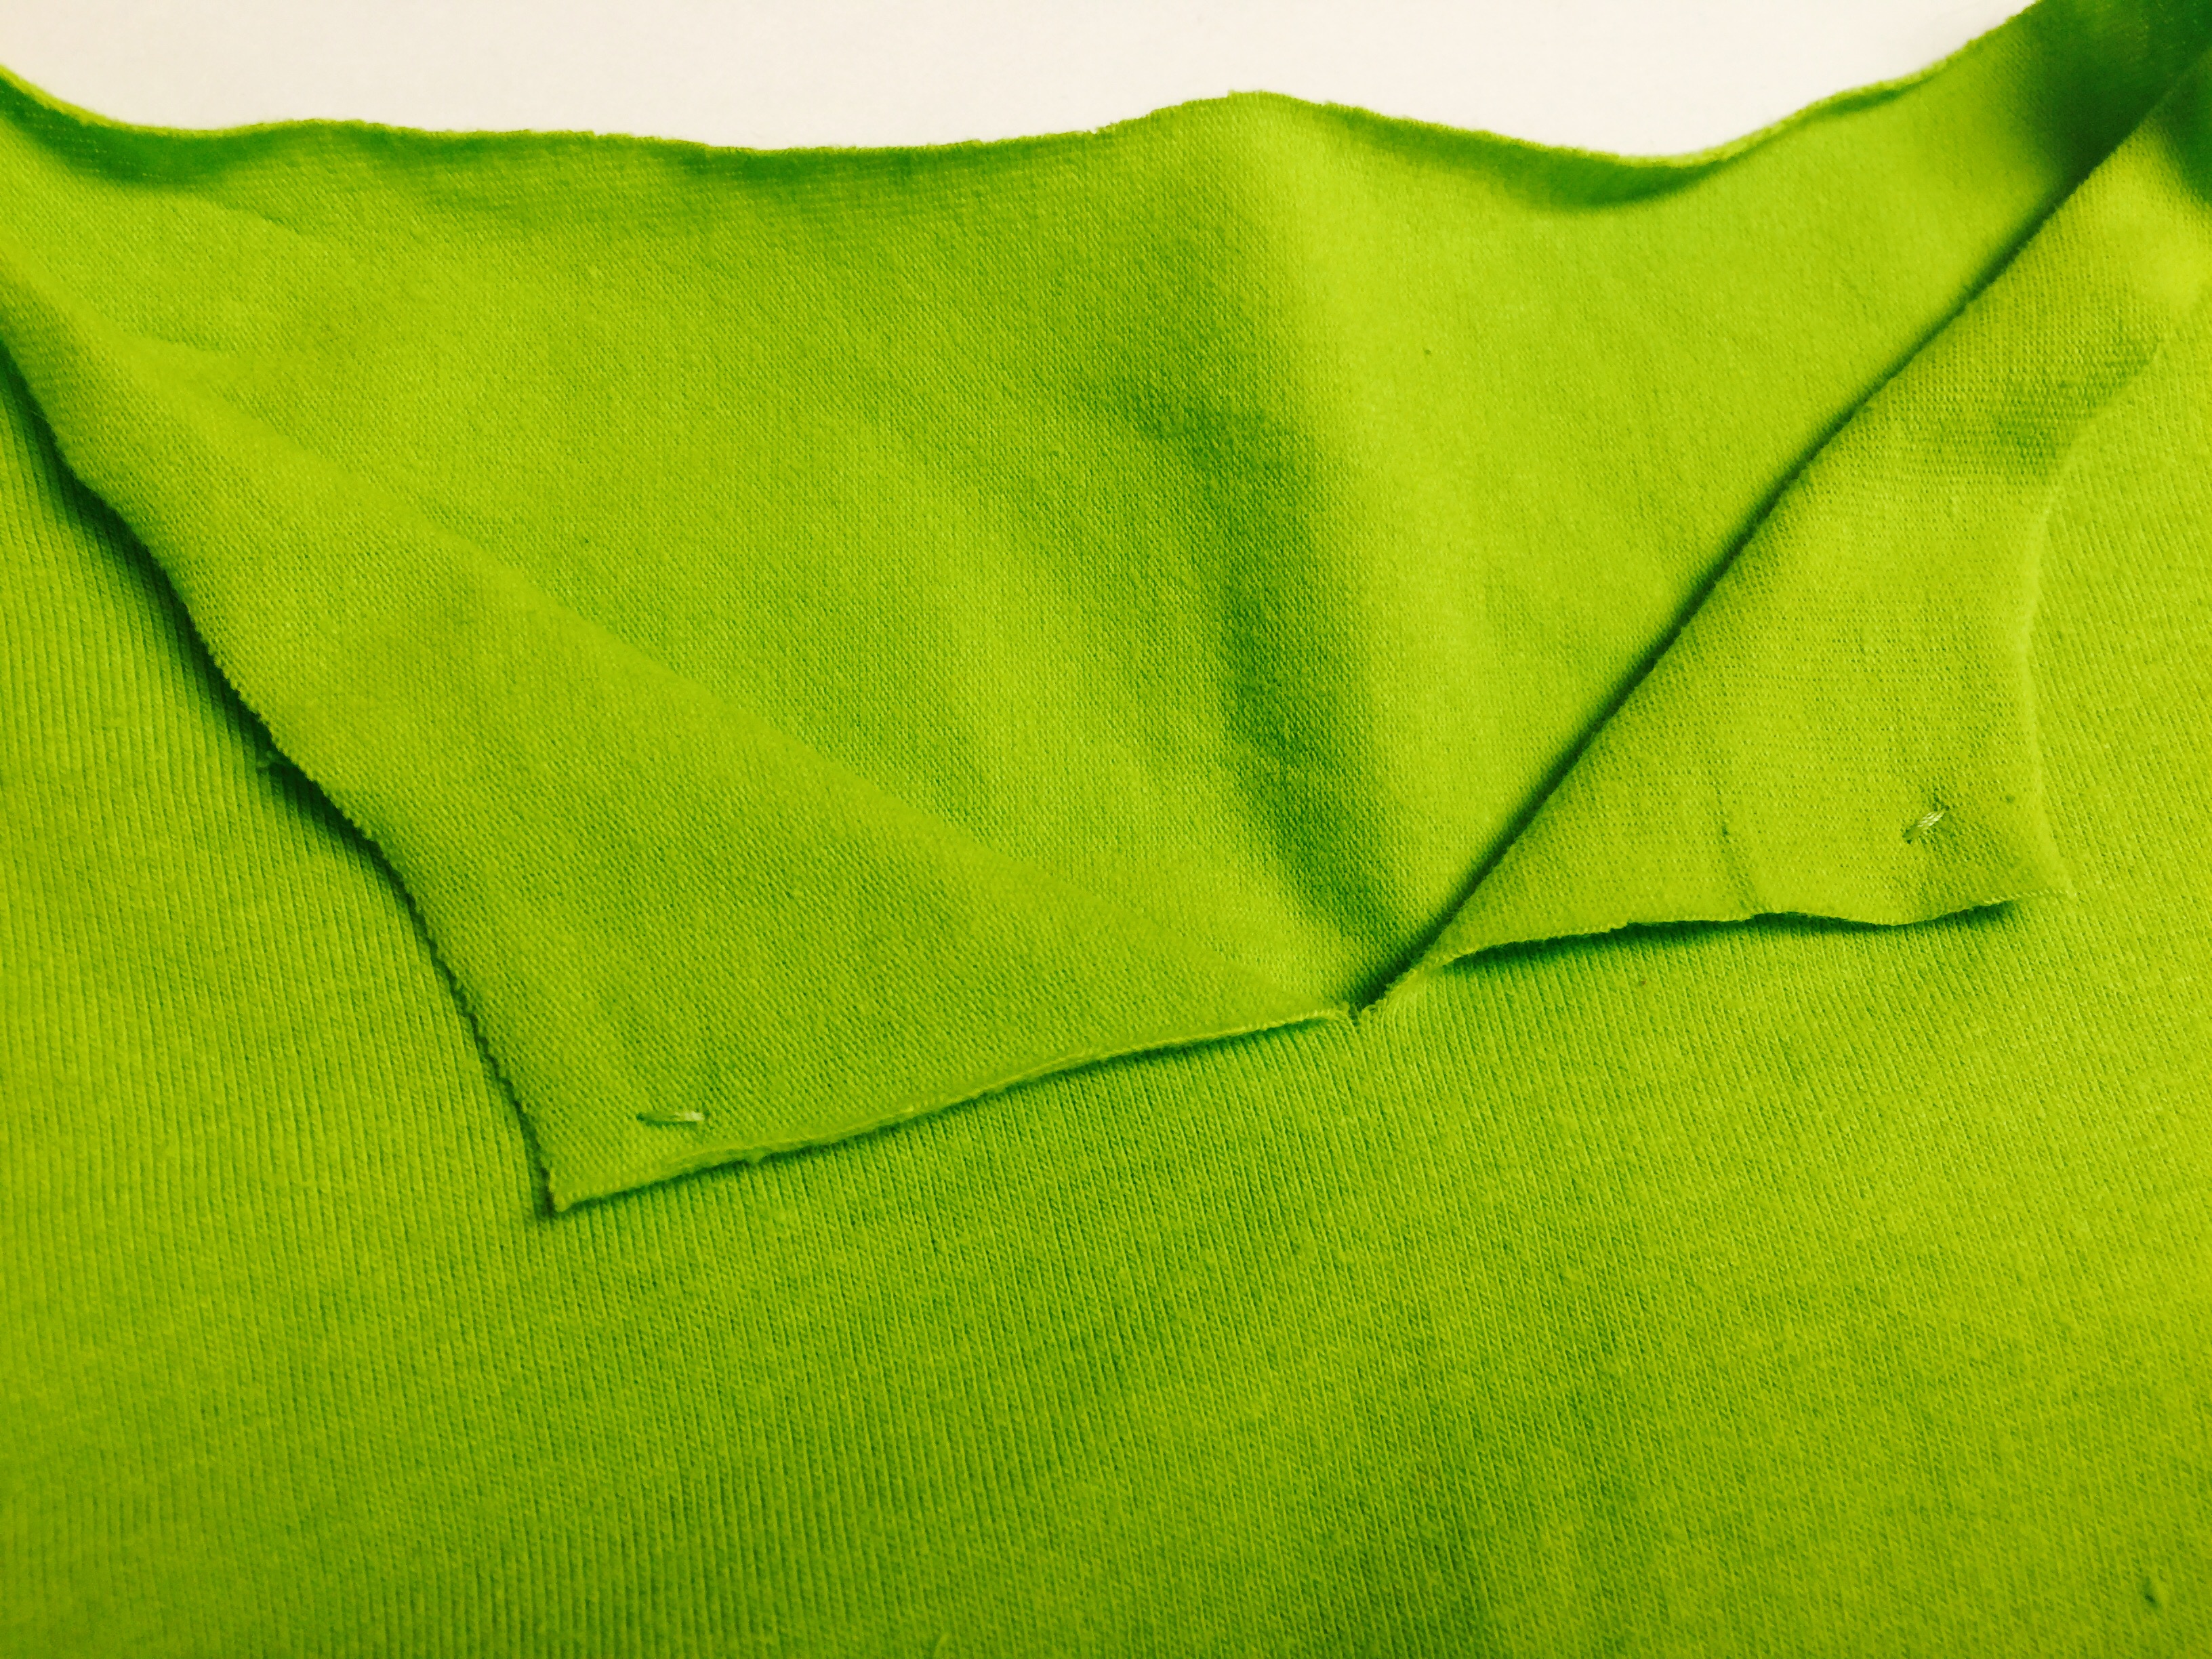
7. Fold edges down like so to create a collar:

8. Tack collar down, and you have yourself a Peter Pan shirt.
The Pants:
For the pants I followed a simple tutorial, You can find it here. This tutorial also goes through another shirt and hat option. I personally liked my version better, both are great options though.
You will need 1/2 yard green knit fabric, I found mine at Joann’s. The link will take you to similar fabric online.
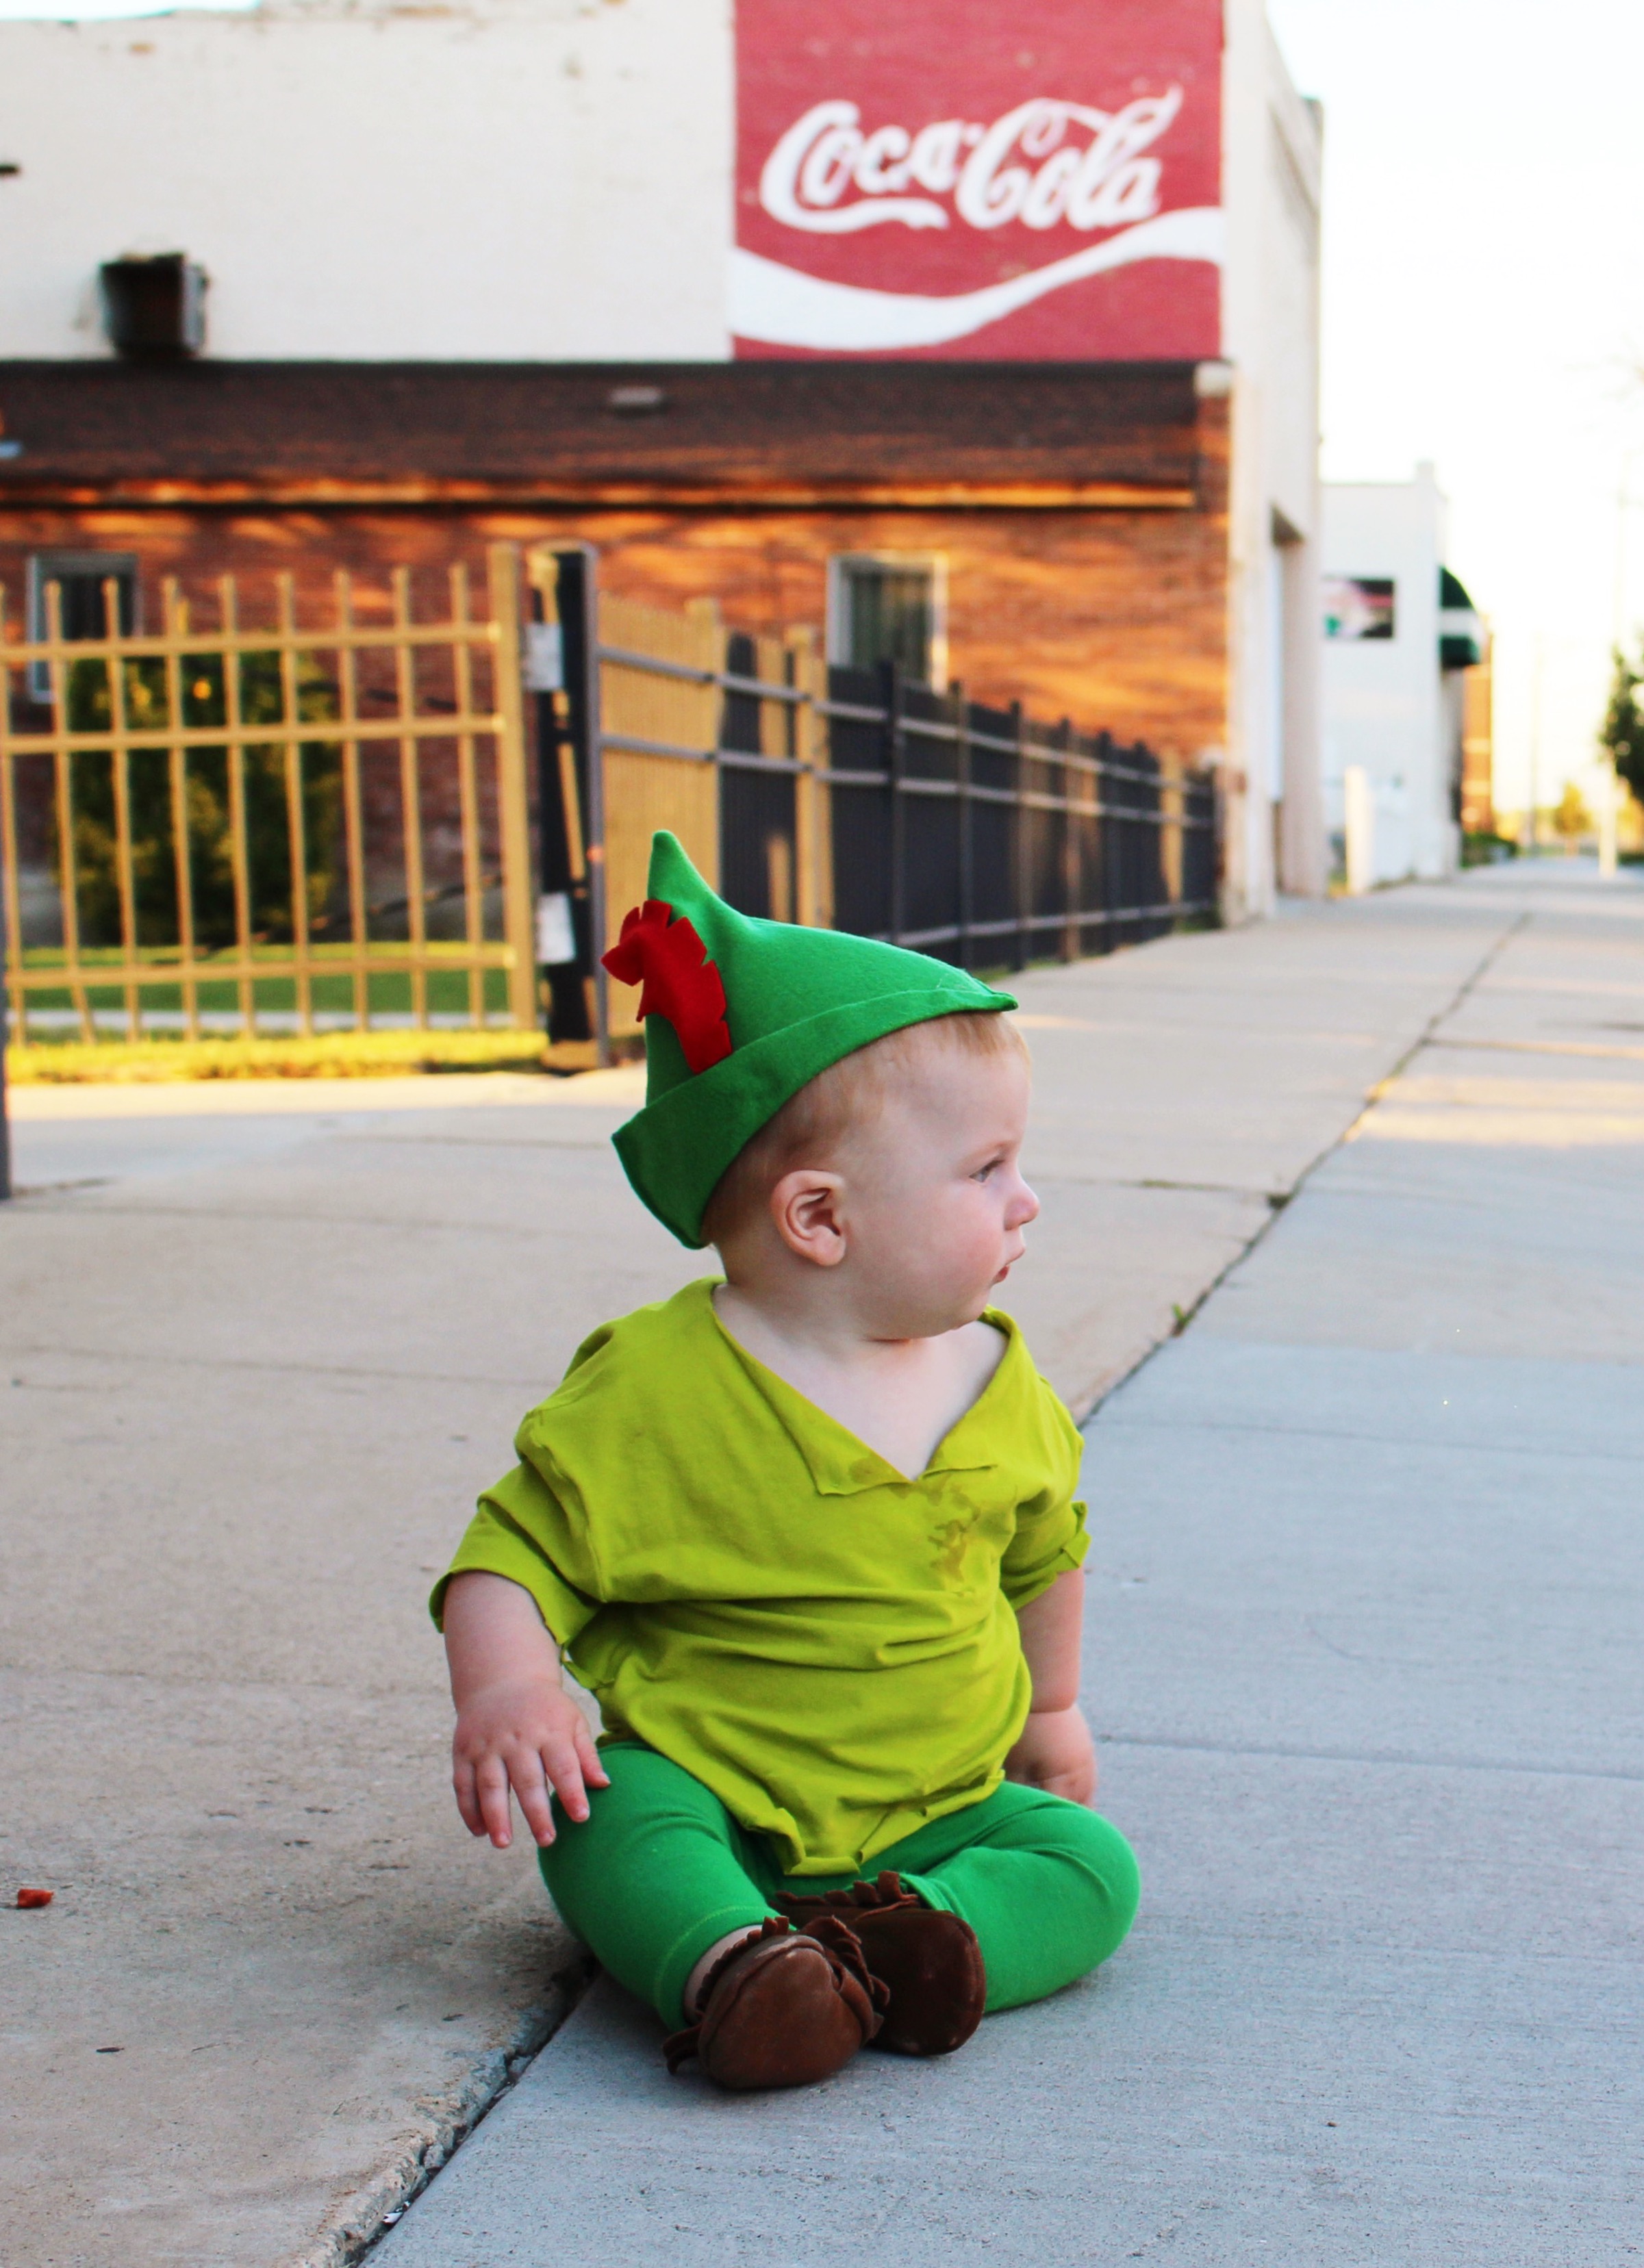
This is my completed costume. I found the brown baby moccasins at Love Winnie James for $15.

“Little boys should never be sent to bed. They always wake up a day older”
-Peter Pan


Leave a comment