

For this project I used a ballpoint needle, and zig zag stitch with the knit fabric. I also used a regular sewing machine.
The fabric I used is called Heather Ross Briar Rose Cotton Jersey Knit Strawberry Lilac.


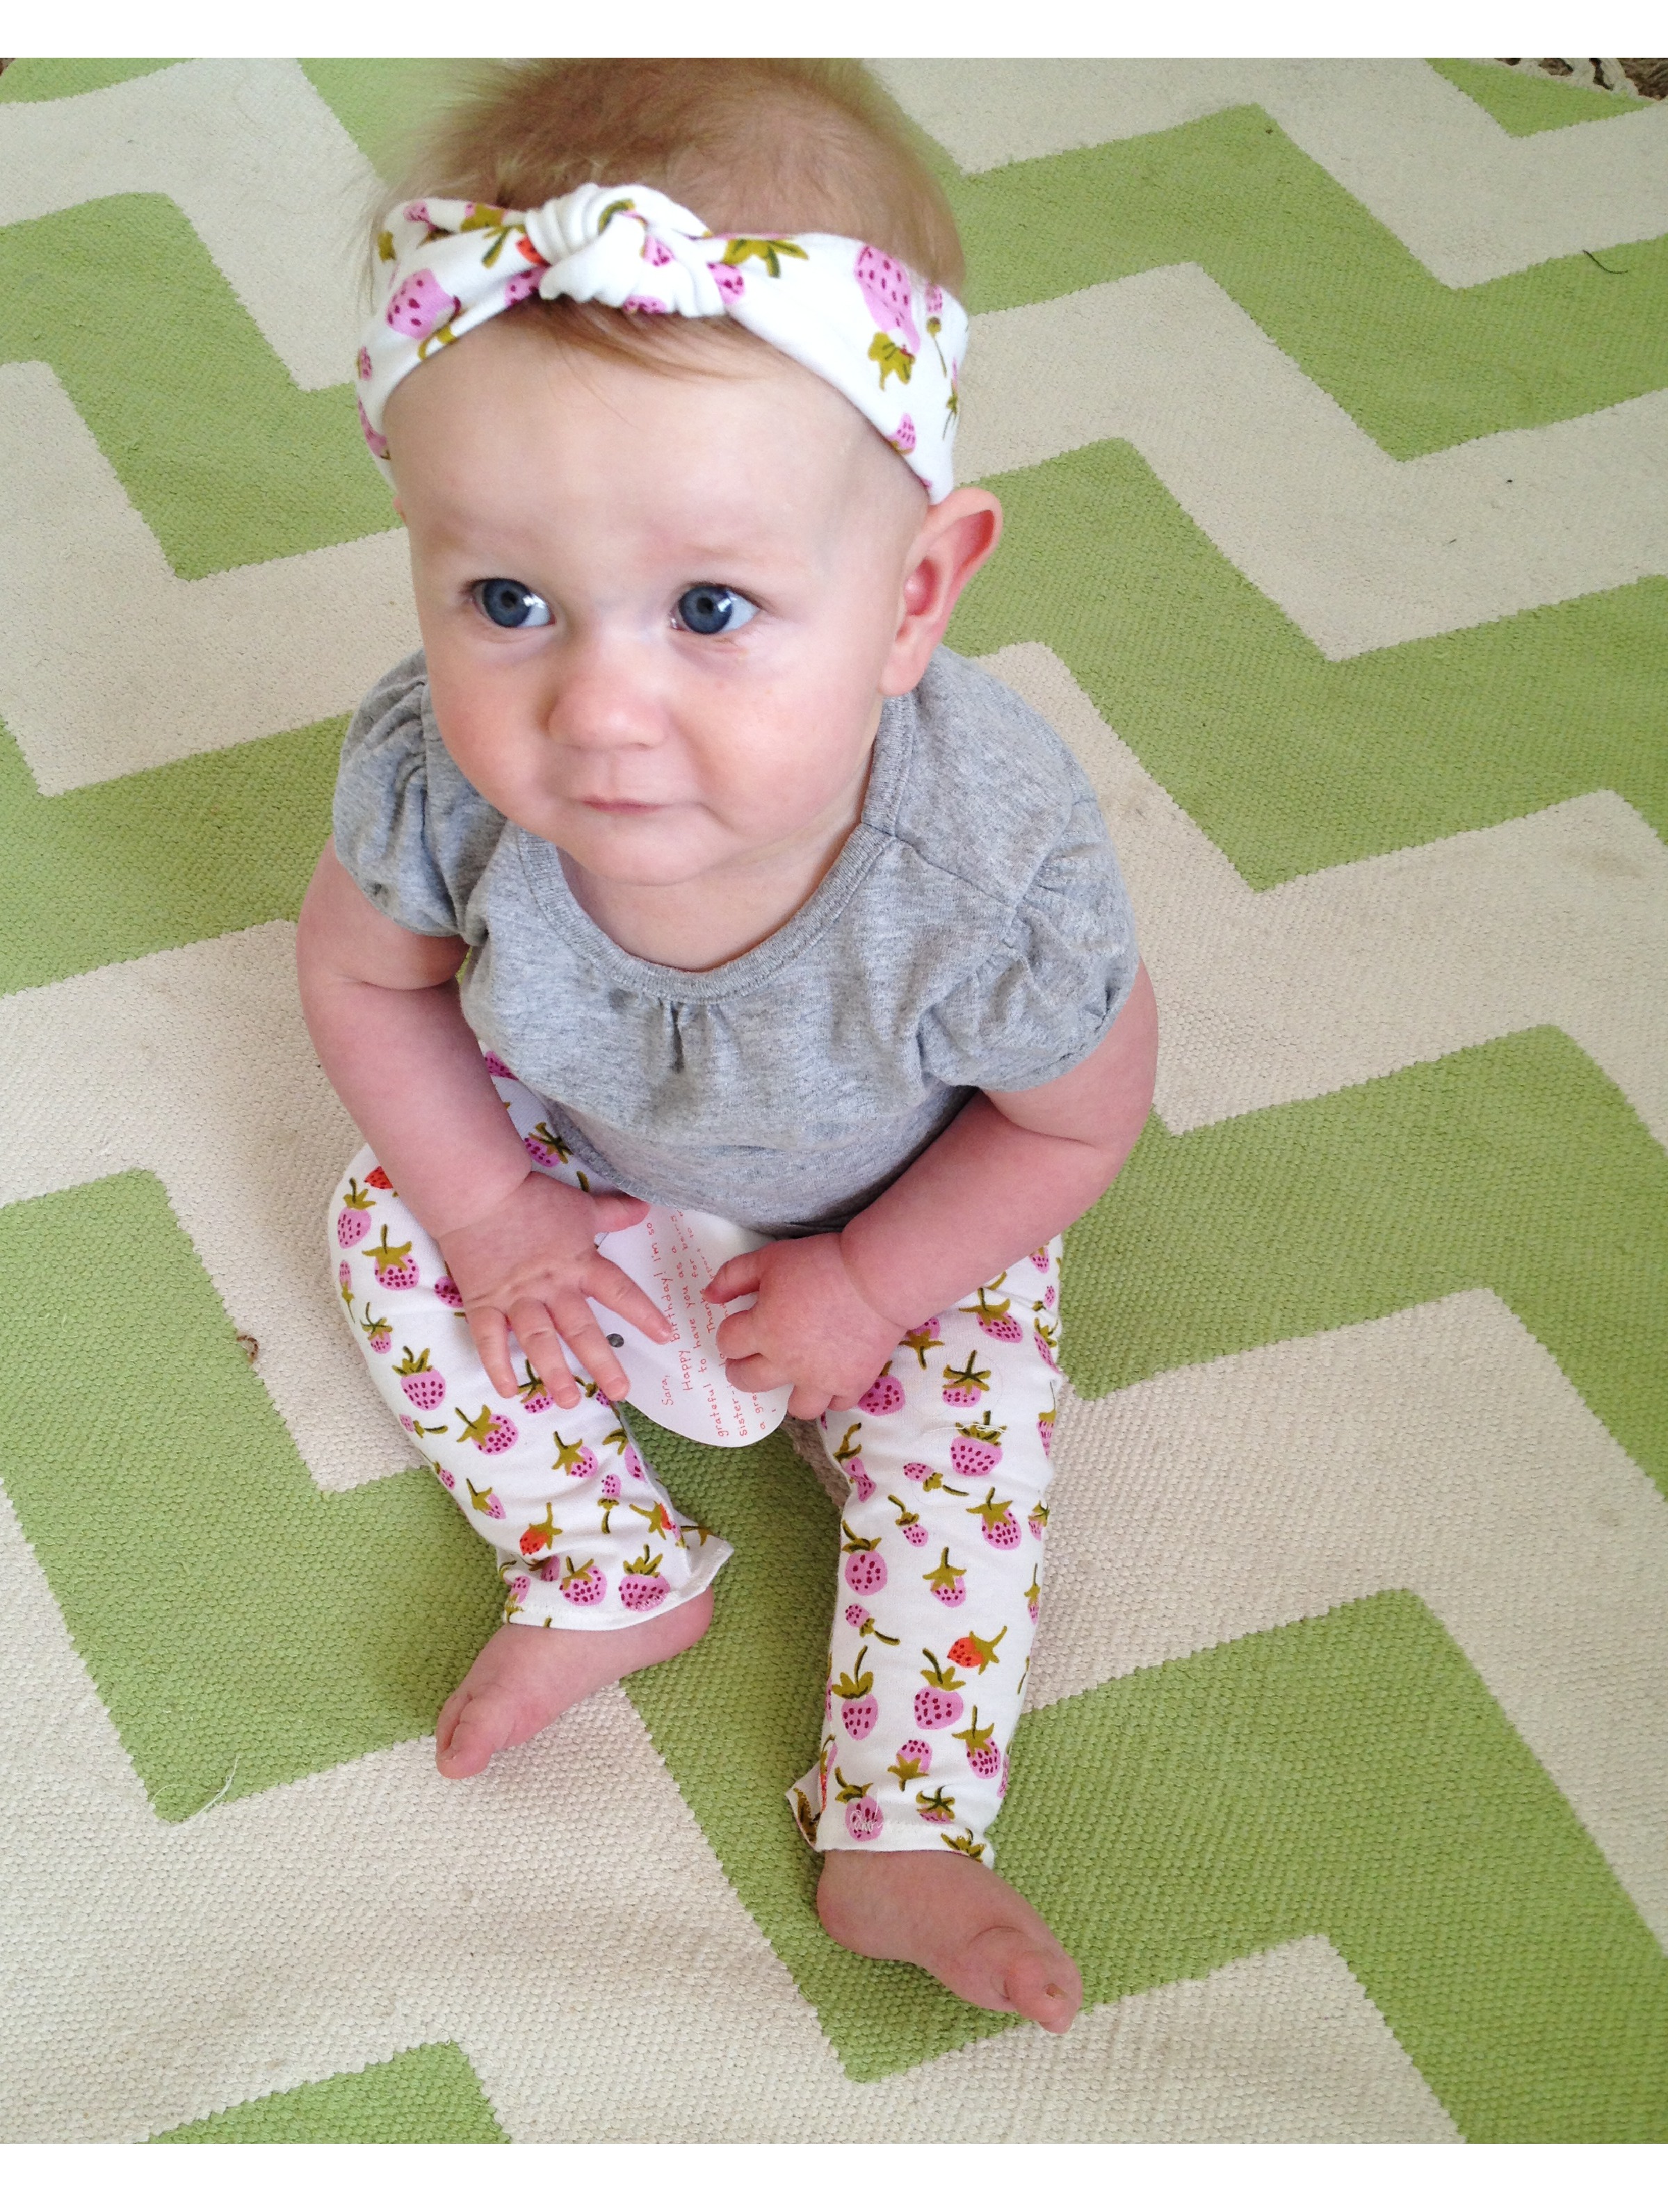
I wasn’t able to find a free tutorial on Pinterest for these, so I thought I would share mine. Another easy project, and very cute with matching pants! This is a quick project- 20 minutes tops. Enjoy!
I would love to see your finished knotted baby turbans! Please share using hashtag:
#knottedbabyturban
Can’t wait to see yours!!

I love that fabric and turban! So cute, Sara!
LikeLike
super cute with the matching little leggings : )
LikeLike
Where did you find your legging pattern?!
LikeLike
Are you referring to the fabric? It’s Briar Rose by Heather Ross, you can find it on fabric.com and other stores online 🙂
LikeLike
Here is the link for the legging pattern I used:https://thesaraproject.com/2014/03/27/diy-baby-leggings/
LikeLike
why am i finding this not so easy hahaha
LikeLike
Oh no! How can I help?
LikeLike
i think i got it 🙂 haha made a couple yesterday!! so excited! thank you for this!
LikeLike
So you don’t sew elastic into the headband, you just use a stretchy knit material?
LikeLike
Exactly! Any knit should work. The fabric I used was a cotton knit. No elastic required.
LikeLike
Do you have a tutorial or the matching pants? Thanks! I’m going to try these bands tomorrow!!
LikeLike
Yes I do! It’s the post right before the headbands. You can find them in the sew category featured at the top of the page 🙂 Good luck making the knotted turban, you will love em!! 🙂
LikeLike
What kind of stitch did you use for the headband so that the knit could still stretch? And did you cut with the stretch?
LikeLike
I used a zig zag stitch with a ball point needle! This way the stitches stretch with the fabric. And make sure to cut your fabric on the grain line.. With the stretch. Hope this helps! 🙂
LikeLike
I’m not finding the joining of the ends very easy. Any advice?
LikeLike
Basically you’ll fold the headband in half so the end edges are front sides together, you’ll see the seam going down the middle backside facing out as shown in the picture. (With the seam in the middle of the back side you won’t see it at all when worn).Then just sew the ends together at 1/4″ seam with a zig zag stitch and trim off seam allowance. Let me know if this is still confusing!! 🙂
LikeLike
I would like to try this, but I don’t understand the last step. How do you sew the ends together?
LikeLike
Basically you’ll fold the headband in half so the end edges are front sides together, you’ll see the seam going down the middle backside facing out as shown in the picture. (With the seam in the middle of the back side you won’t see it at all when worn).Then just sew the ends together at 1/4″ seam with a zig zag stitch and trim off seam allowance. Let me know if this is still confusing!! 🙂
LikeLike
Thank you! I LOVE it!!!
LikeLike
OMG HOW CUTE! Great job girl. I LOVE your blog too! It is so pretty and simple!
LikeLike
Thank you! That means so much!! 😊
LikeLiked by 1 person
how much material does this require for an infant? Is 1/4 yd enough?
LikeLike
1/4 yd is plenty! You could probably get two-four headbands out of that.
LikeLike
This is probably a silly question. I was sorta playing around with a couple pieces of stretchy knits and when I tied a knot they got real short. Is it really head measurement minus 2-3? I’m afraid to cut lol.
LikeLike
Because the knit fabric is so stretchy, you need to subtract a few inches so the headband fits snugly around your baby’s head. You can always play it safe and only subtract an inch or even less if you’re worried- and then measure it on your baby’s head and take away more if you need. Hope this helps! 🙂
LikeLike
This is so cute! Thanks for sharing! I’m going to make some for the little girl I baby sit!
Laura
http://laurahager.blogspot.com/
LikeLike
This is so cute! Matching headbands & leggings! Going Tito make one for my granddaughter! Thank you.
LikeLike
Let me start by saying I am a beginner. This headband is adorable and very easy to make. I did have to add 3 inches to the length to accomodate my daughters head. Once the thread goes in you lose the elasticity. Am I doing something wrong?
LikeLike
Make sure you are using a ball point needle and a zig zag stitch, than it should still stretch for you!
LikeLike
Thanks! I figured it out. Apparently the fabric only stretches one way and not both.
LikeLike
Oh yay! I’m glad you were able to figure it out 🙂
LikeLike
Silly question but I can’t figure out how to tie the knot?
LikeLike
Hi Lindsey! ll I did was tie a regular knot (half of a square knot), and manipulated it so the top of the knot is on the top of the headband, and I pulled it a apart a little to get the look I wanted of a bigger, chunkier knot).Hope this helps!
LikeLike
I am also confused about the last step. Did you tie the pieces together to make the knot or sew it together and use a different piece of fabric to create the knot?
LikeLike
I just tied the one long head band piece together in a knot, and centered the knot to the side where I wanted it 😀 And then sewed the two end pieces of the headband together to finish it off.
LikeLike
Thanks for the awesome tutorial! I just whipped one up in about 8 min! And I’m a beginner! I wish I could post a pic, it came out so good! I have a boy so this was fun and exciting to make, my first girl project, I made it for his cousin so she matches his diaper and shirt I made for my son when we go to the aquarium this weekend! 🙂
LikeLike
This makes me so happy!! I would love to see a picture of it! I’ll have to start a hashtag or something! 😊
LikeLike
Could another type of fabric work for this project? For example, I sewed a swaddler blanket as a gift for someone that is made out of the baby/soft flannel. I was going to try this using the same material in a complementing color. Thanks!
LikeLike
Hi Jess! You could use a flannel but keep in mind it does not stretch as much as a knit, so the measurements need to be pretty exact. You could do something like this instead: cut two pieces of flannel (front and back, add a few inched to each end from exact head measurement (and curve or point the ends), sew together RST, flip out right side and you could just tie the headband on the head in a knot or bow instead. Just an idea! That might work better for a growing child. Using a knit lets the headband stretch over the child’s head and also grow with the child, while fitting snugly to stay on. Hope this helps! I also did a tutorial for a wired head wrap thats really cute too: https://thesaraproject.com/2014/09/18/diy-wired-head-wraps/
LikeLike
I am not a person to comment on anything but this is toooo cute and the matching pants I love it
LikeLike
Could I hand sew the part that you use the sewing machine for? I don’t have a sewing machine, or skills.
LikeLike
You would probably need to use a sewing machine or serger for these headbands unfortunately. Sorry!
LikeLike