
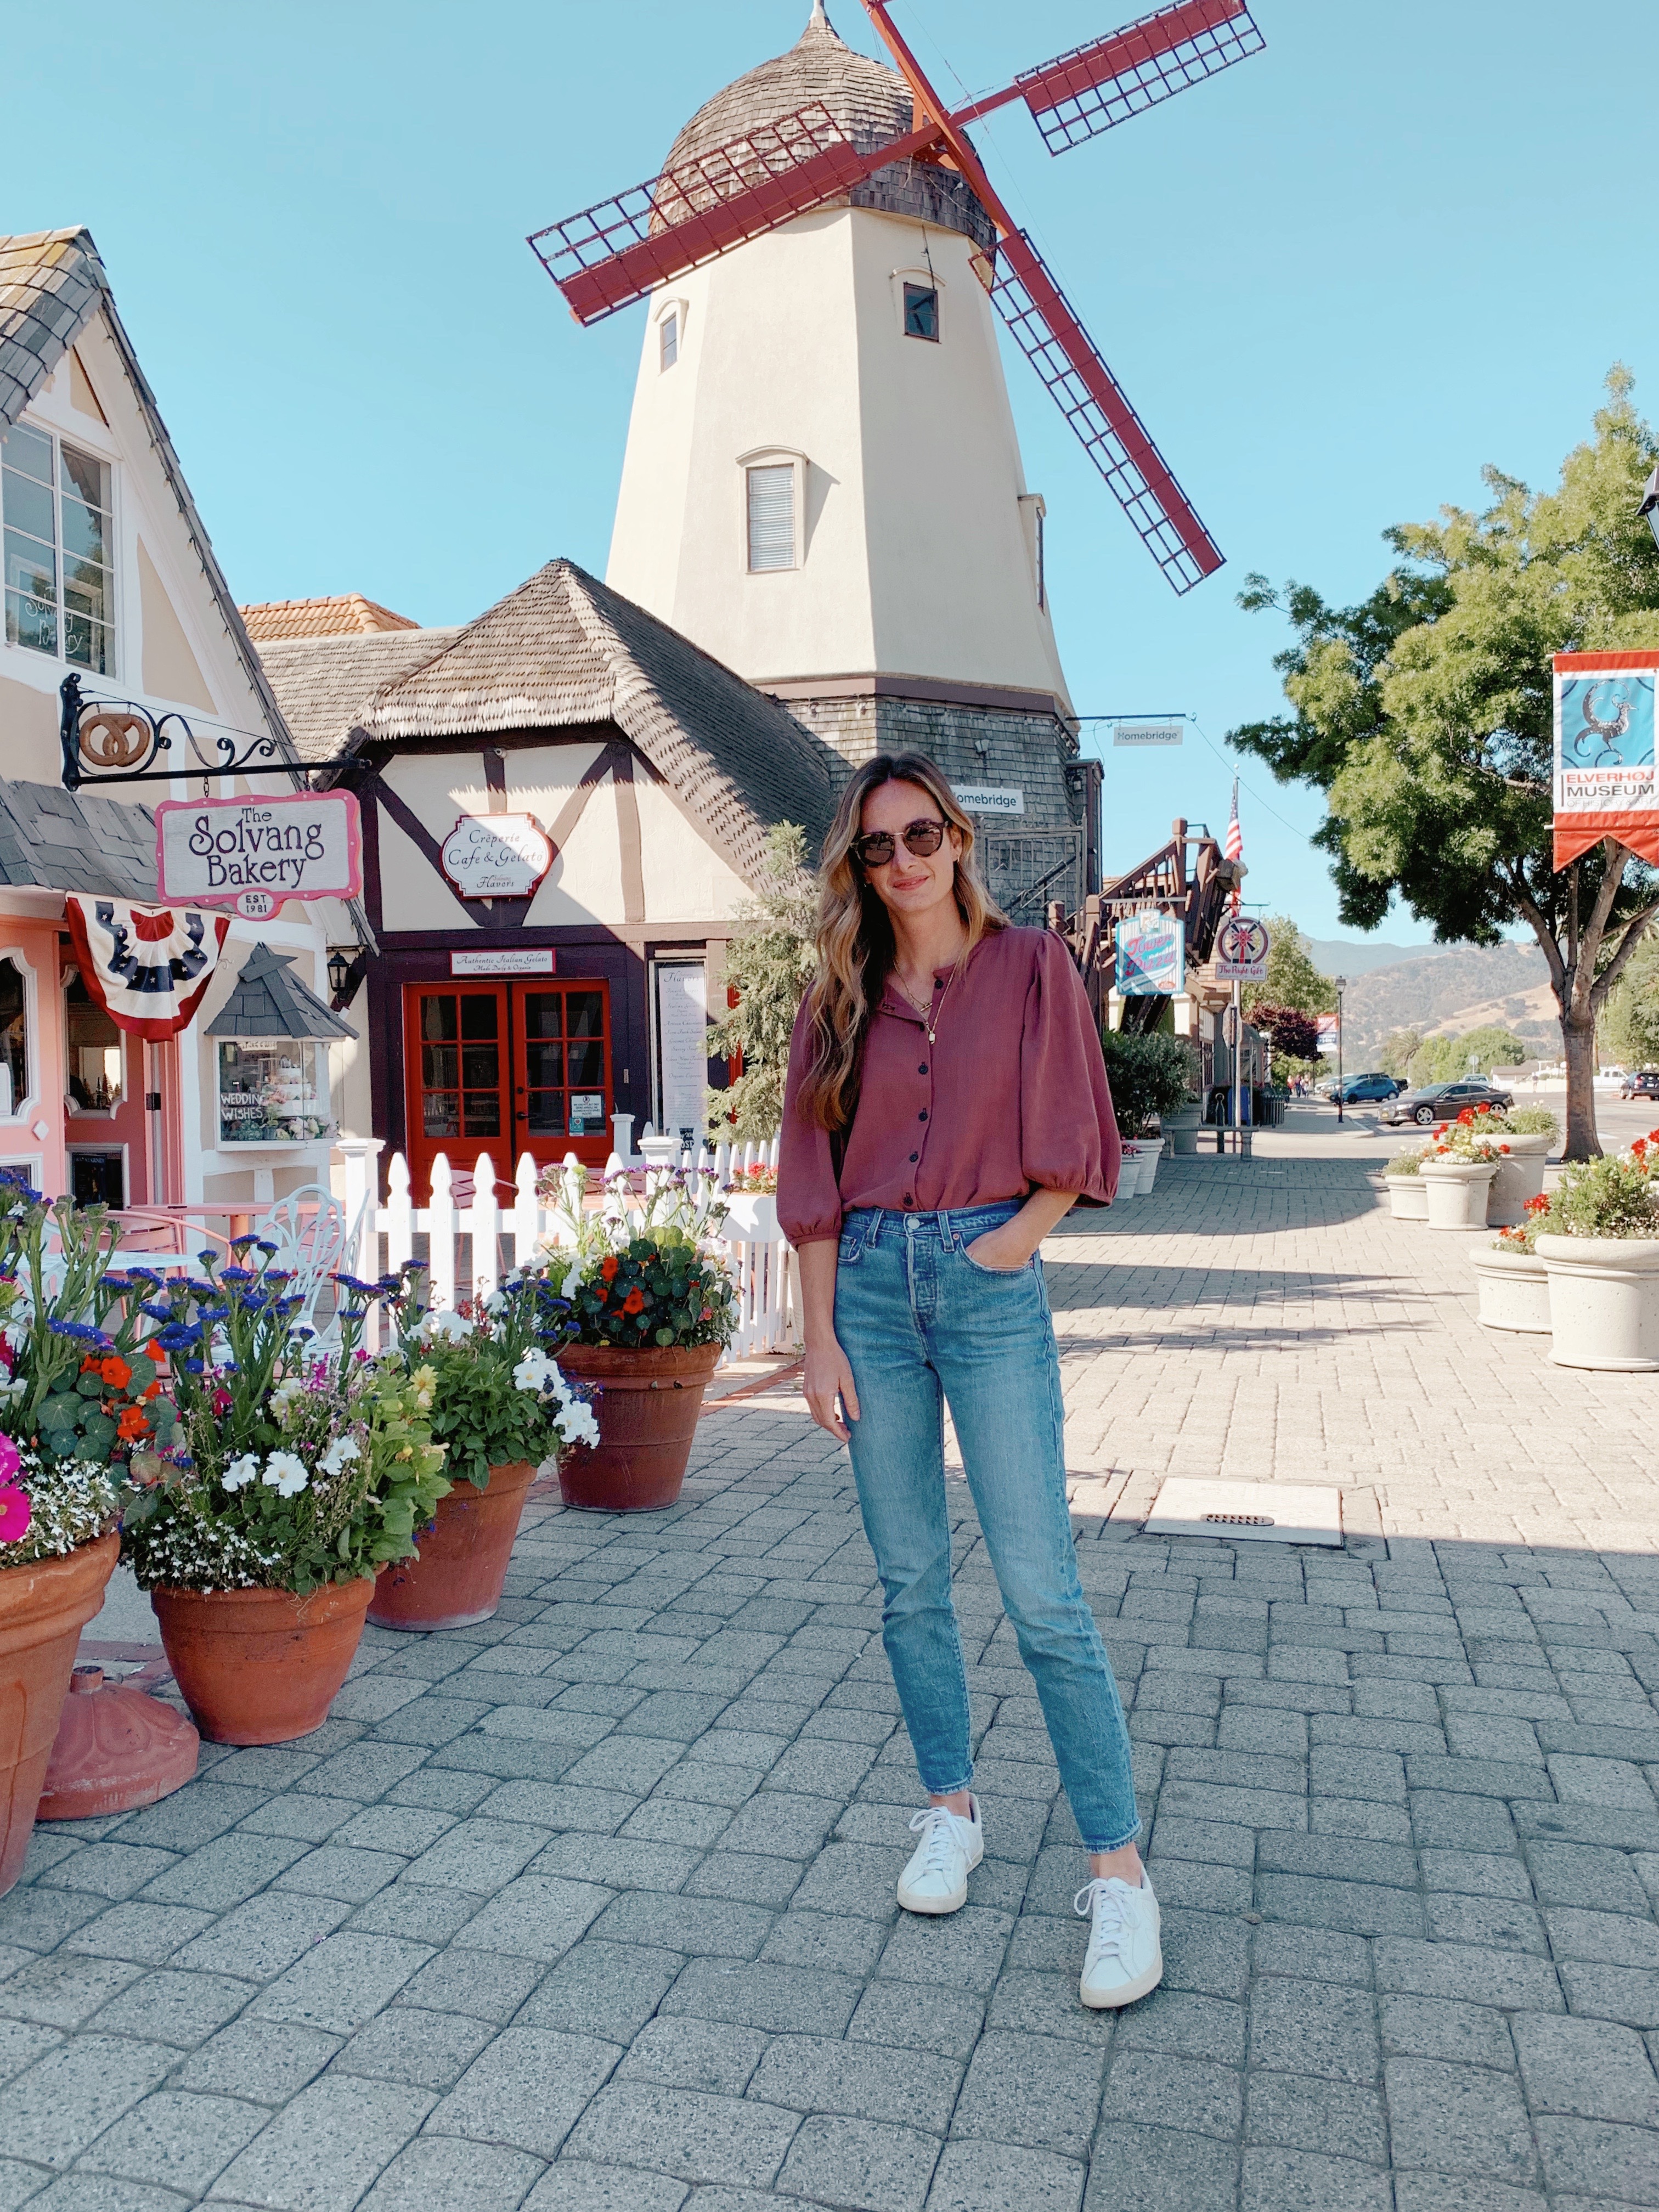
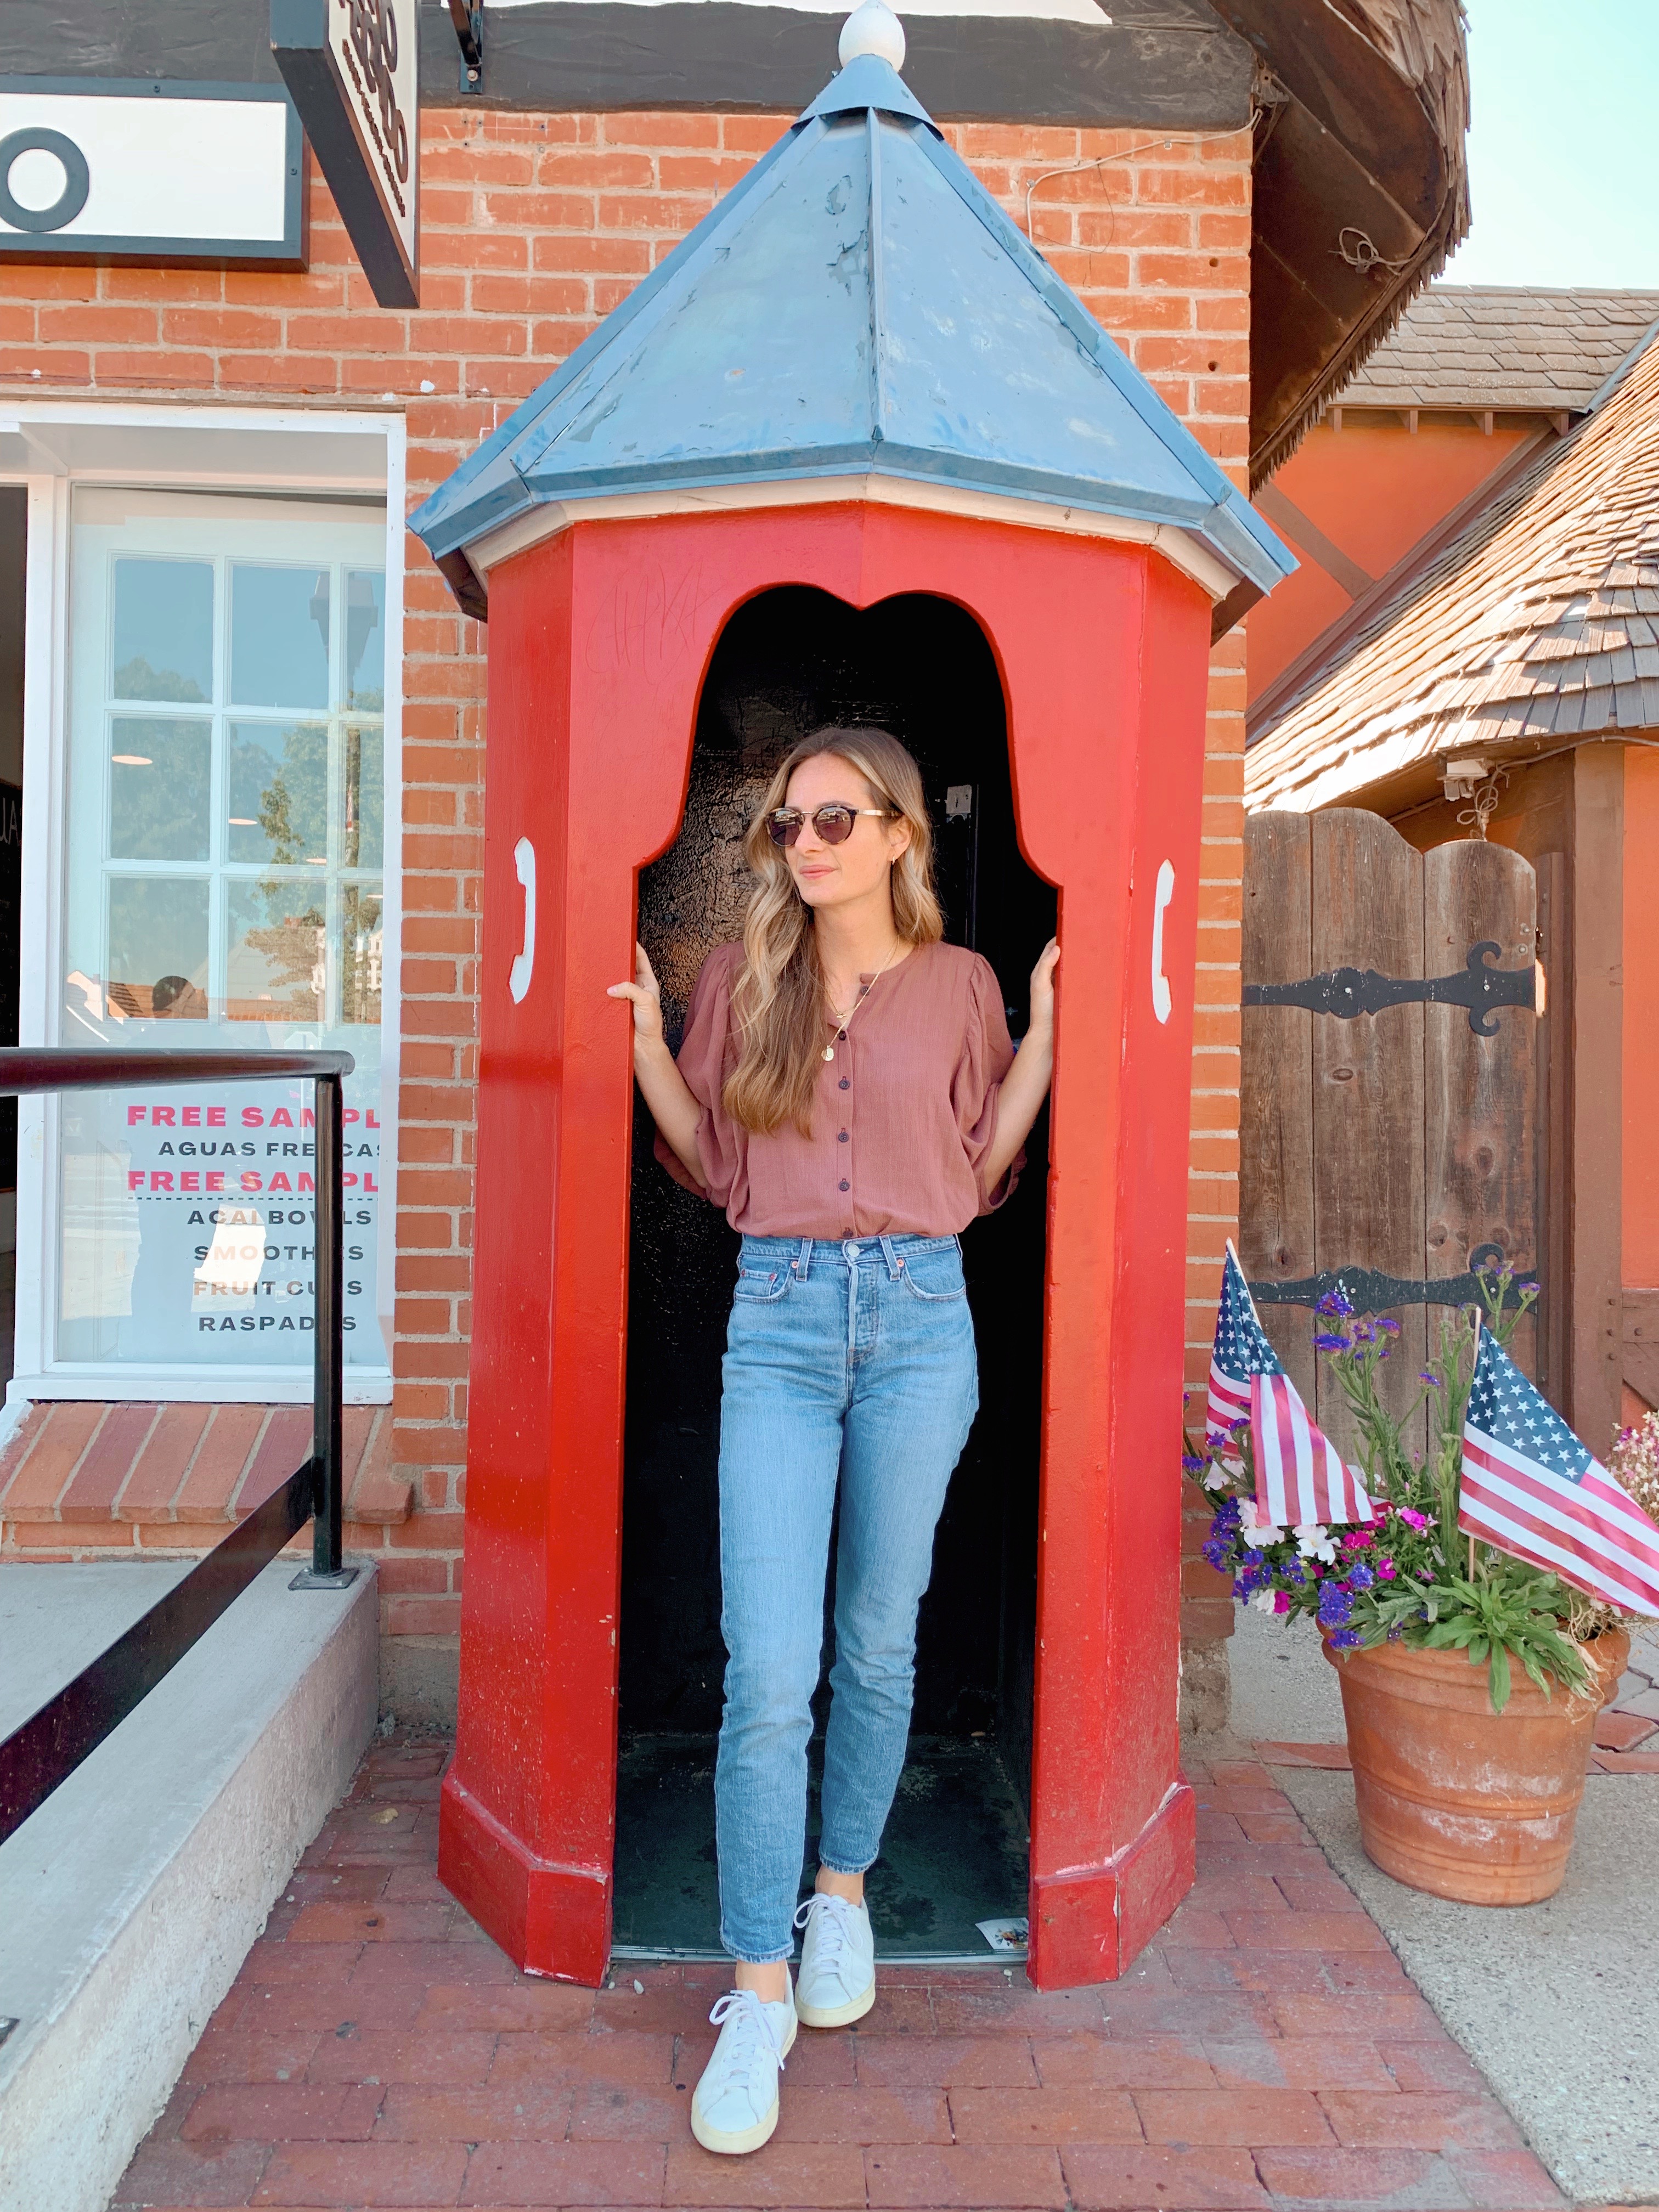
Hi all! Hope everyone is having a great start to summer. Trying to keep my kids busy over here, feeling exhausted most days, but we’re having lots of fun! Lately, I’ve noticed my closet is lacking in “casual dressy” shirts! Since Covid, my wardrobe has mostly become t-shirts, jeans and lots of active wear. As we are starting to go out again, I’ve been needing some nicer tops to pair with jeans. I’ve always loved the Anthea Blouse by Anna Allen, and this seemed like a great opportunity to try it out.
I sewed up a size 2, no changes, and used a really nice fabric I found at Joann. It’s a mauve brown slub linen rayon fabric in the color “rootbeer”– a nice dark neutral. This fabric has really great texture and drape, too. This pattern was pretty straight forward to sew! Next time I might size down, shorten the sleeves and sleeve band too. I found the band opening to be a little too wide for me, and sleeves a little long.
I also love the dress version of this pattern and hope to make it soon with these added changes.
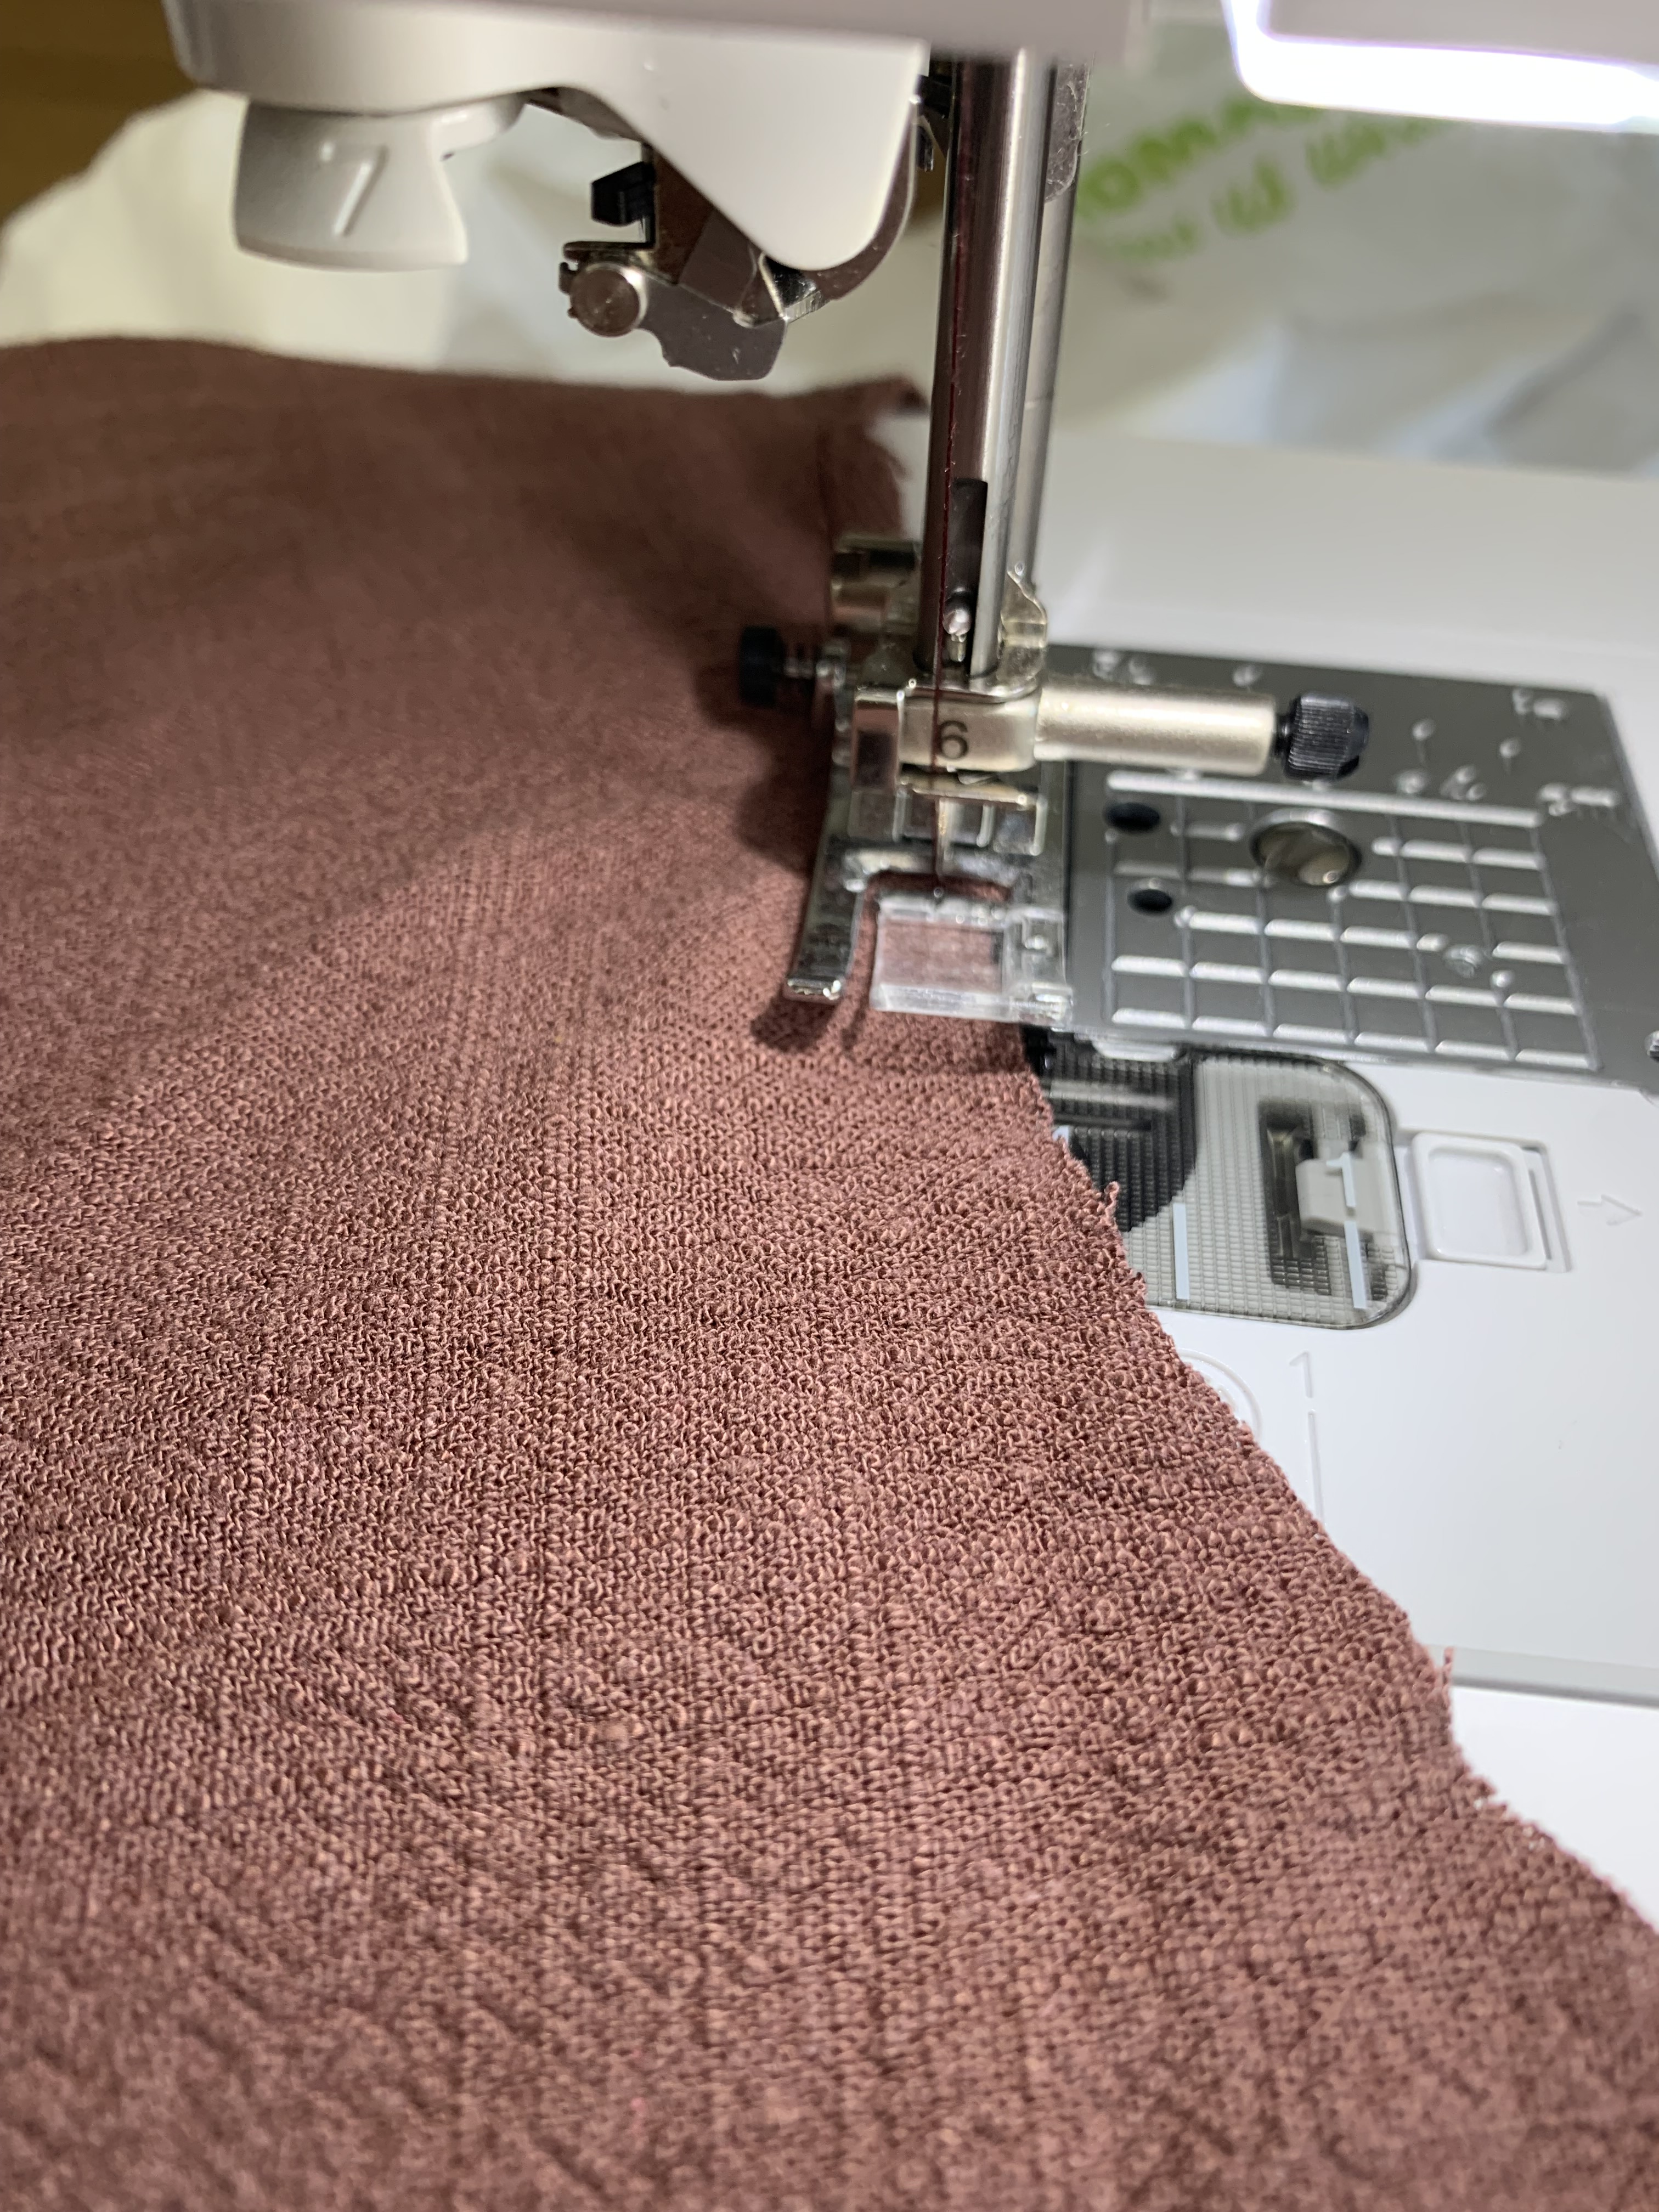
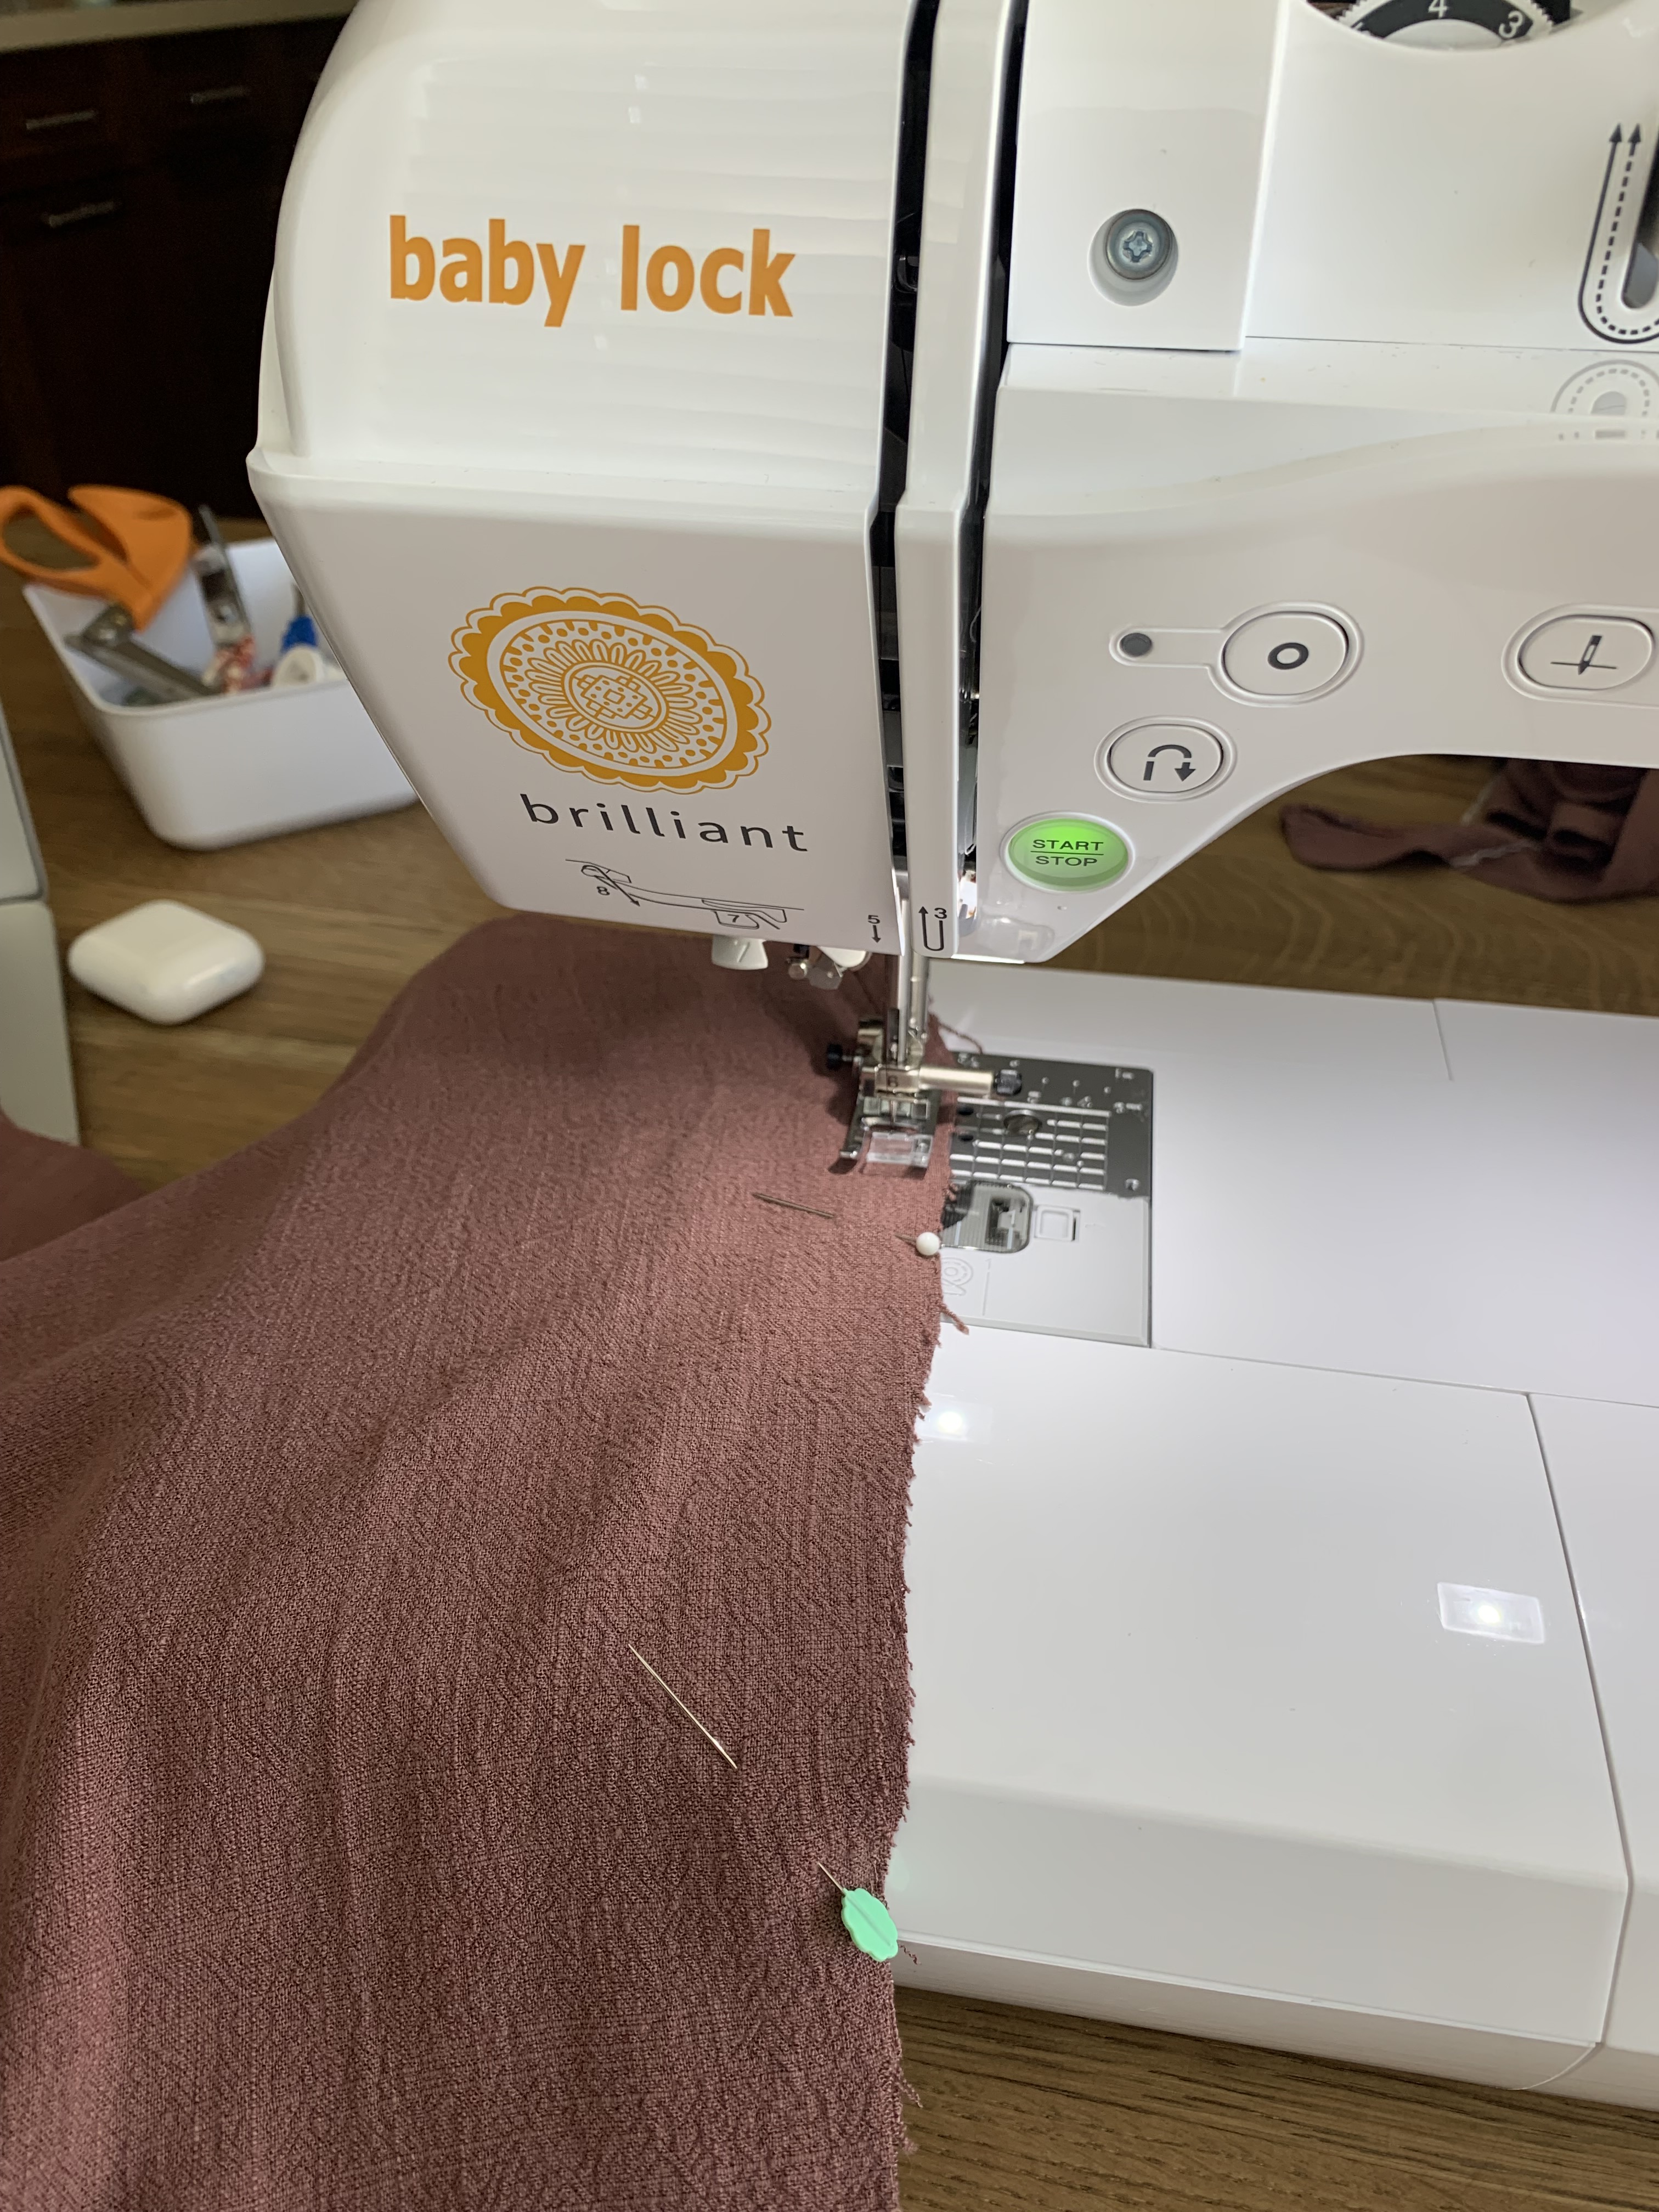
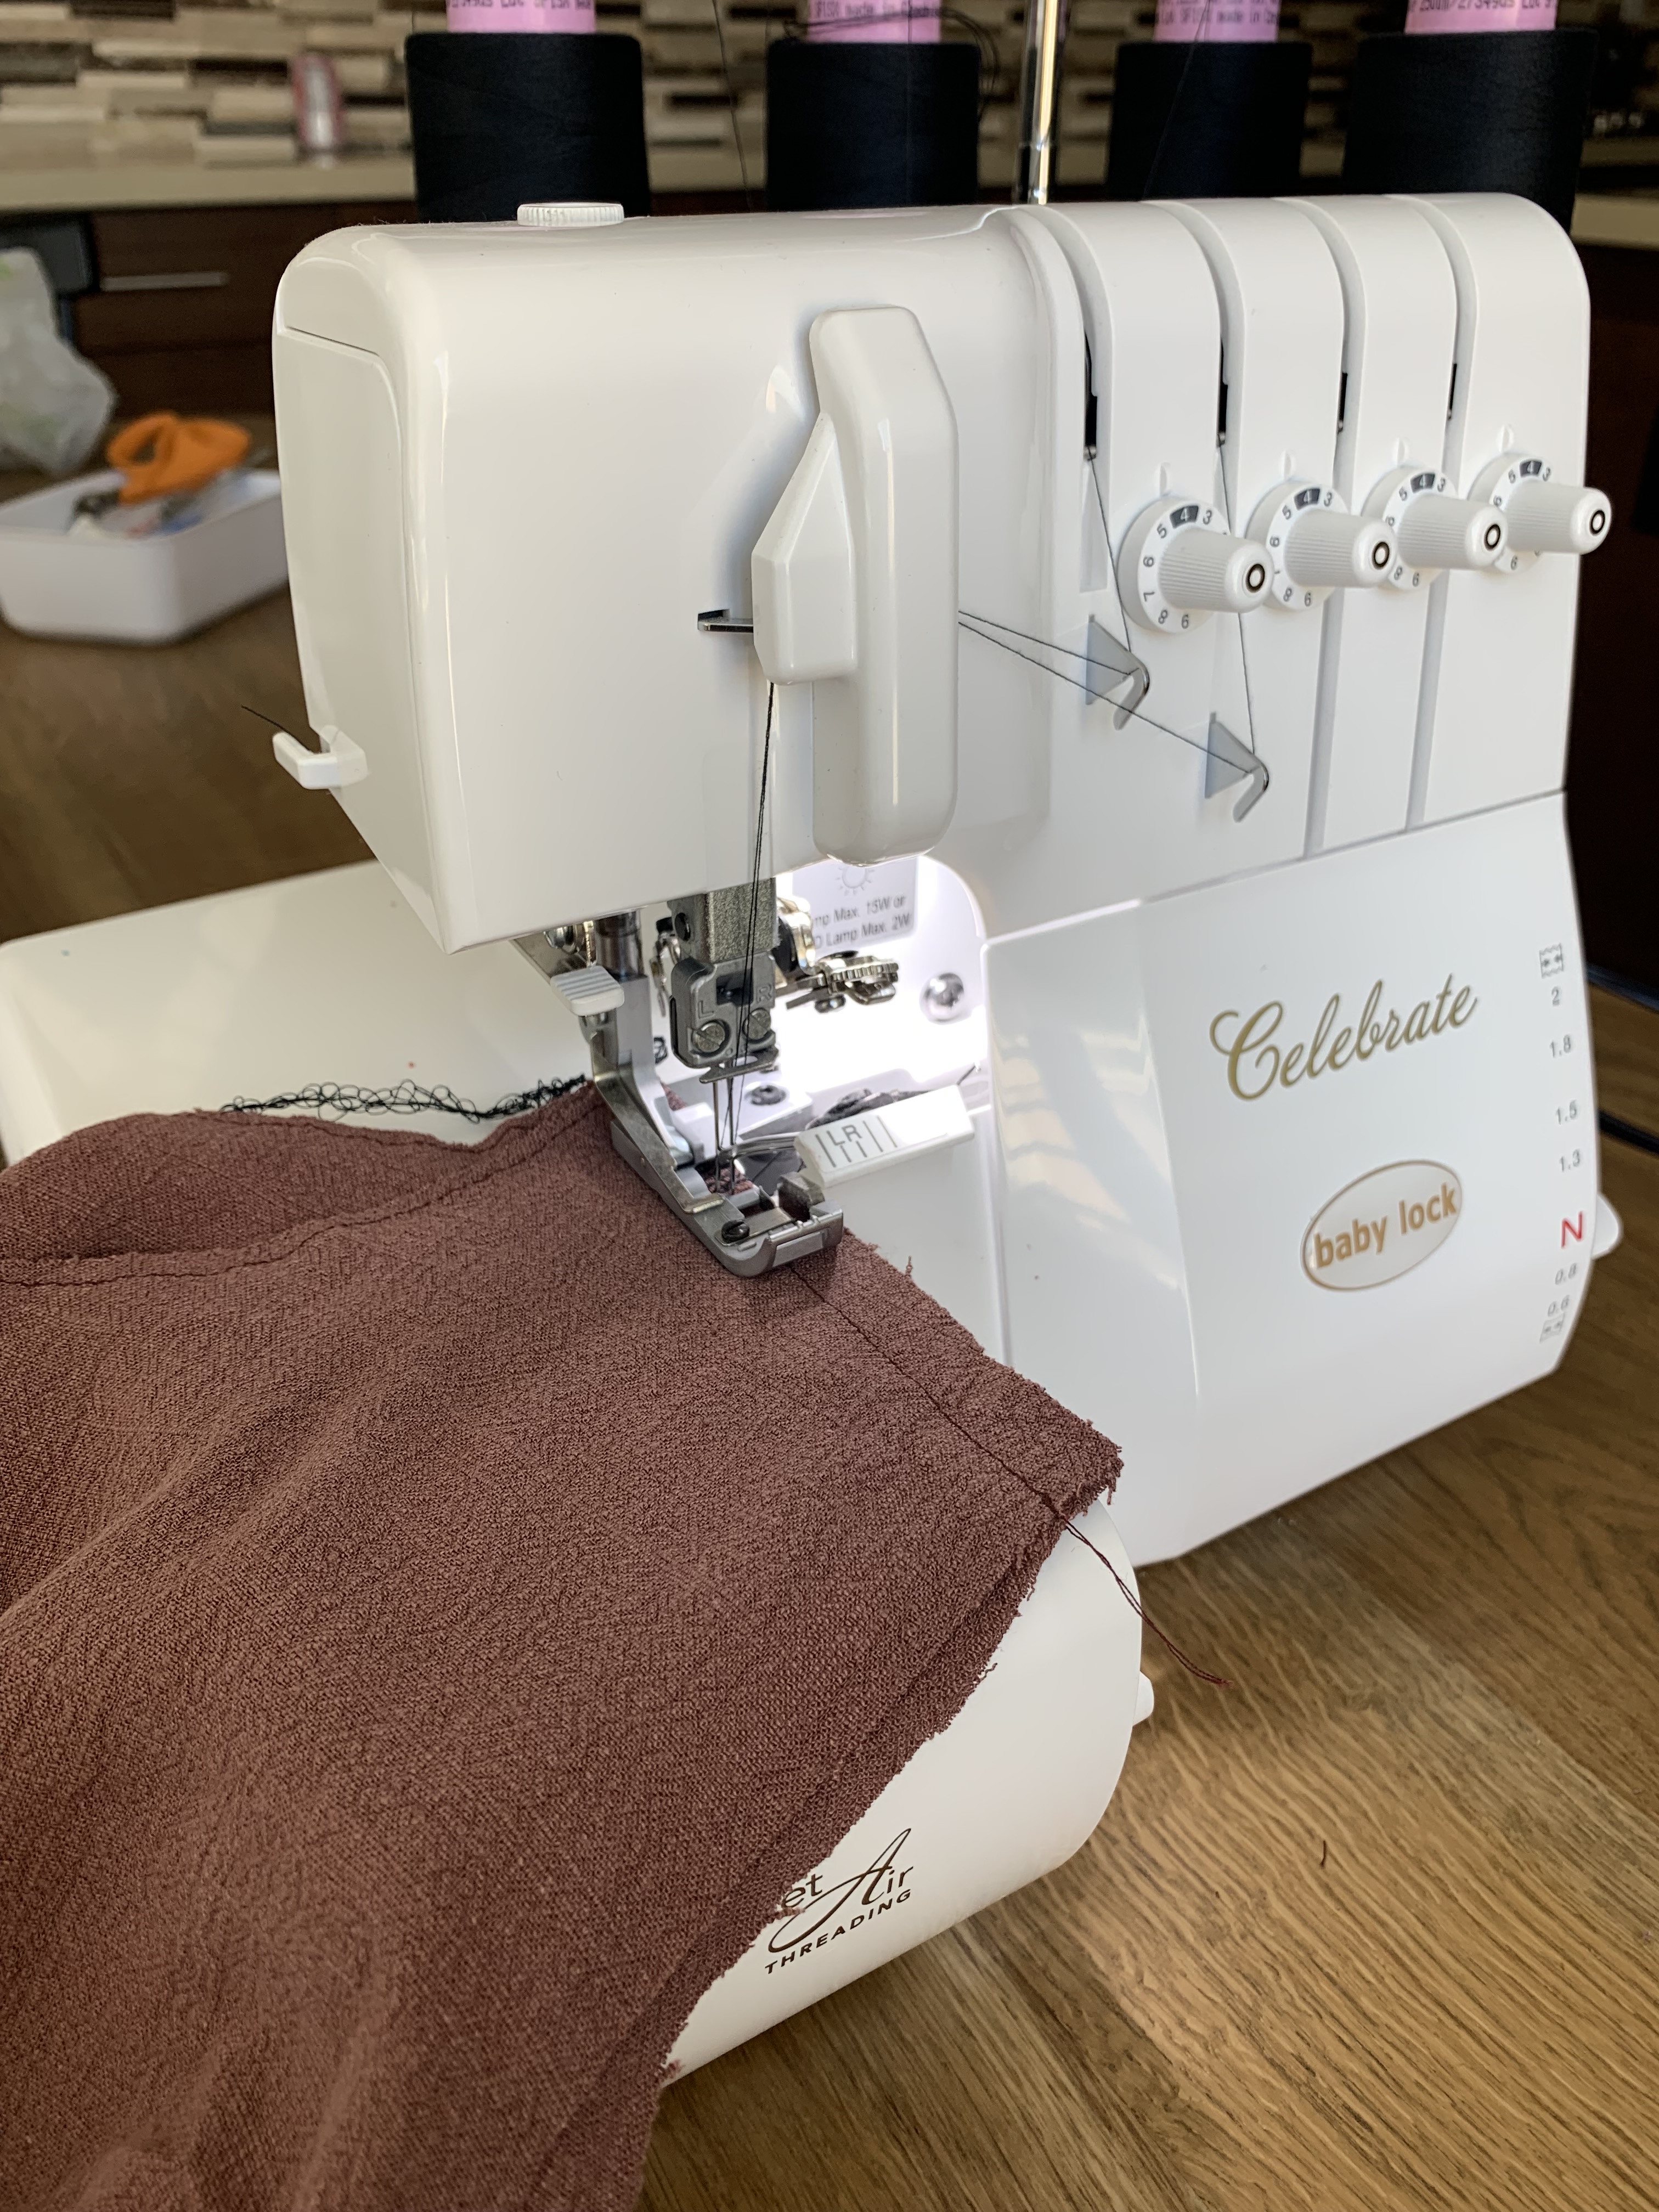
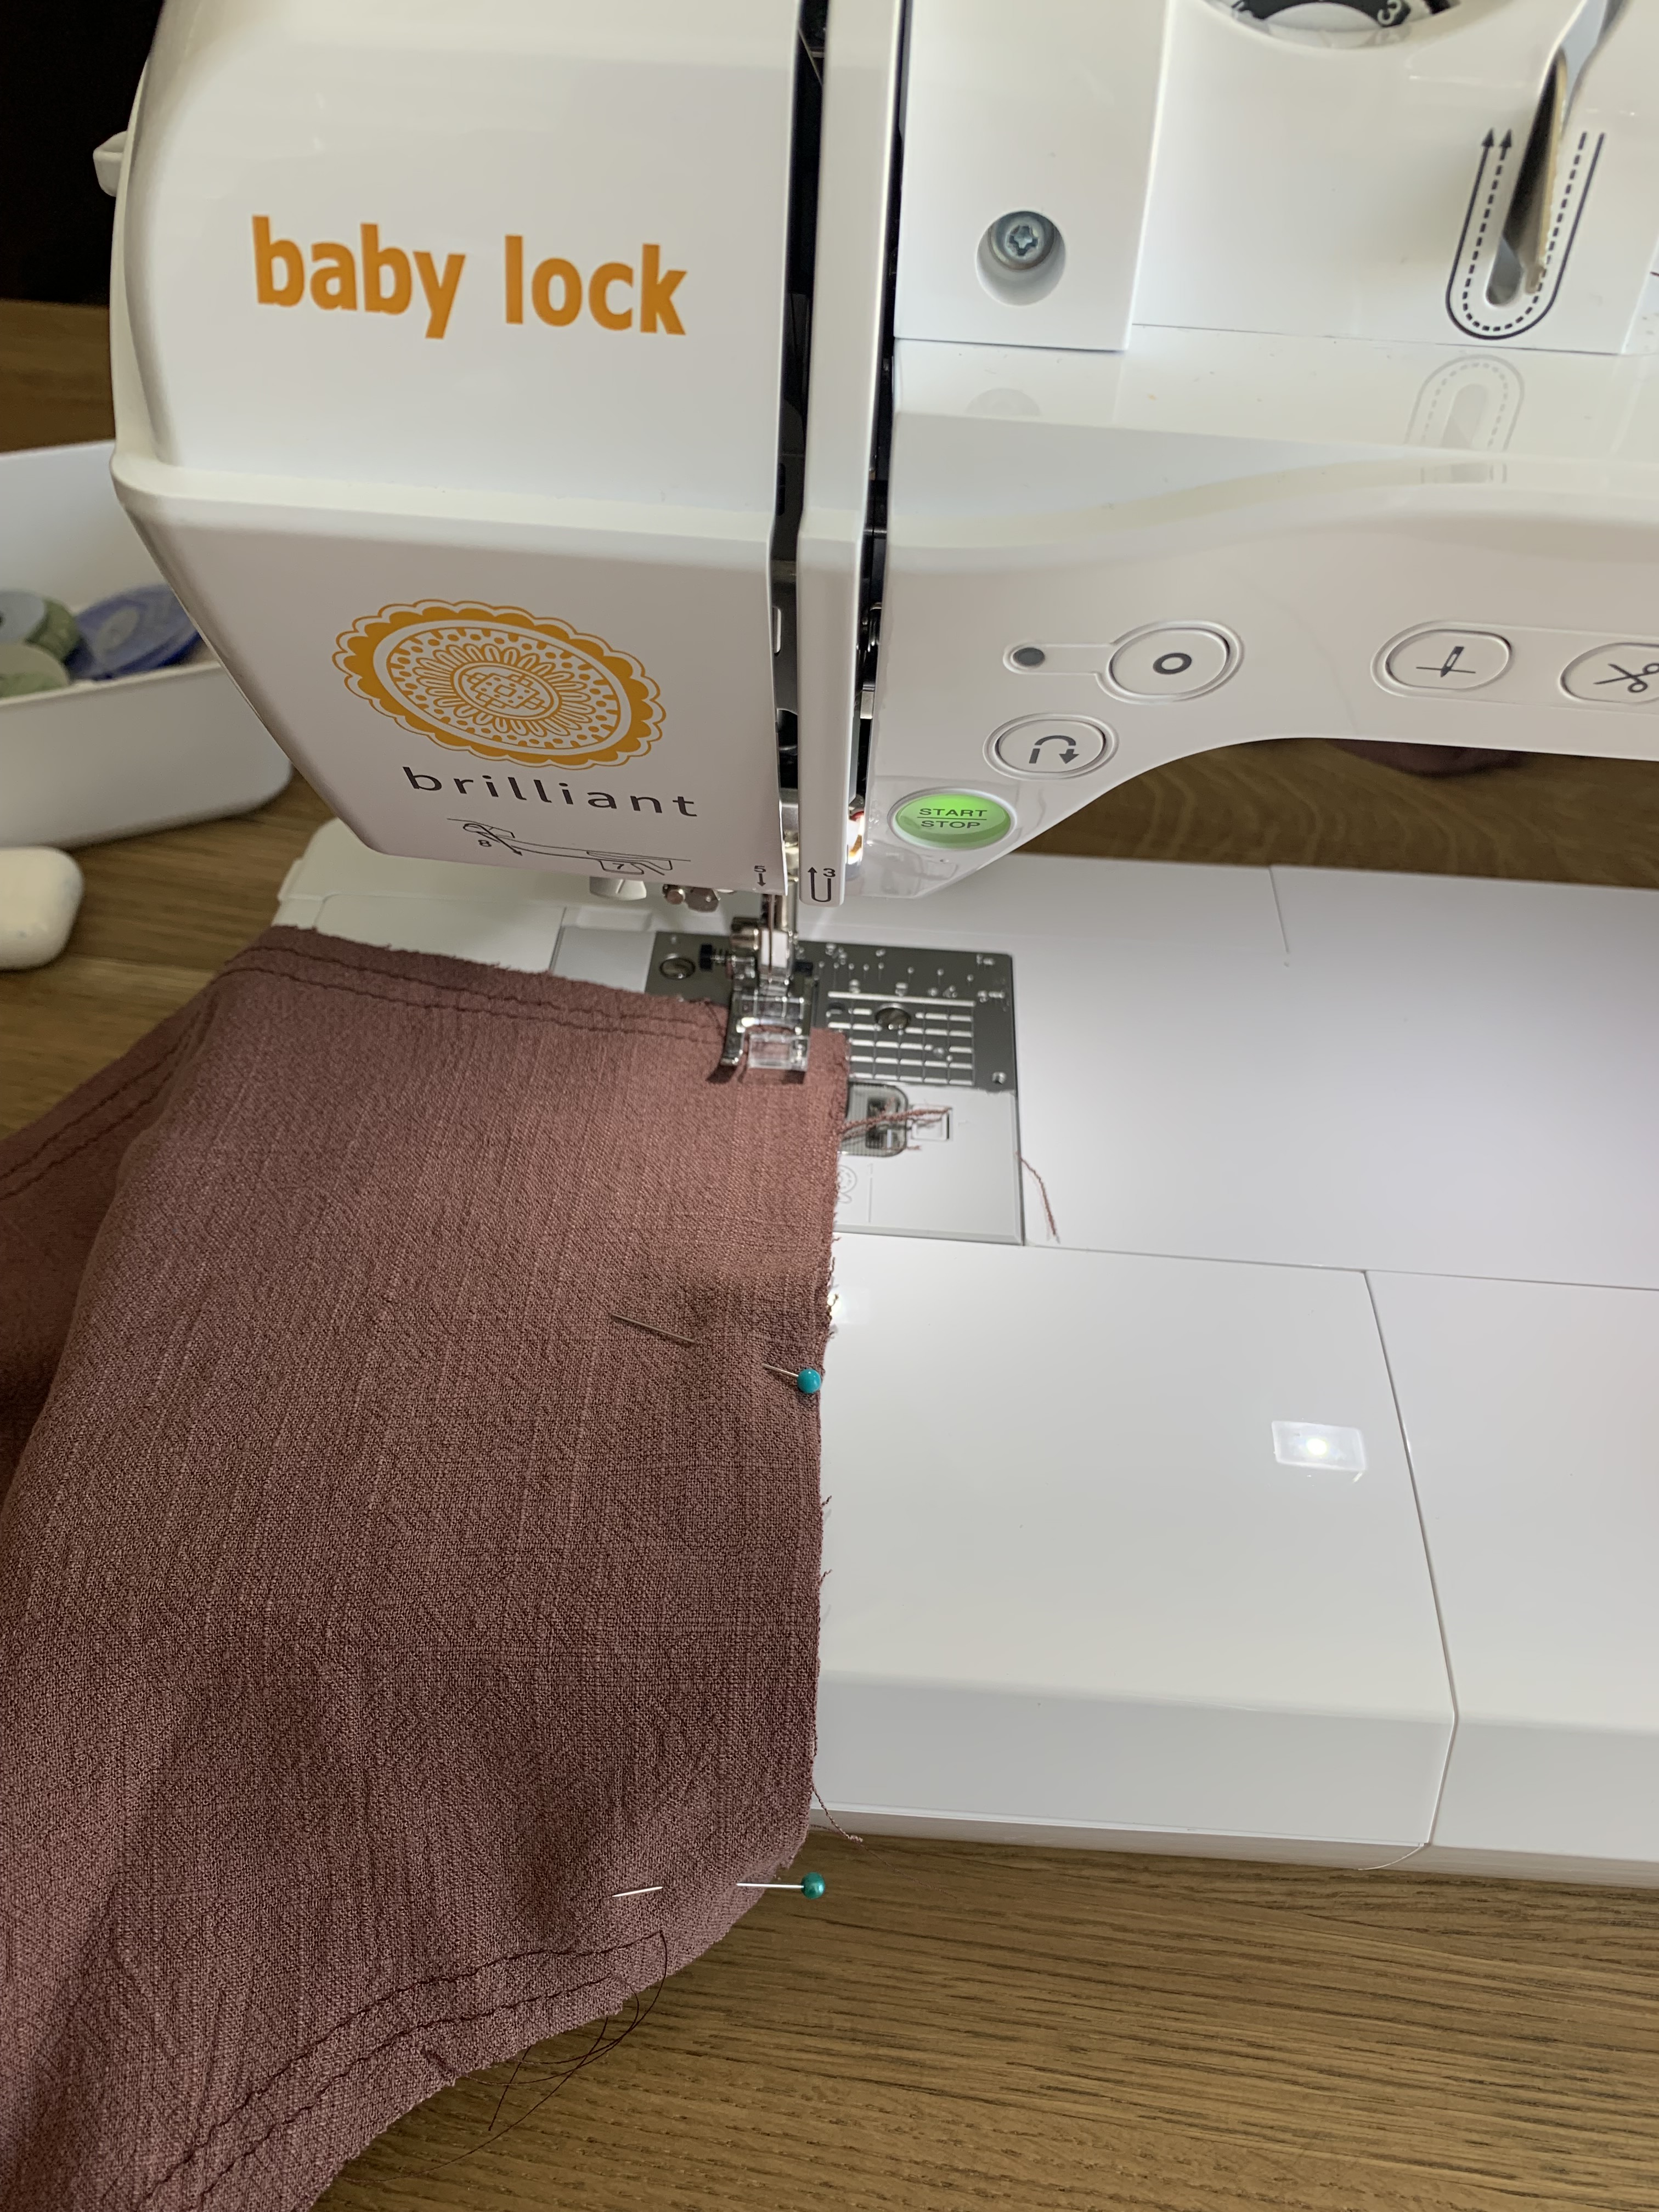
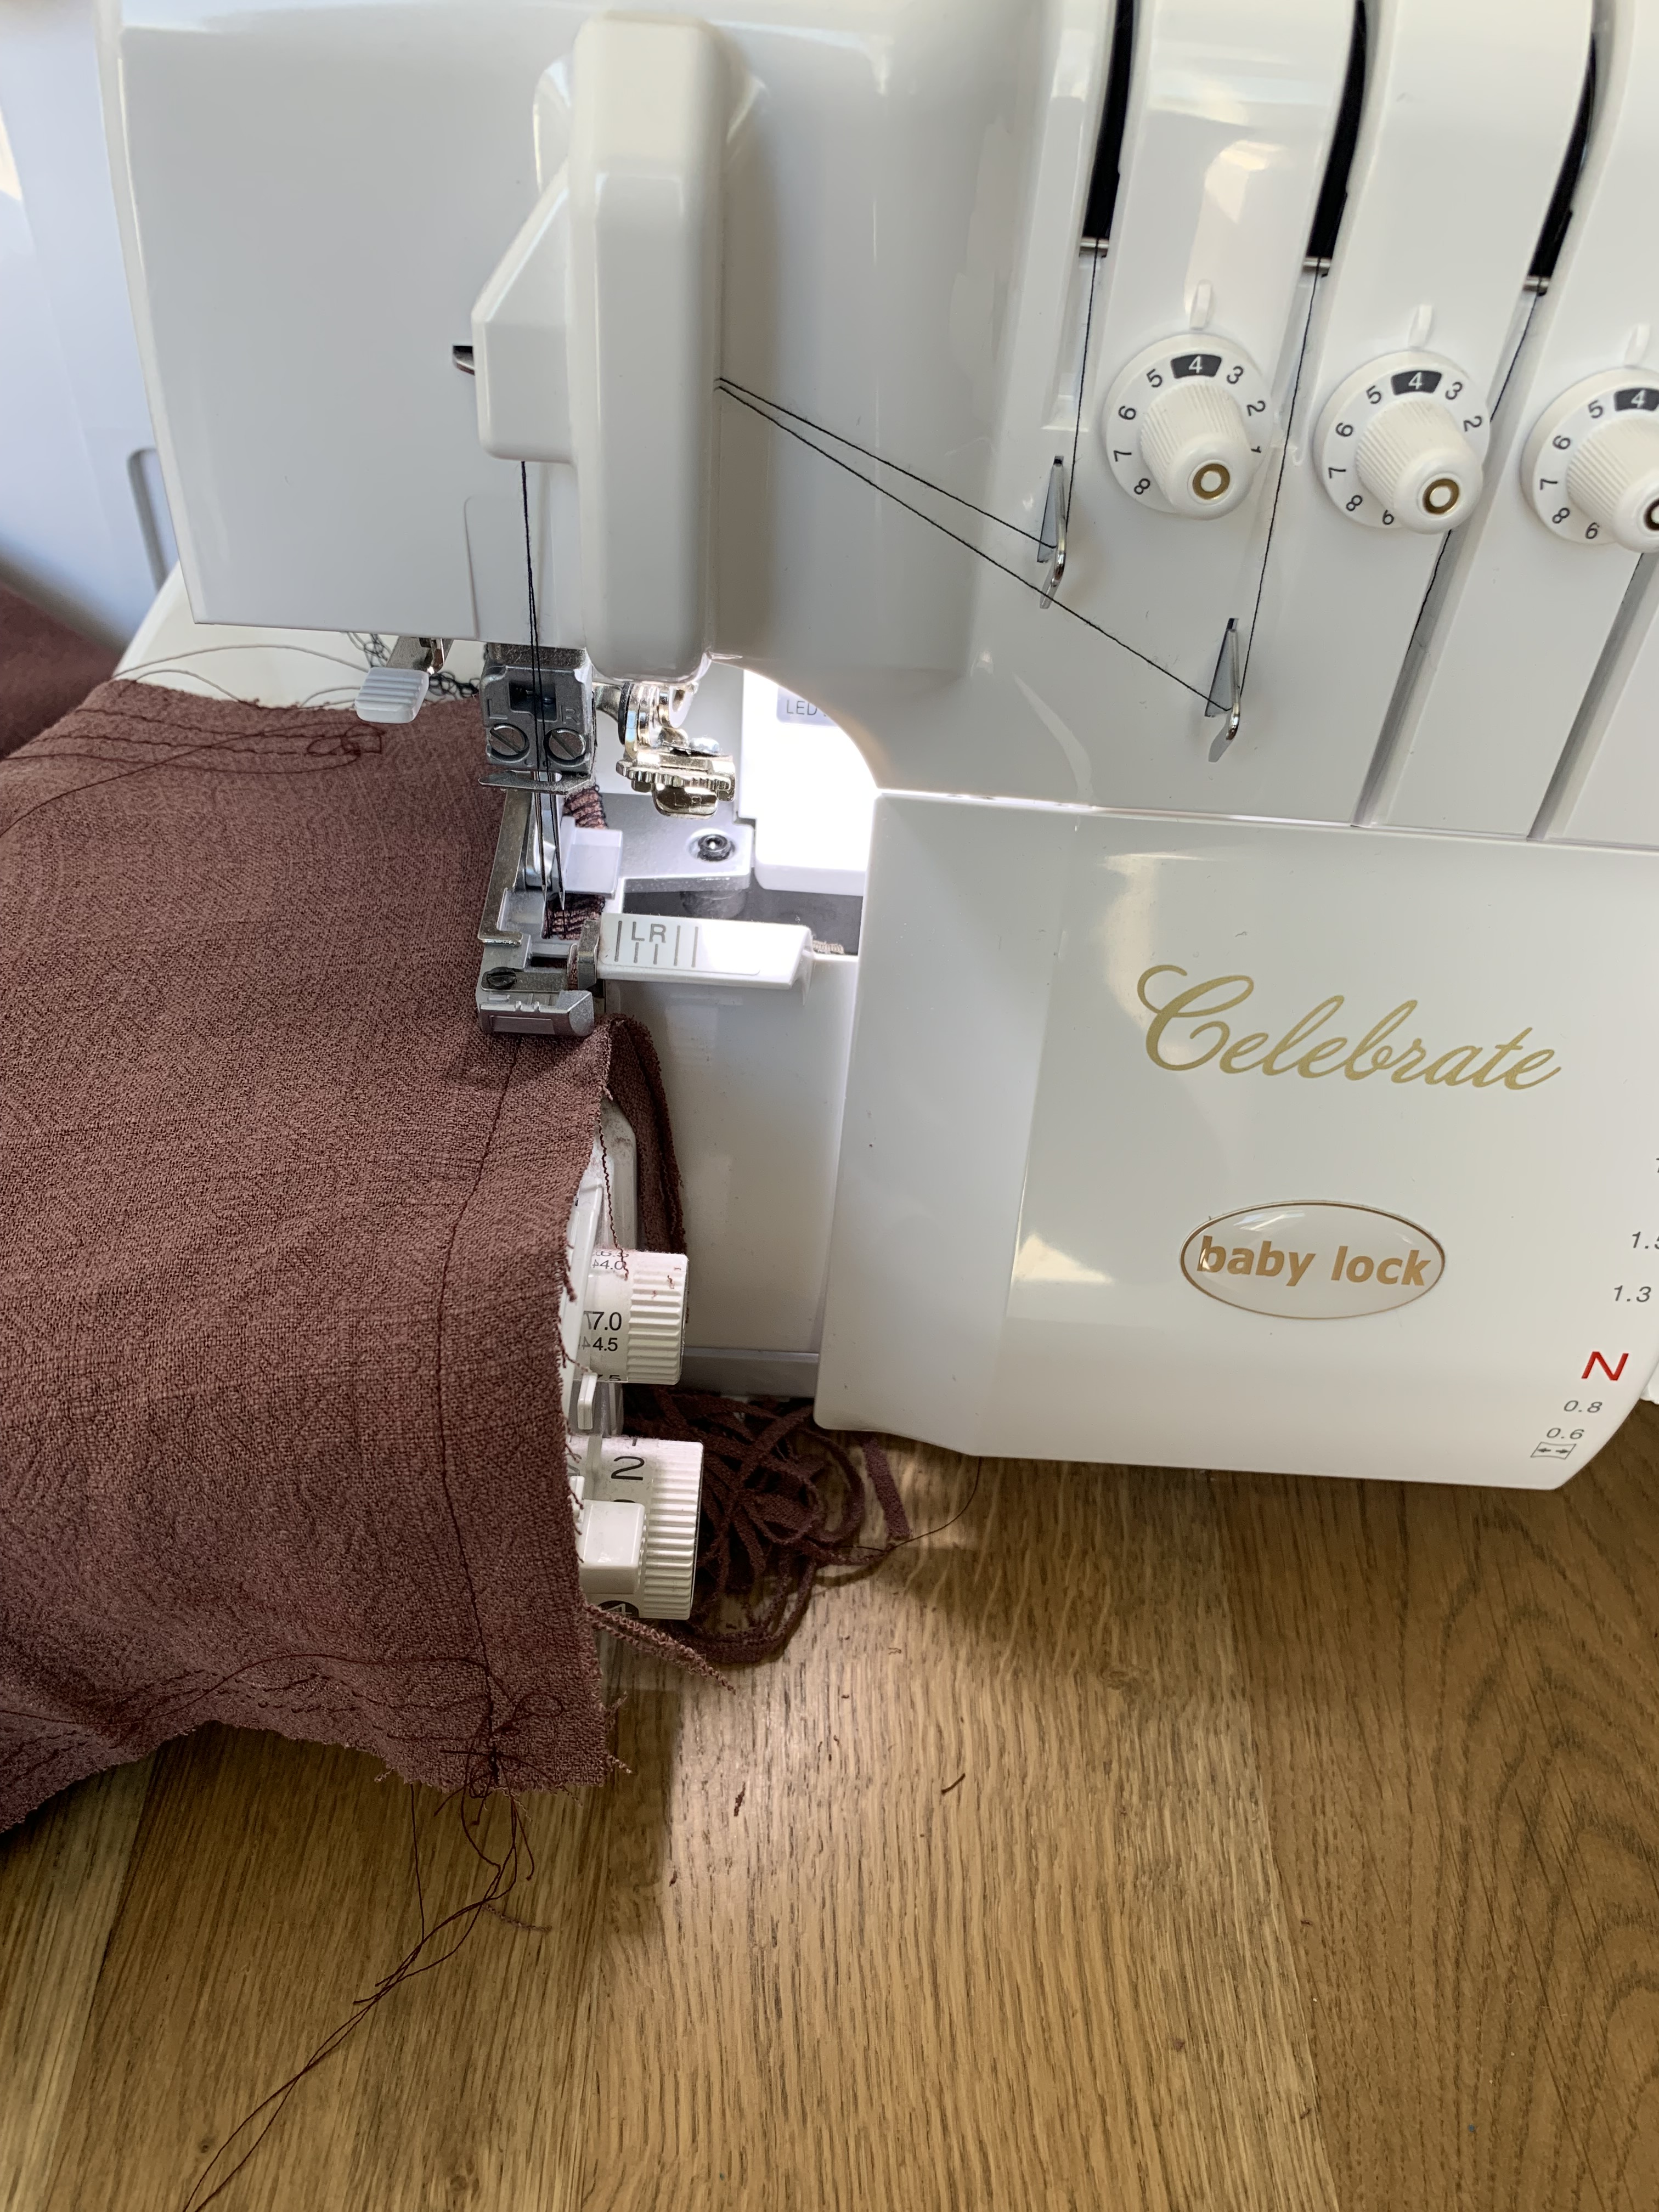
I took photos along the way to share how I made my Anthea Blouse, using my amazing Baby Lock sewing machines. I’ve had these machine for 18 months now and have loved every minute with them! They come at a great price point, and showcase high quality sewing. For this project I used my Baby Lock Brilliant sewing machine and Celebrate Serger.
Let’s jump into the tutorial!
Step 1: Stay stitch the bodice front and back necklines.

Step 2: Prep your interfacing, apply to front bodice pieces as instructions direct.
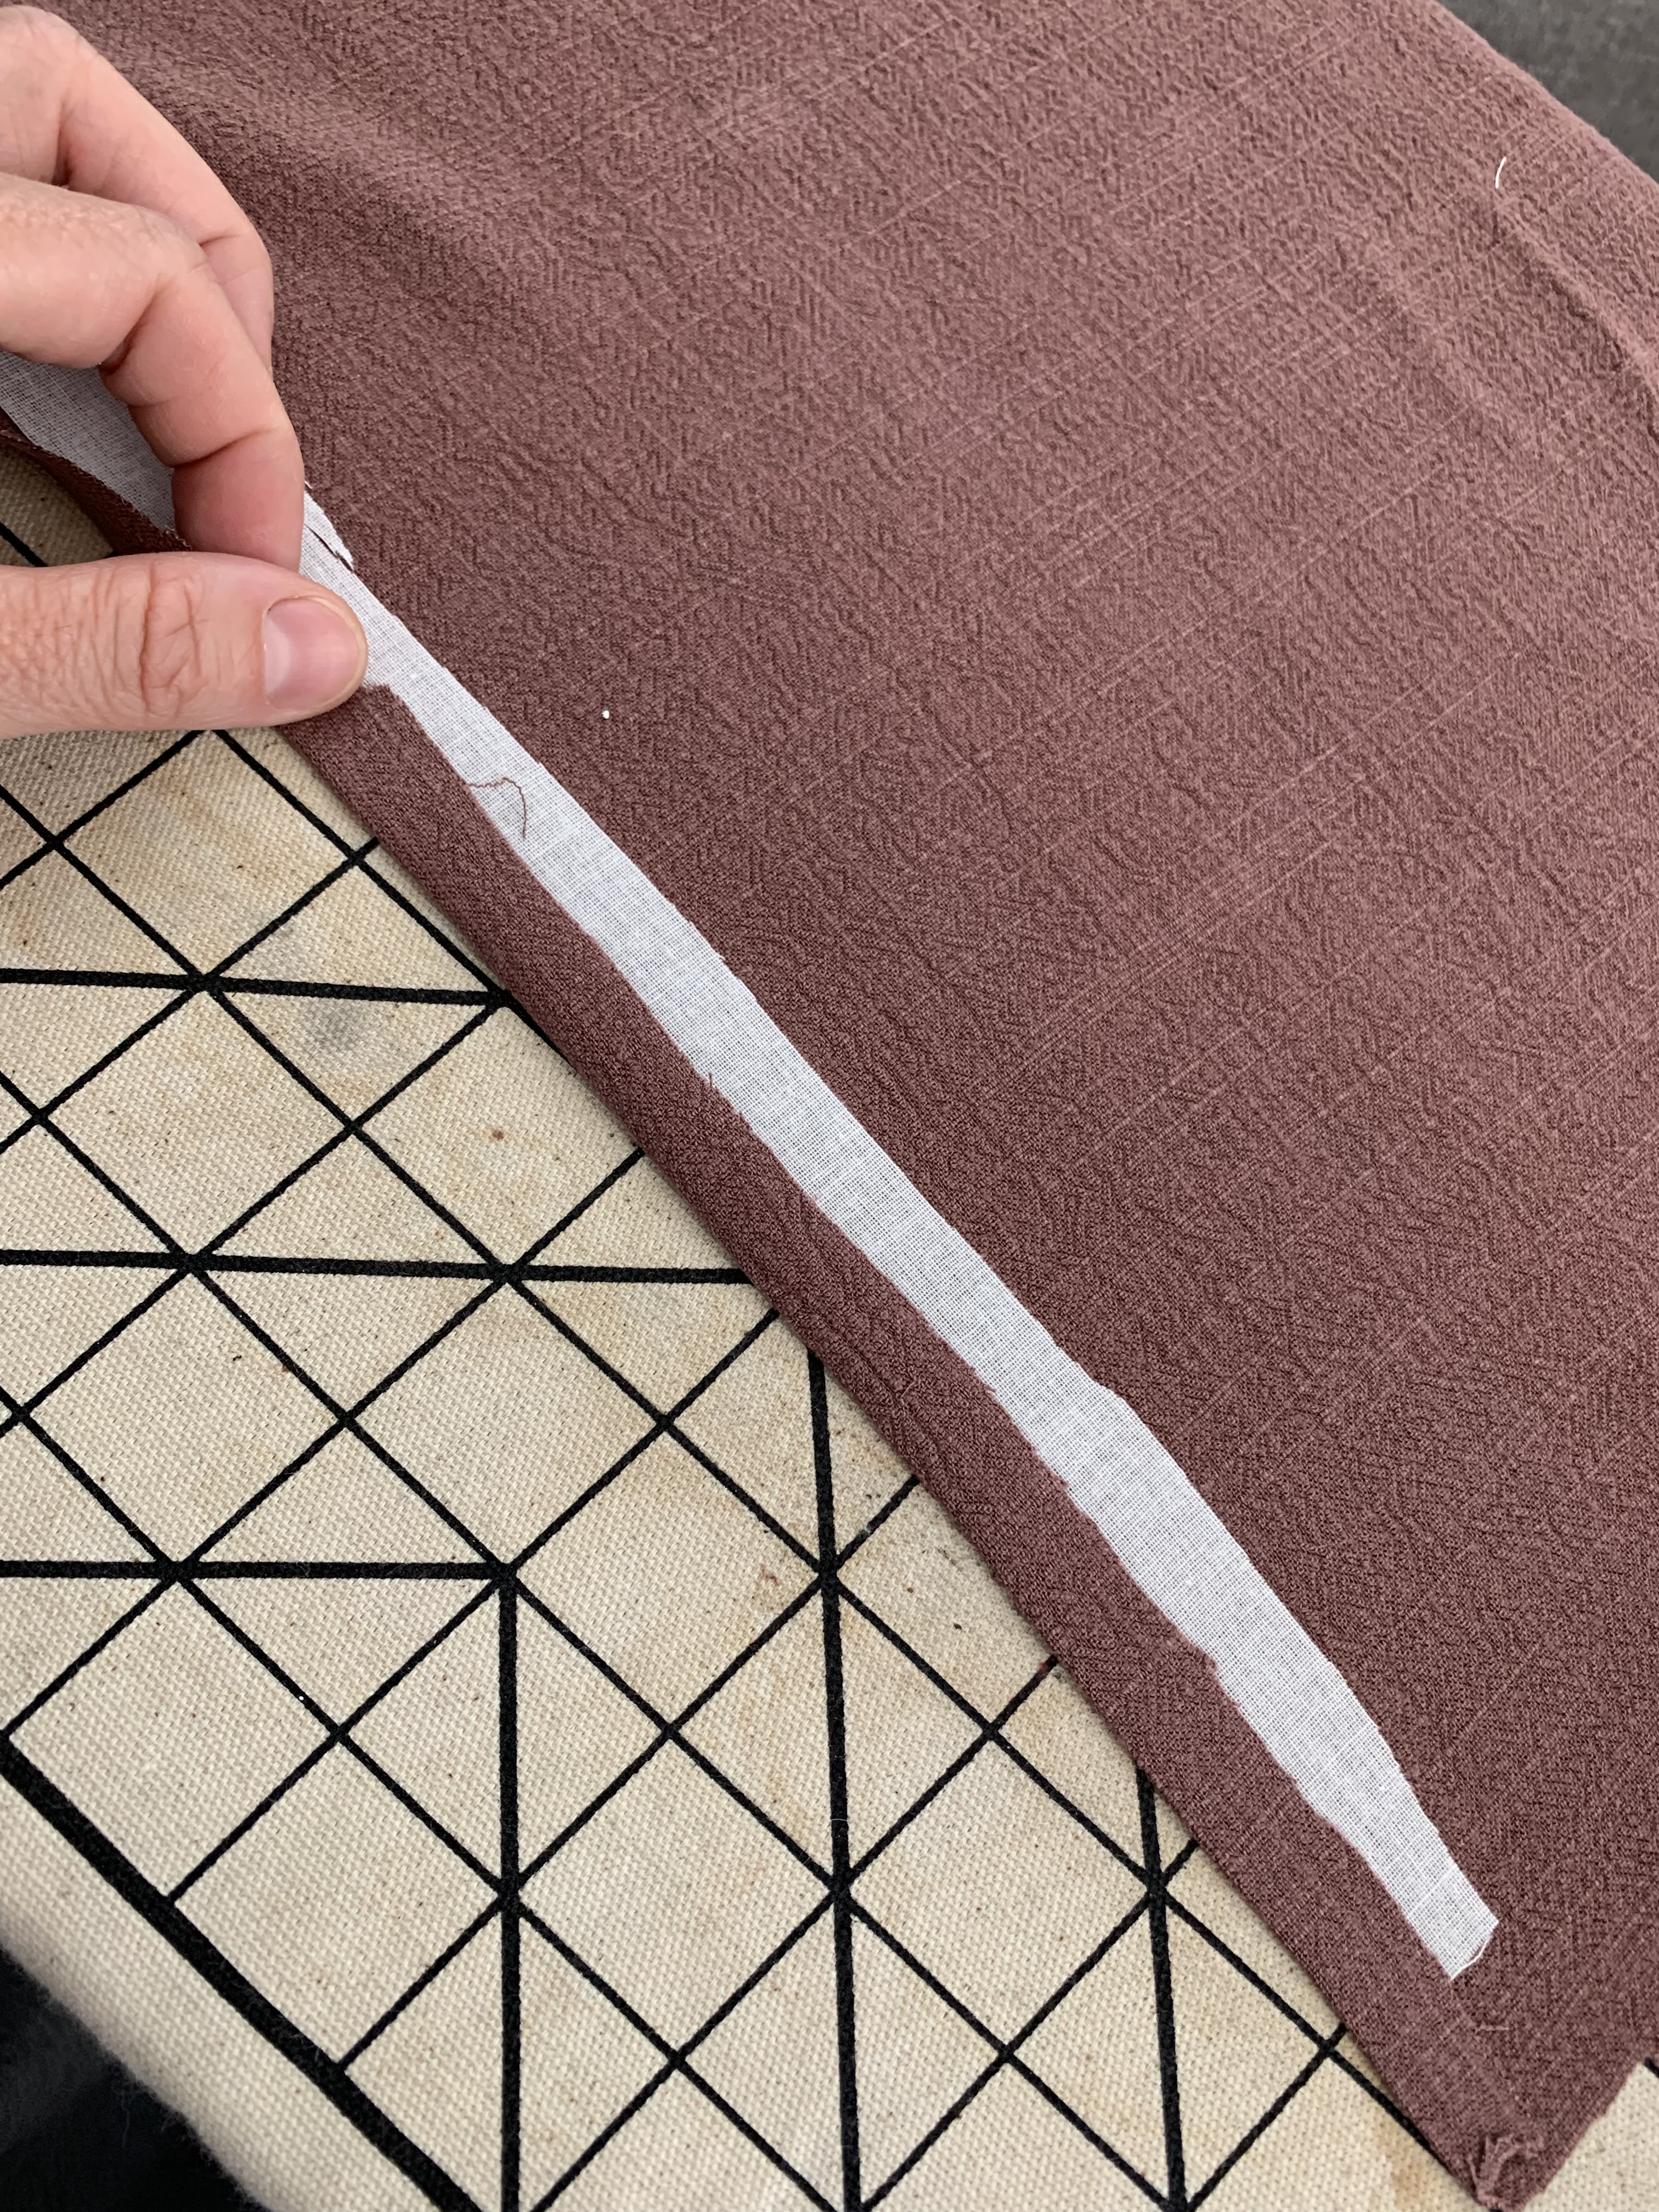
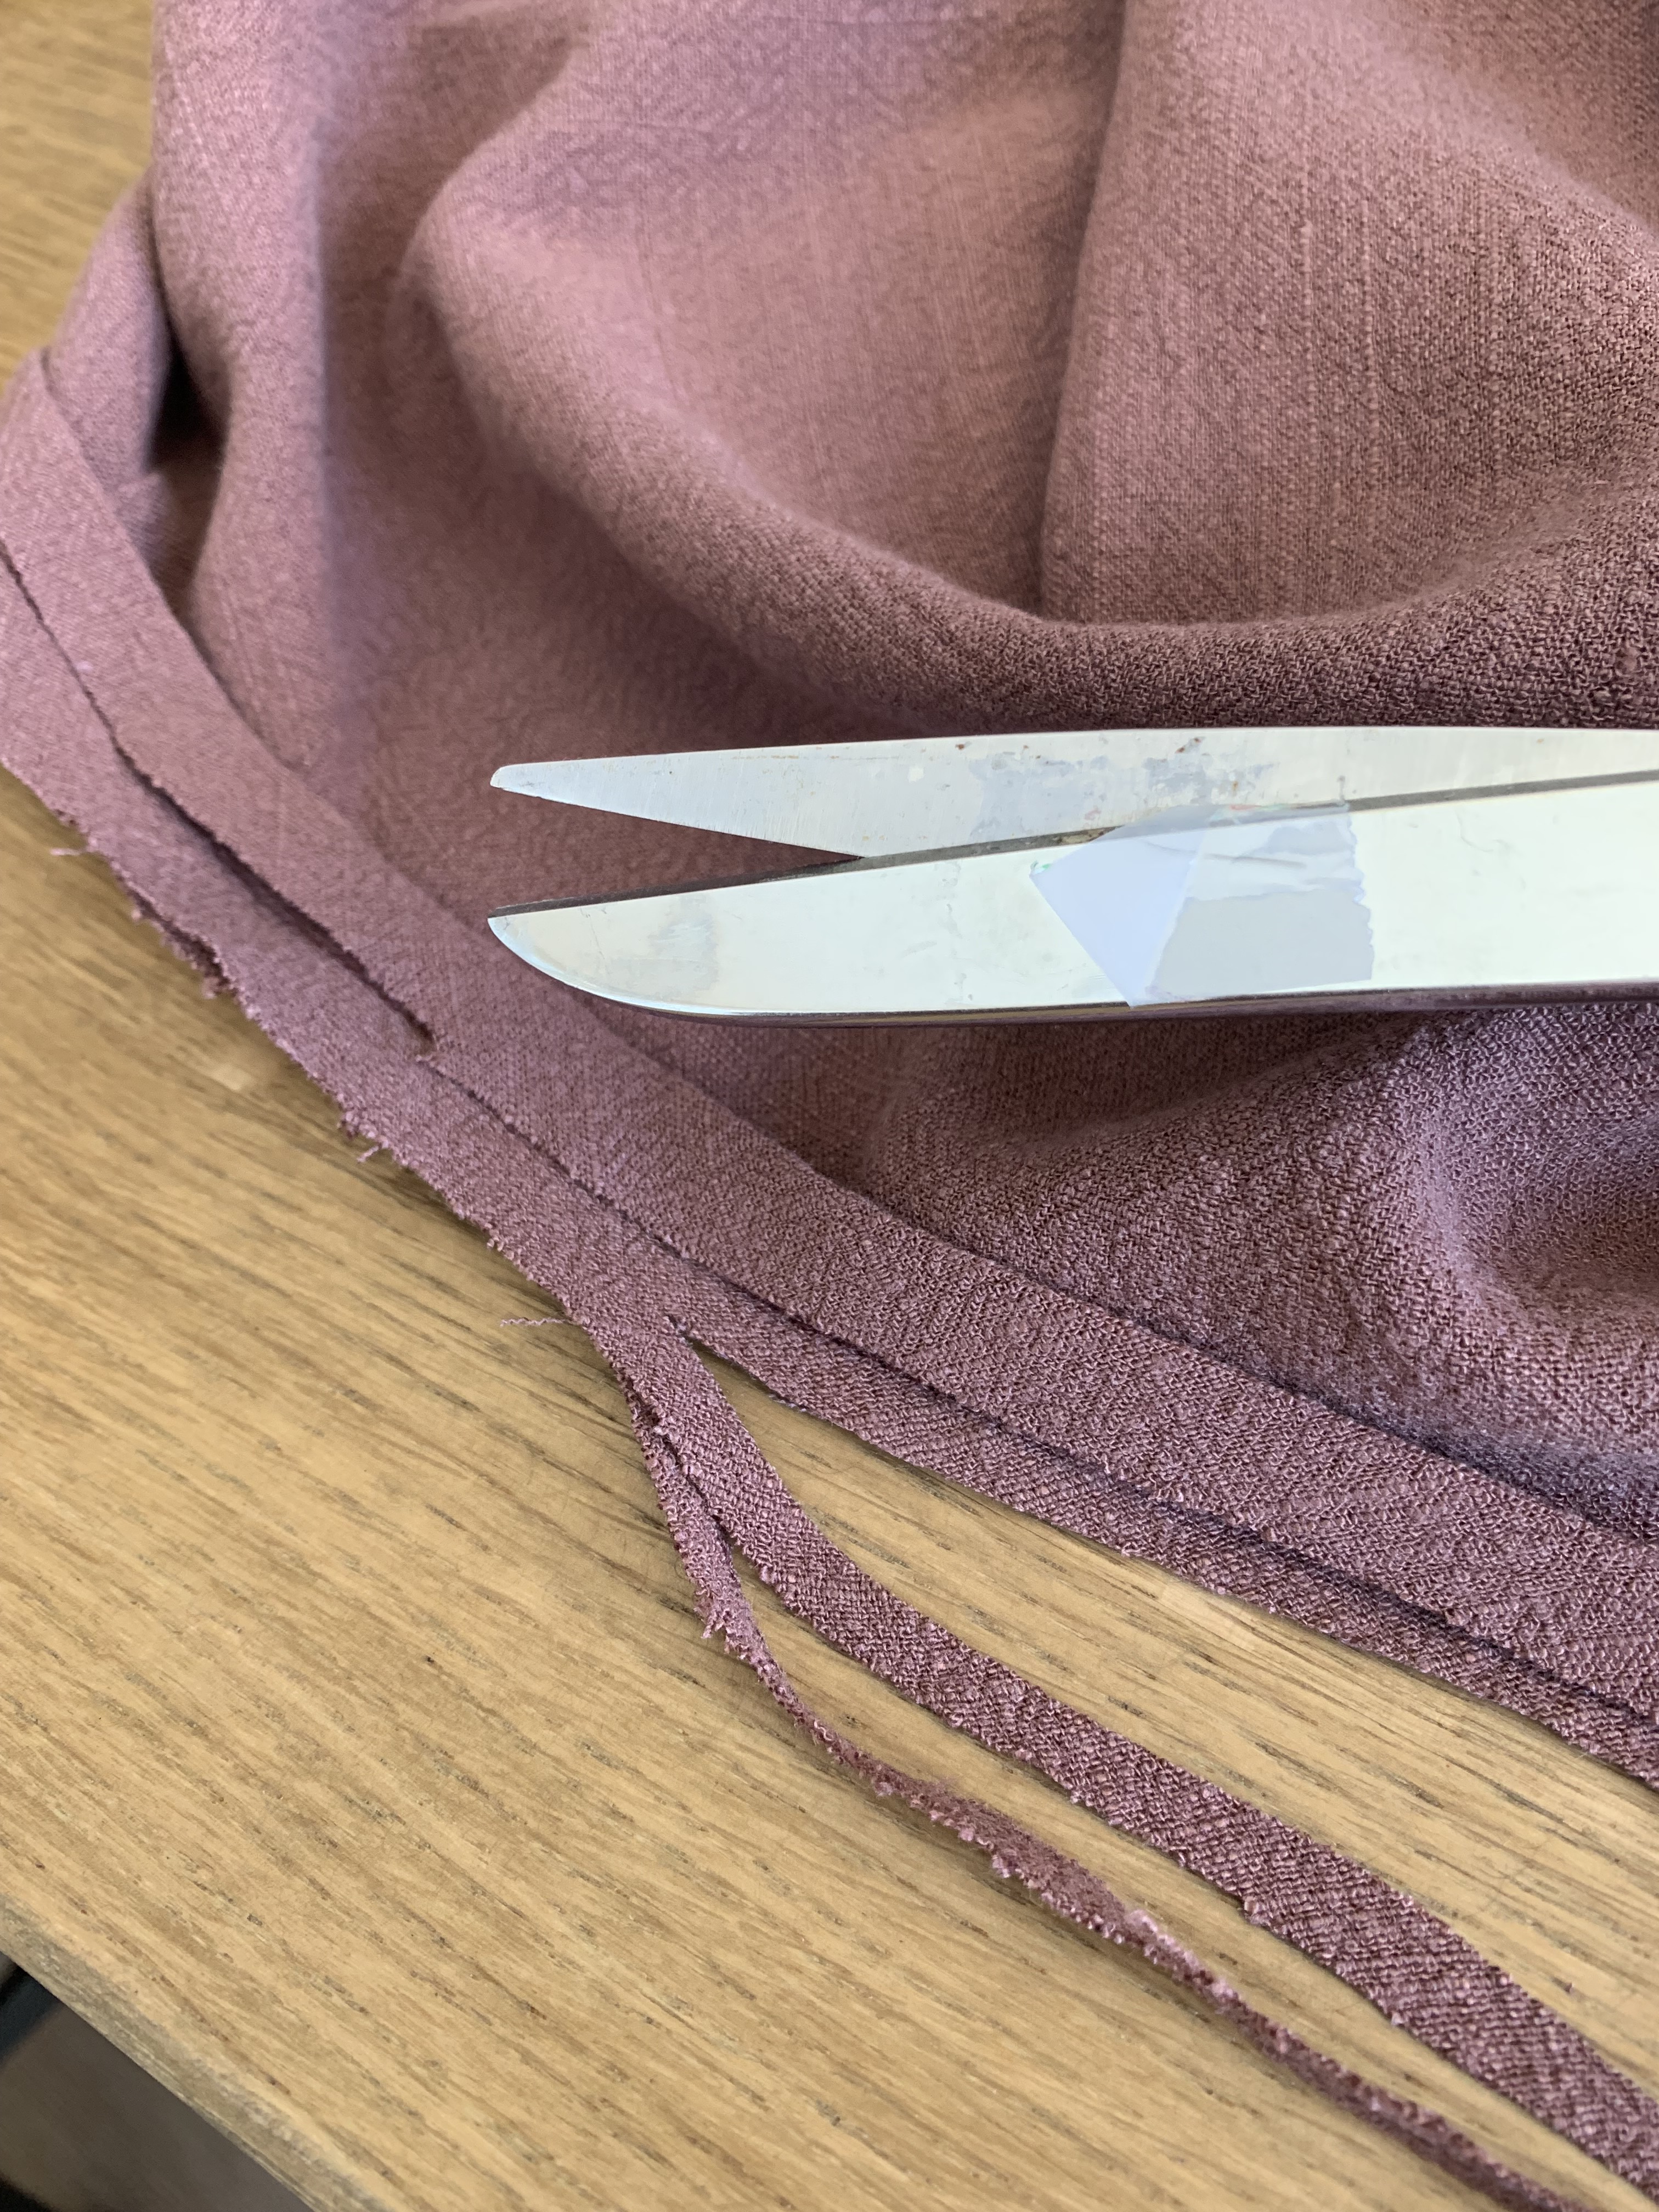
Step 3: Fold and press the center front to the wrong side at 3/8″ and again at 3/4″. Pin in place. Sew along the edge to secure. I like to use the edgestitch foot #6 to get a really neat and straight finish.
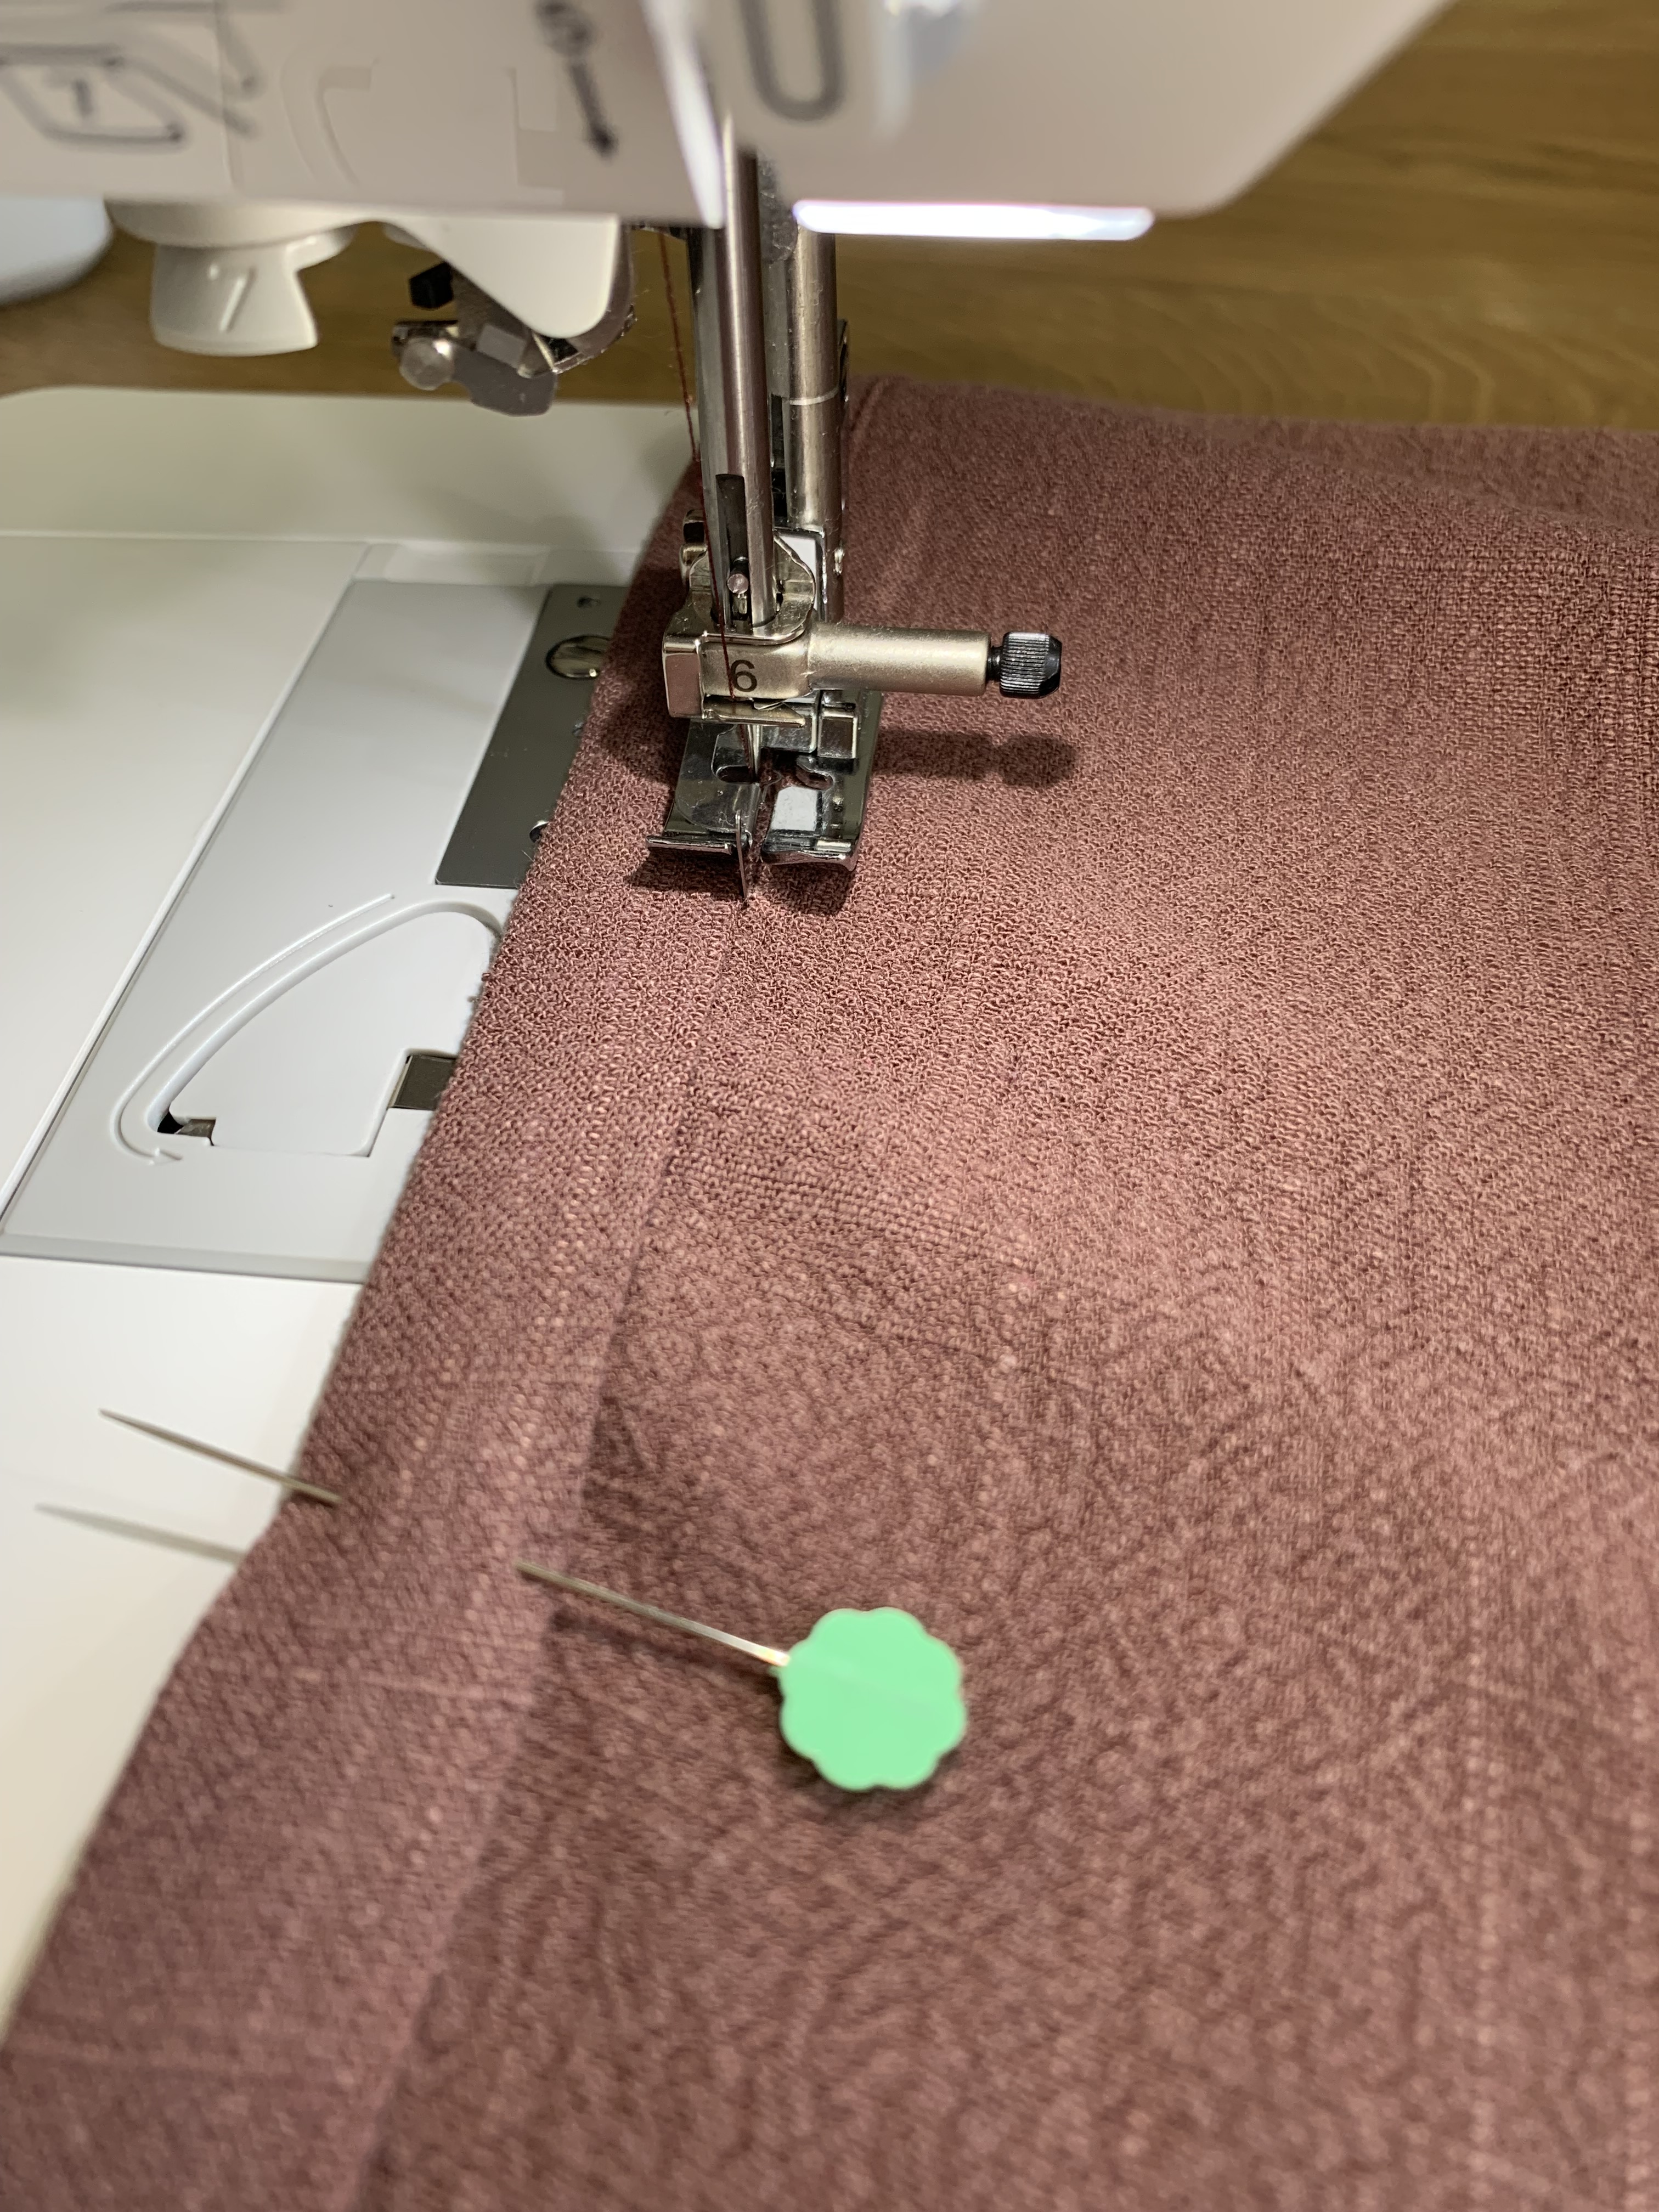
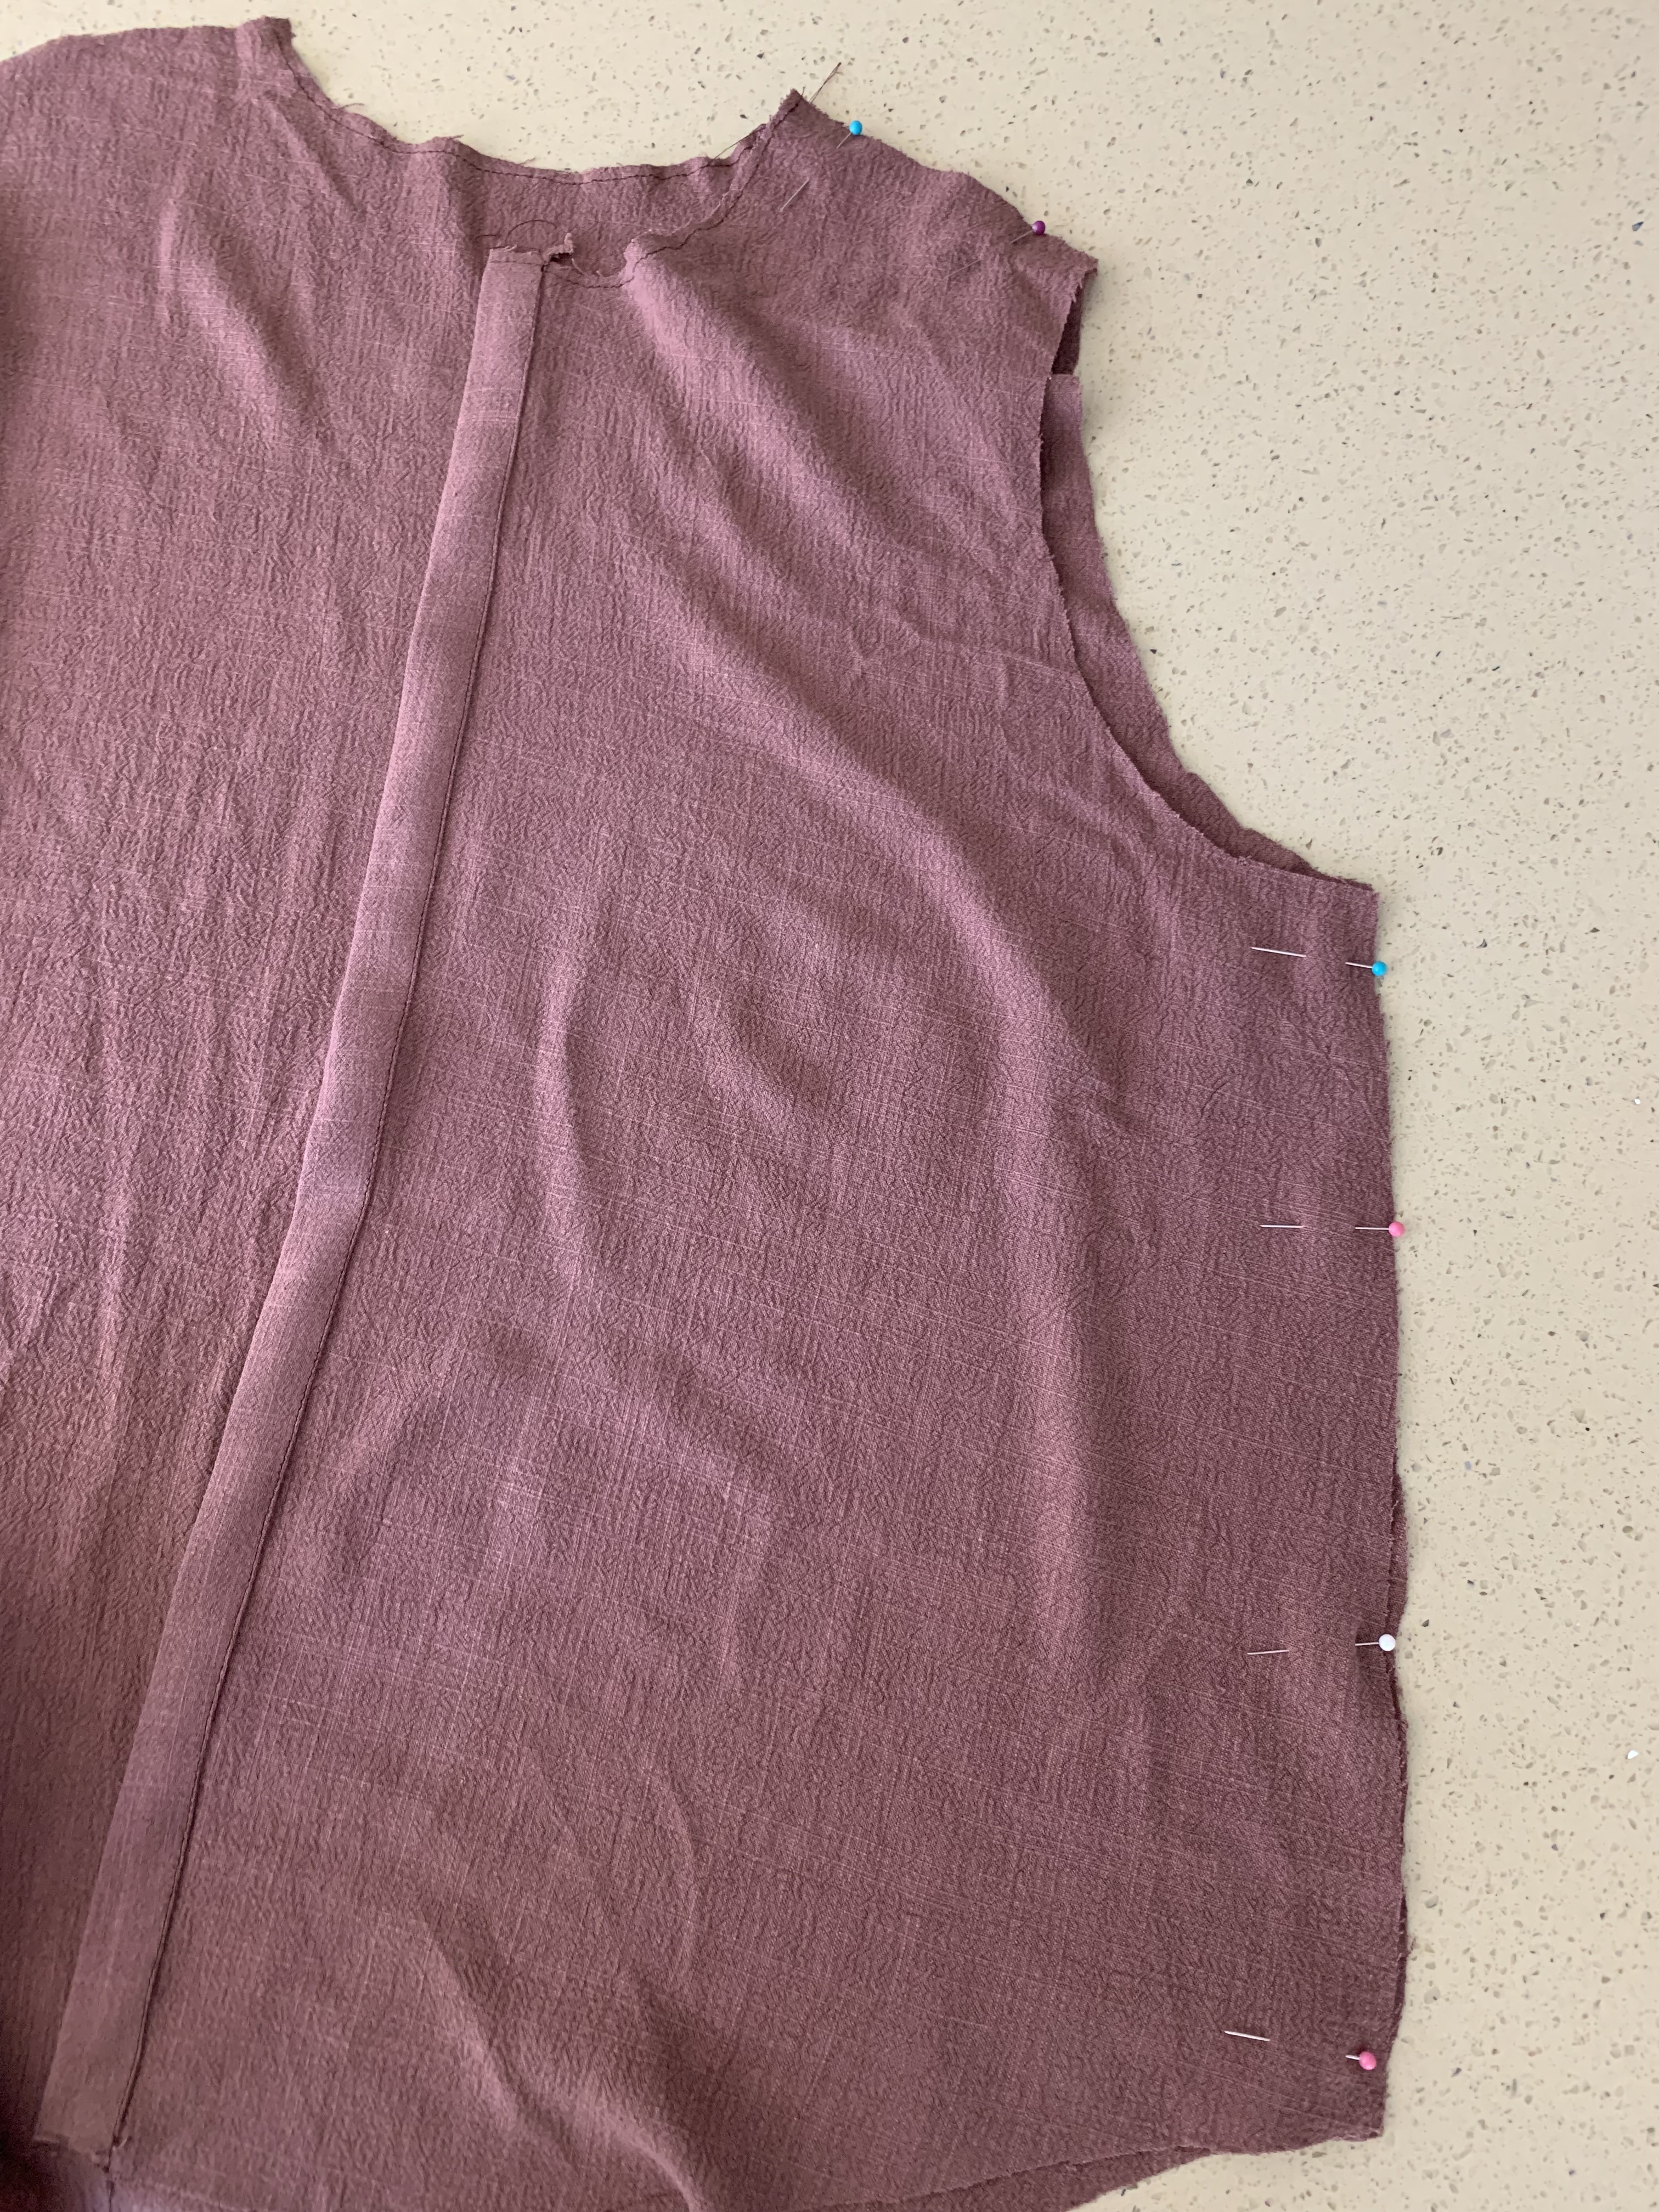
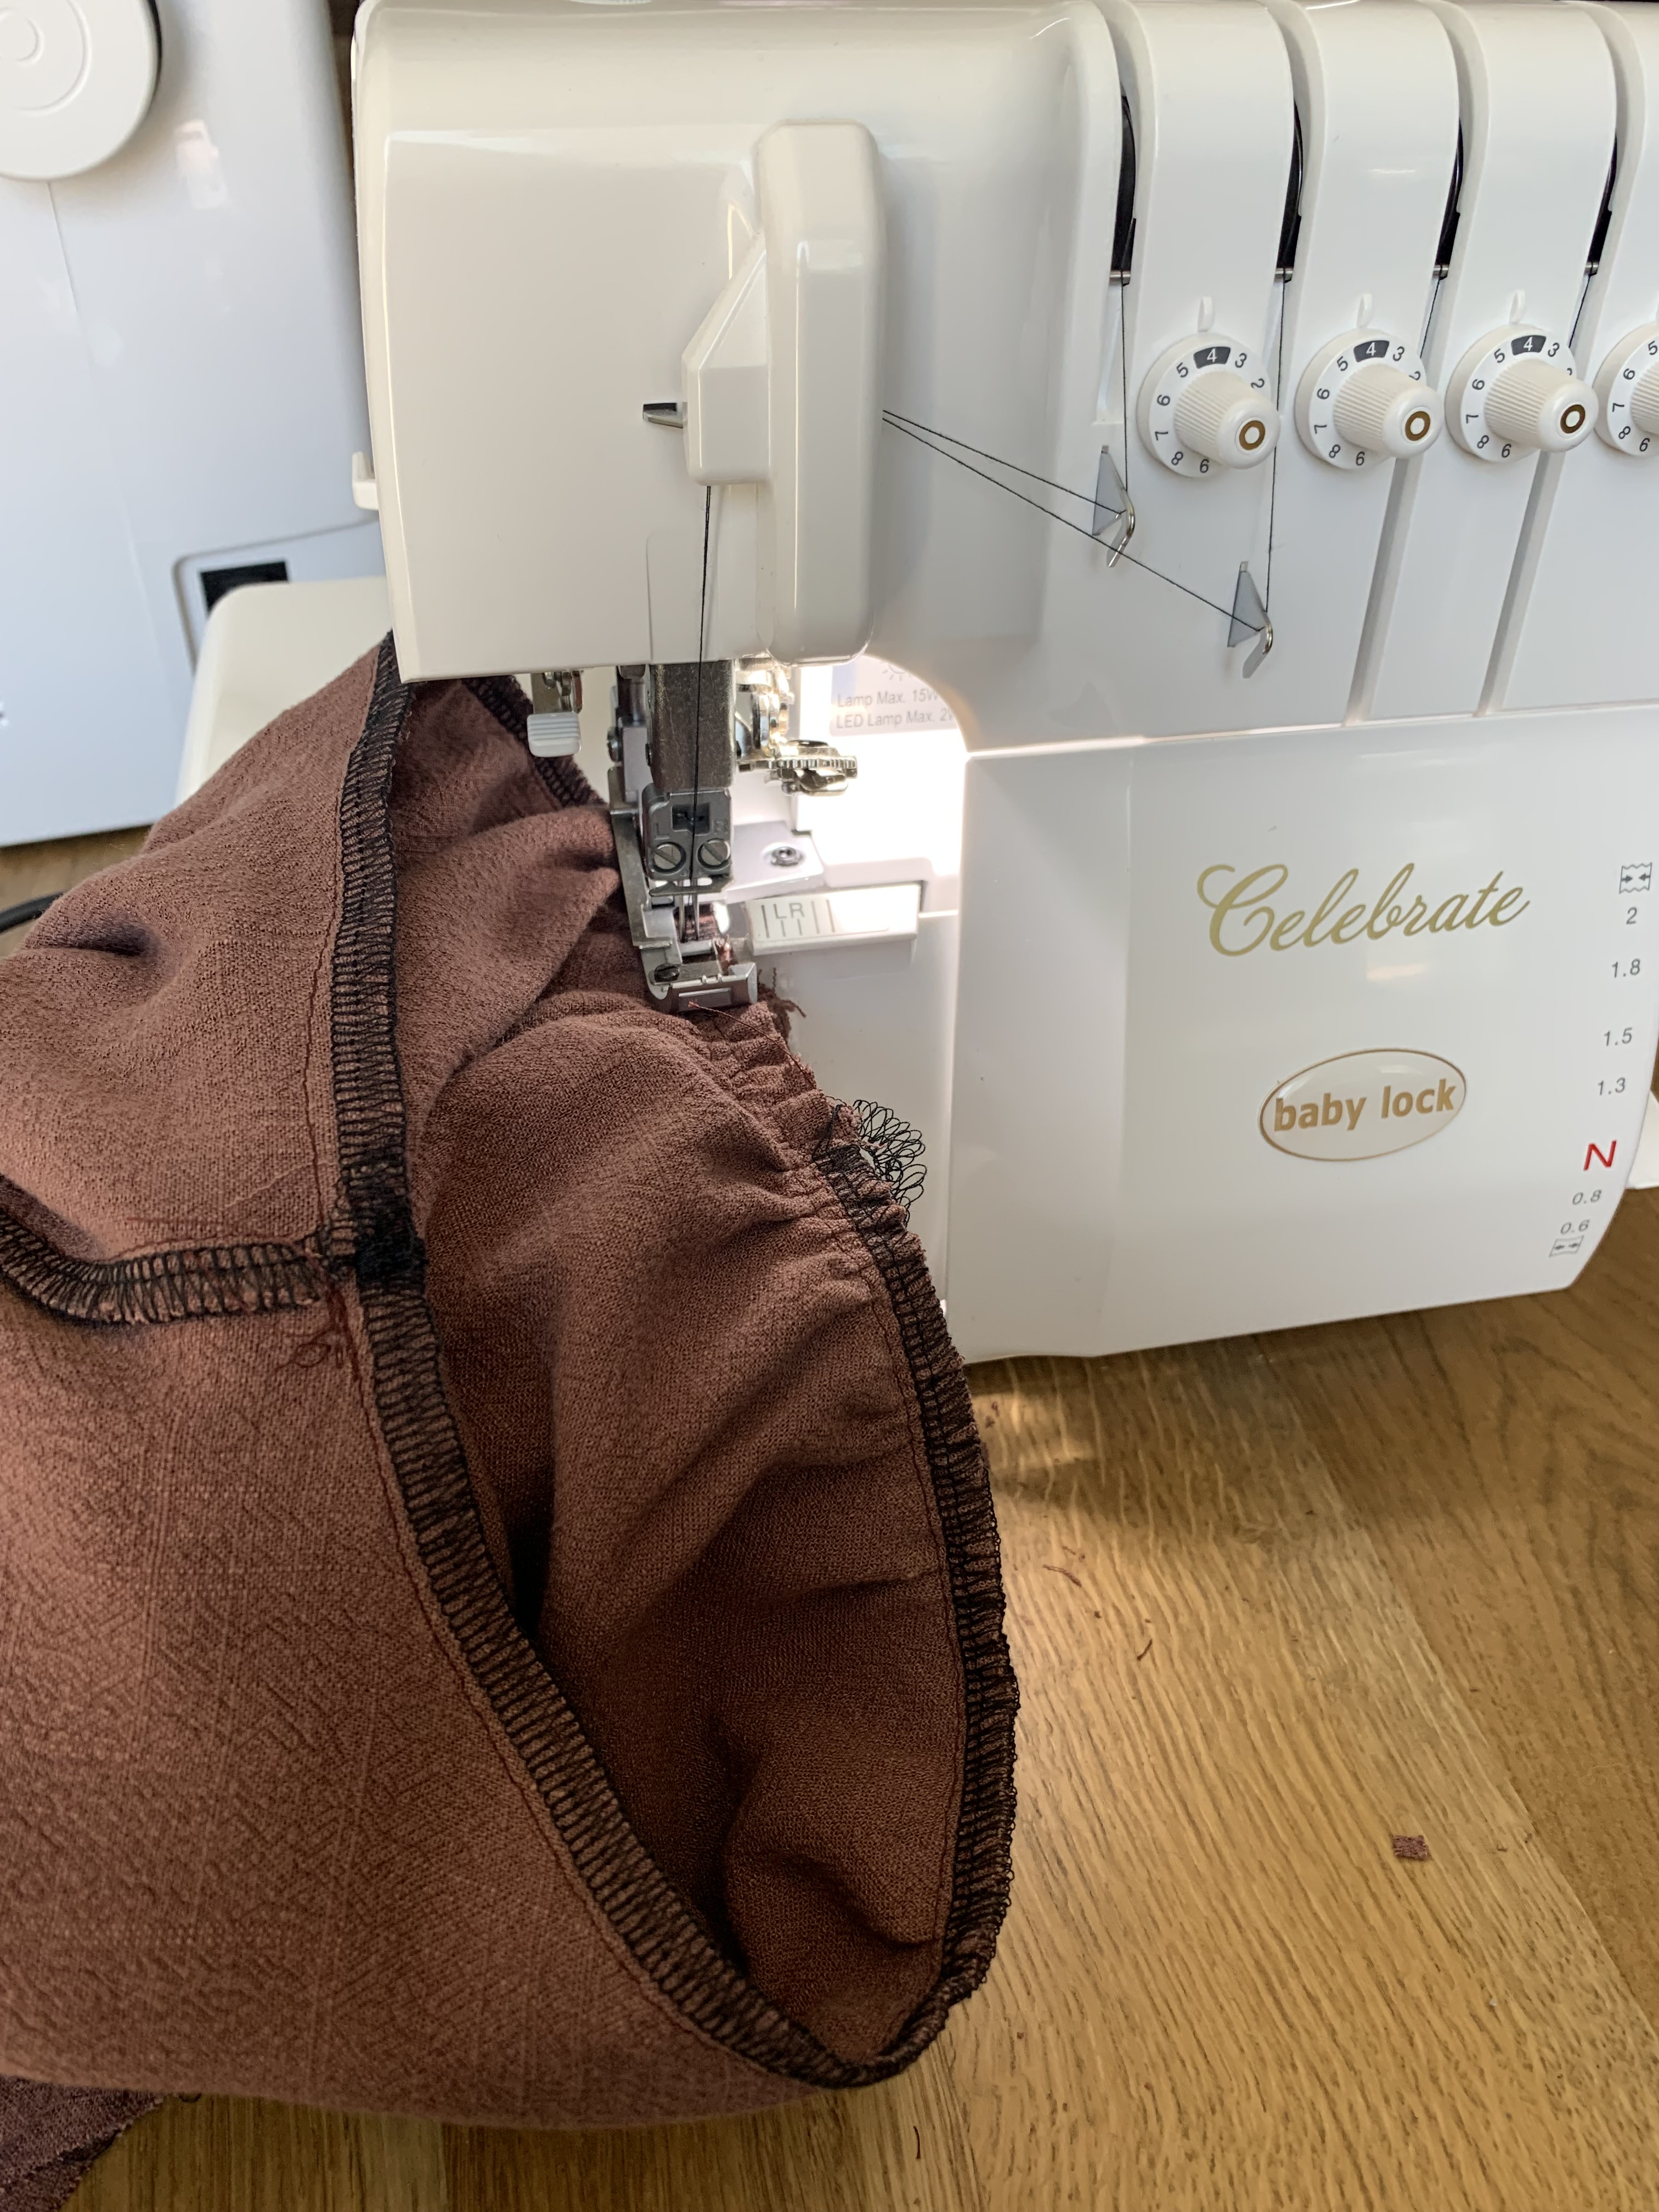
Step 4: Pin front and back bodice right sides together at shoulder and side seams. Sew at 1/2″ seam allowance. Finish as desired. I used my Baby Lock Celebrate serger to finish my seams.

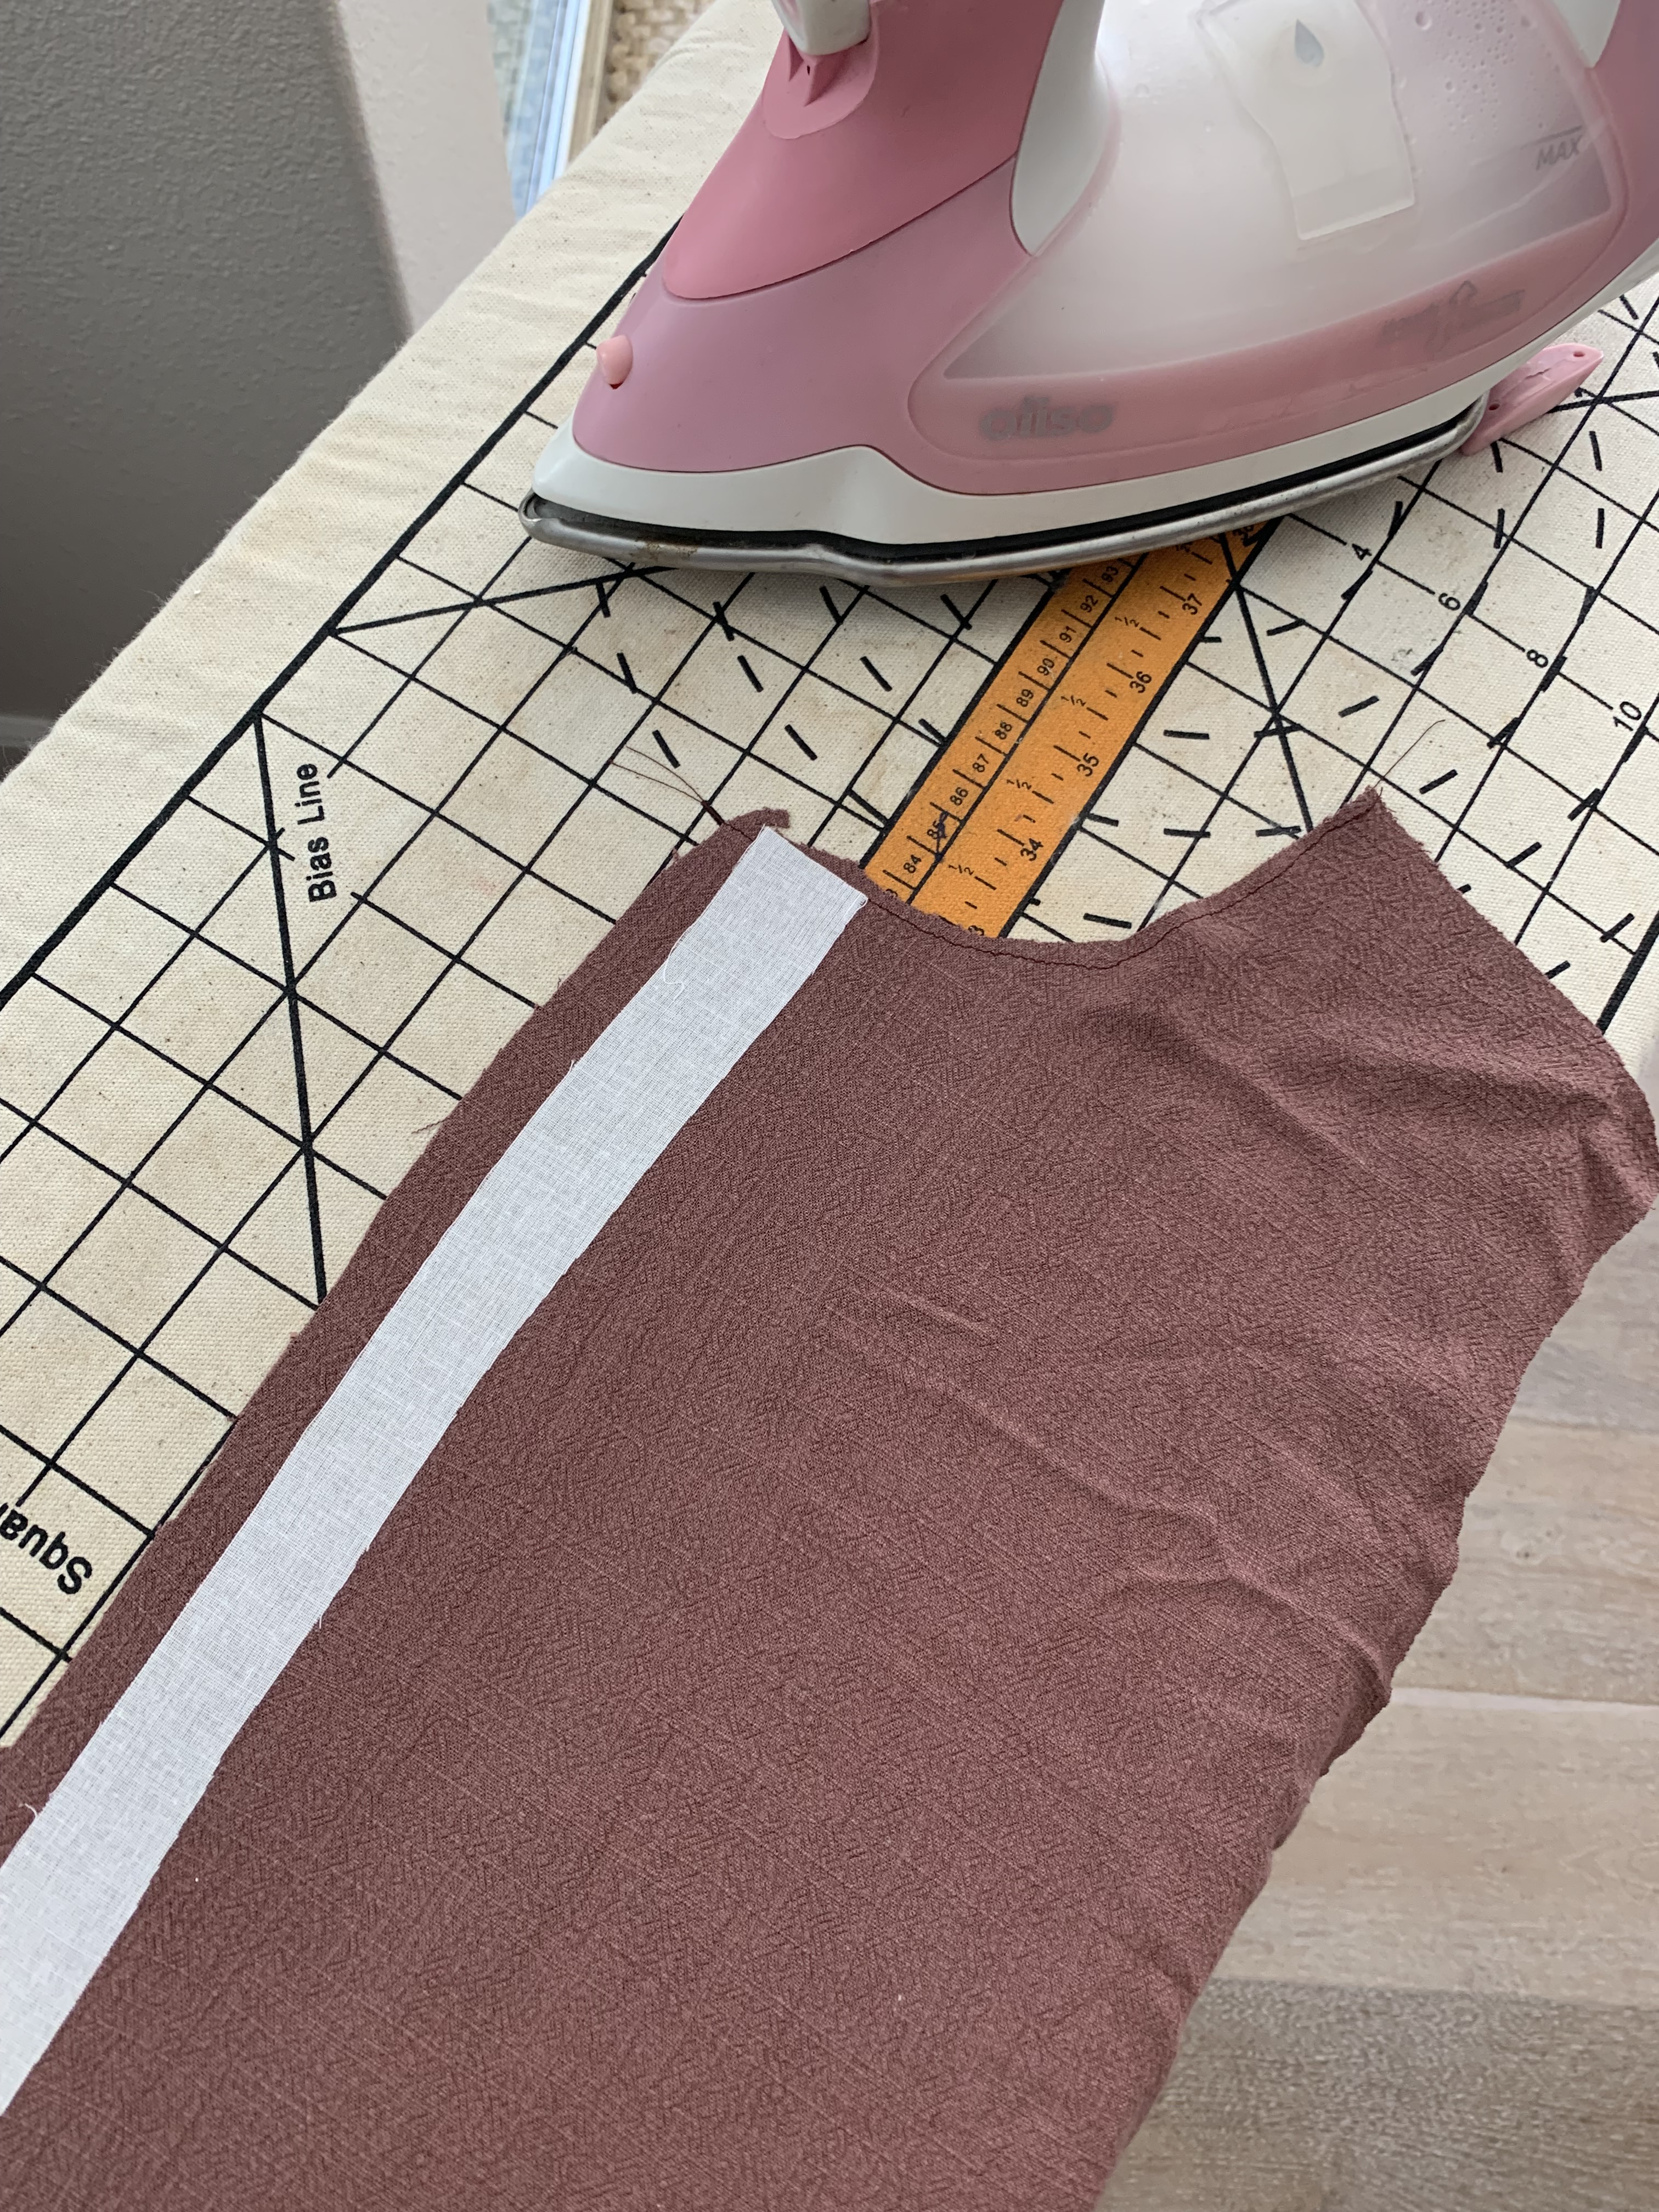
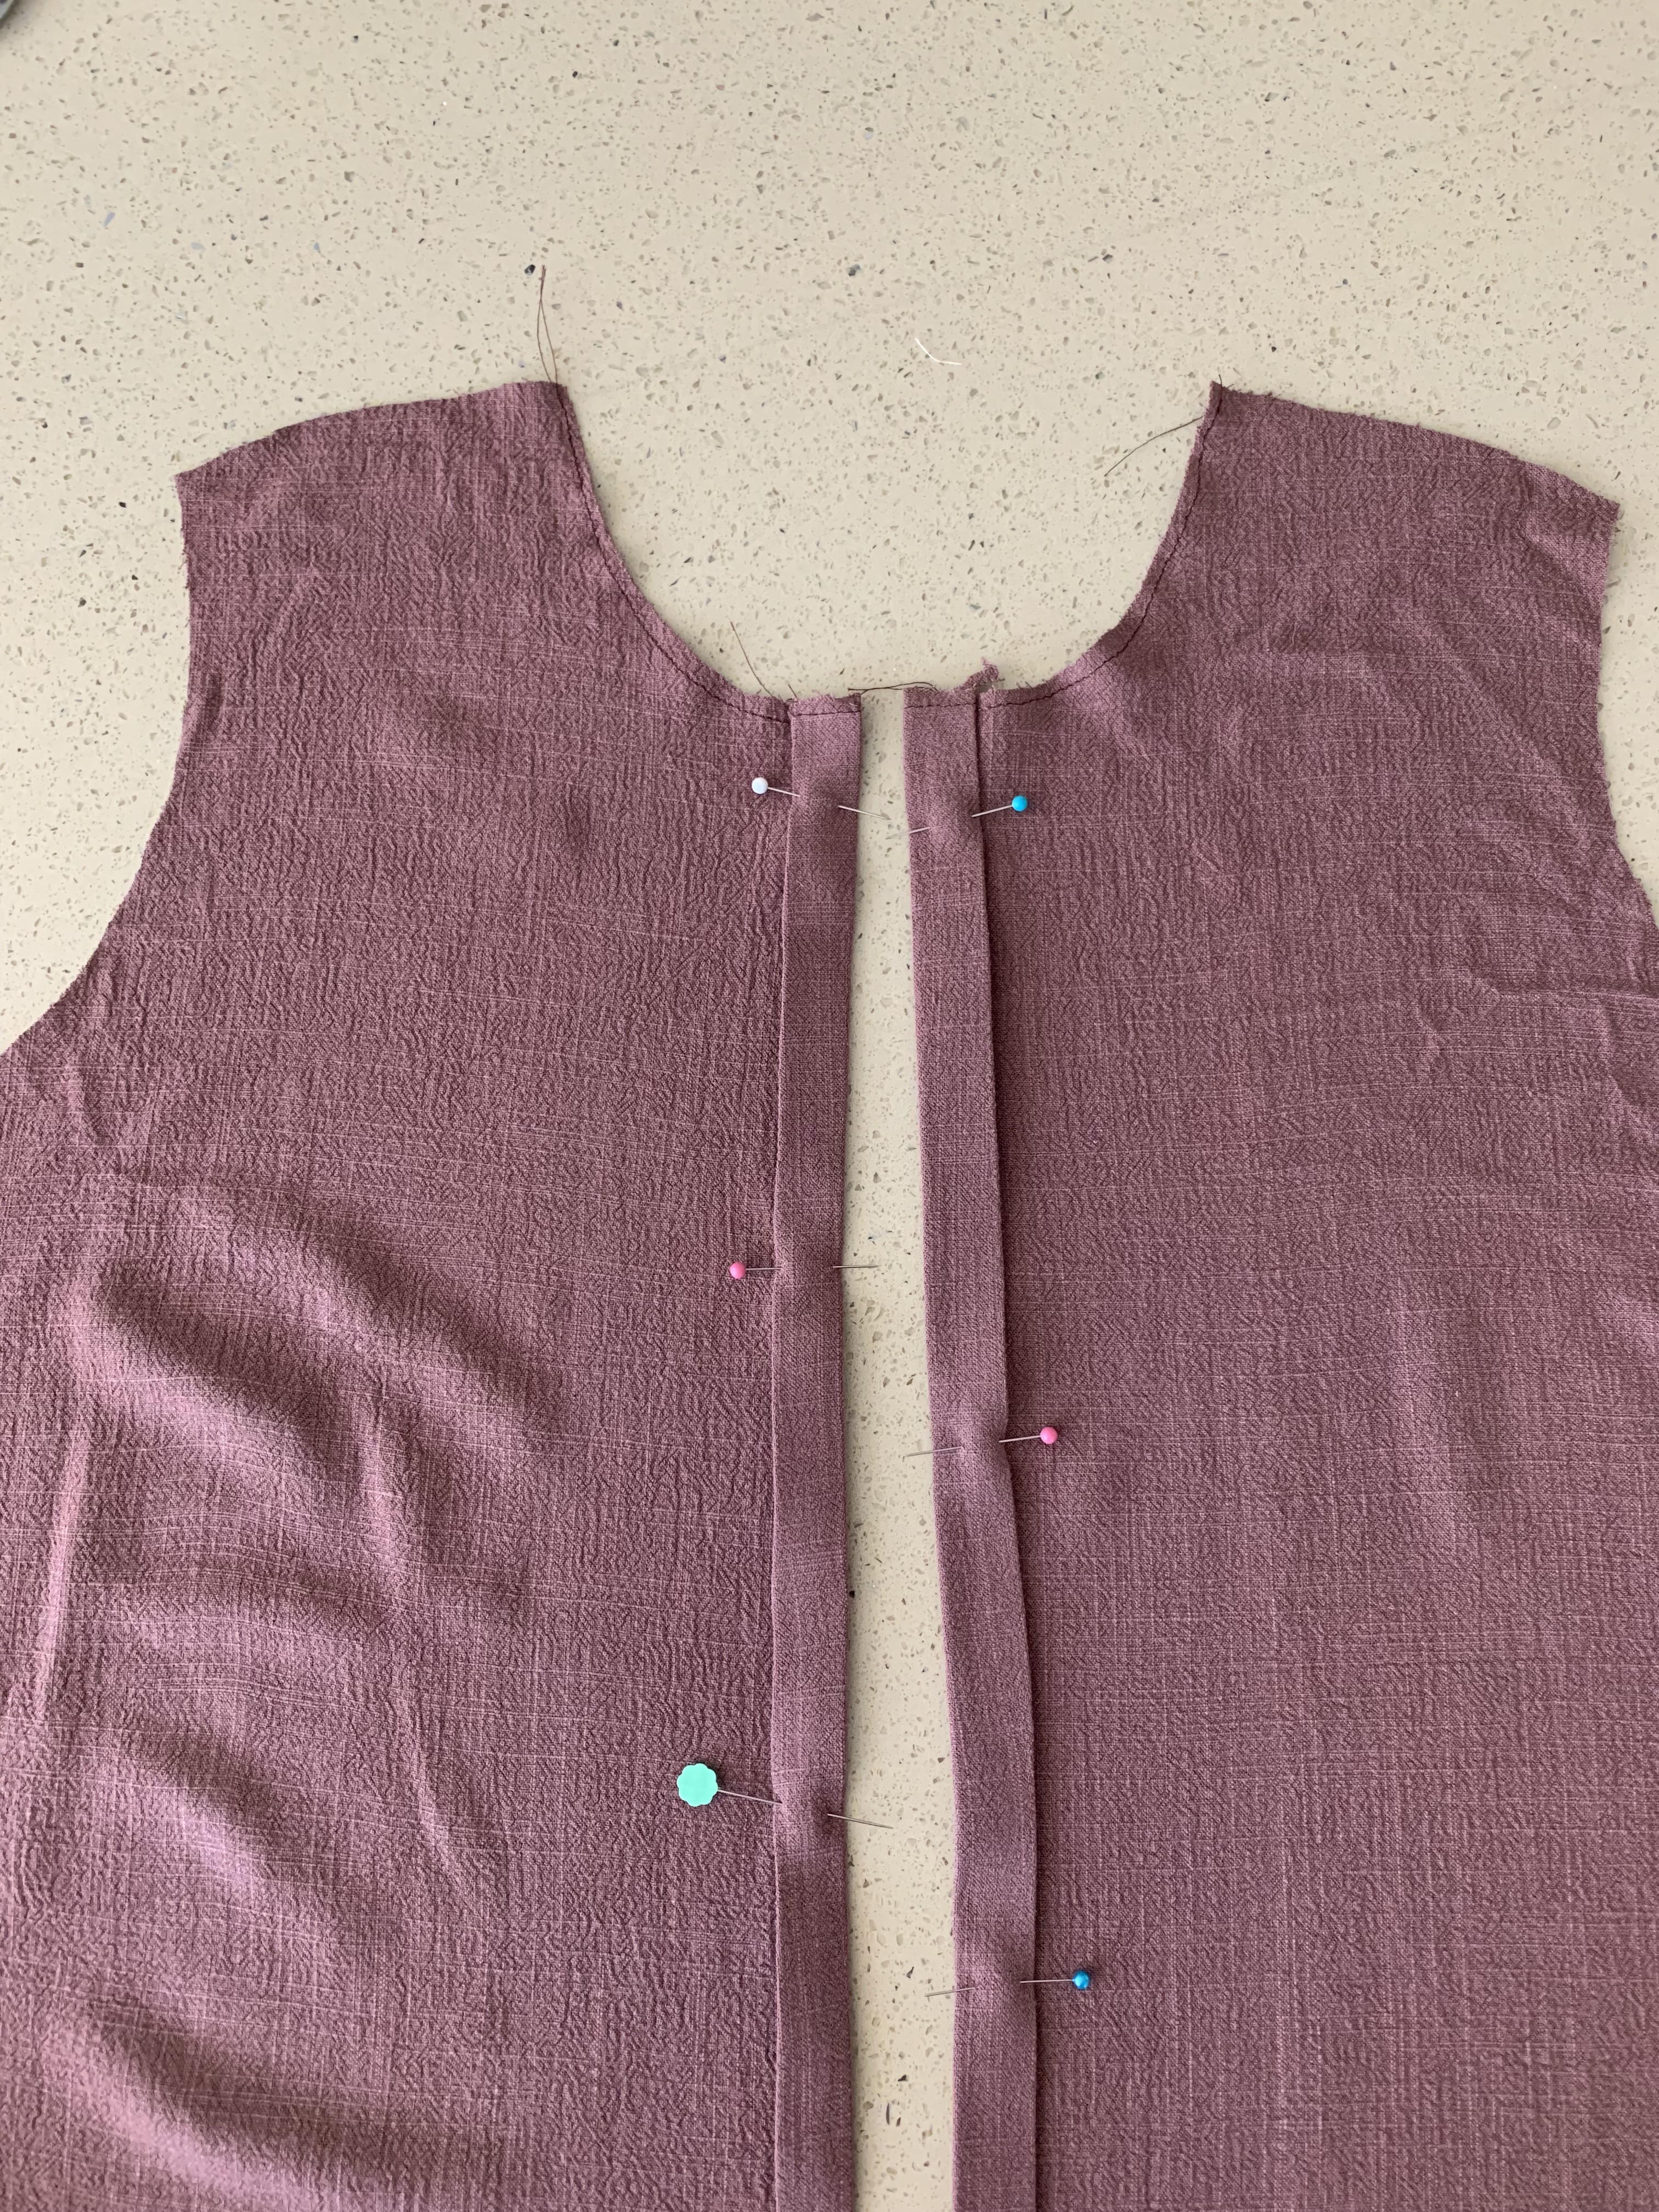
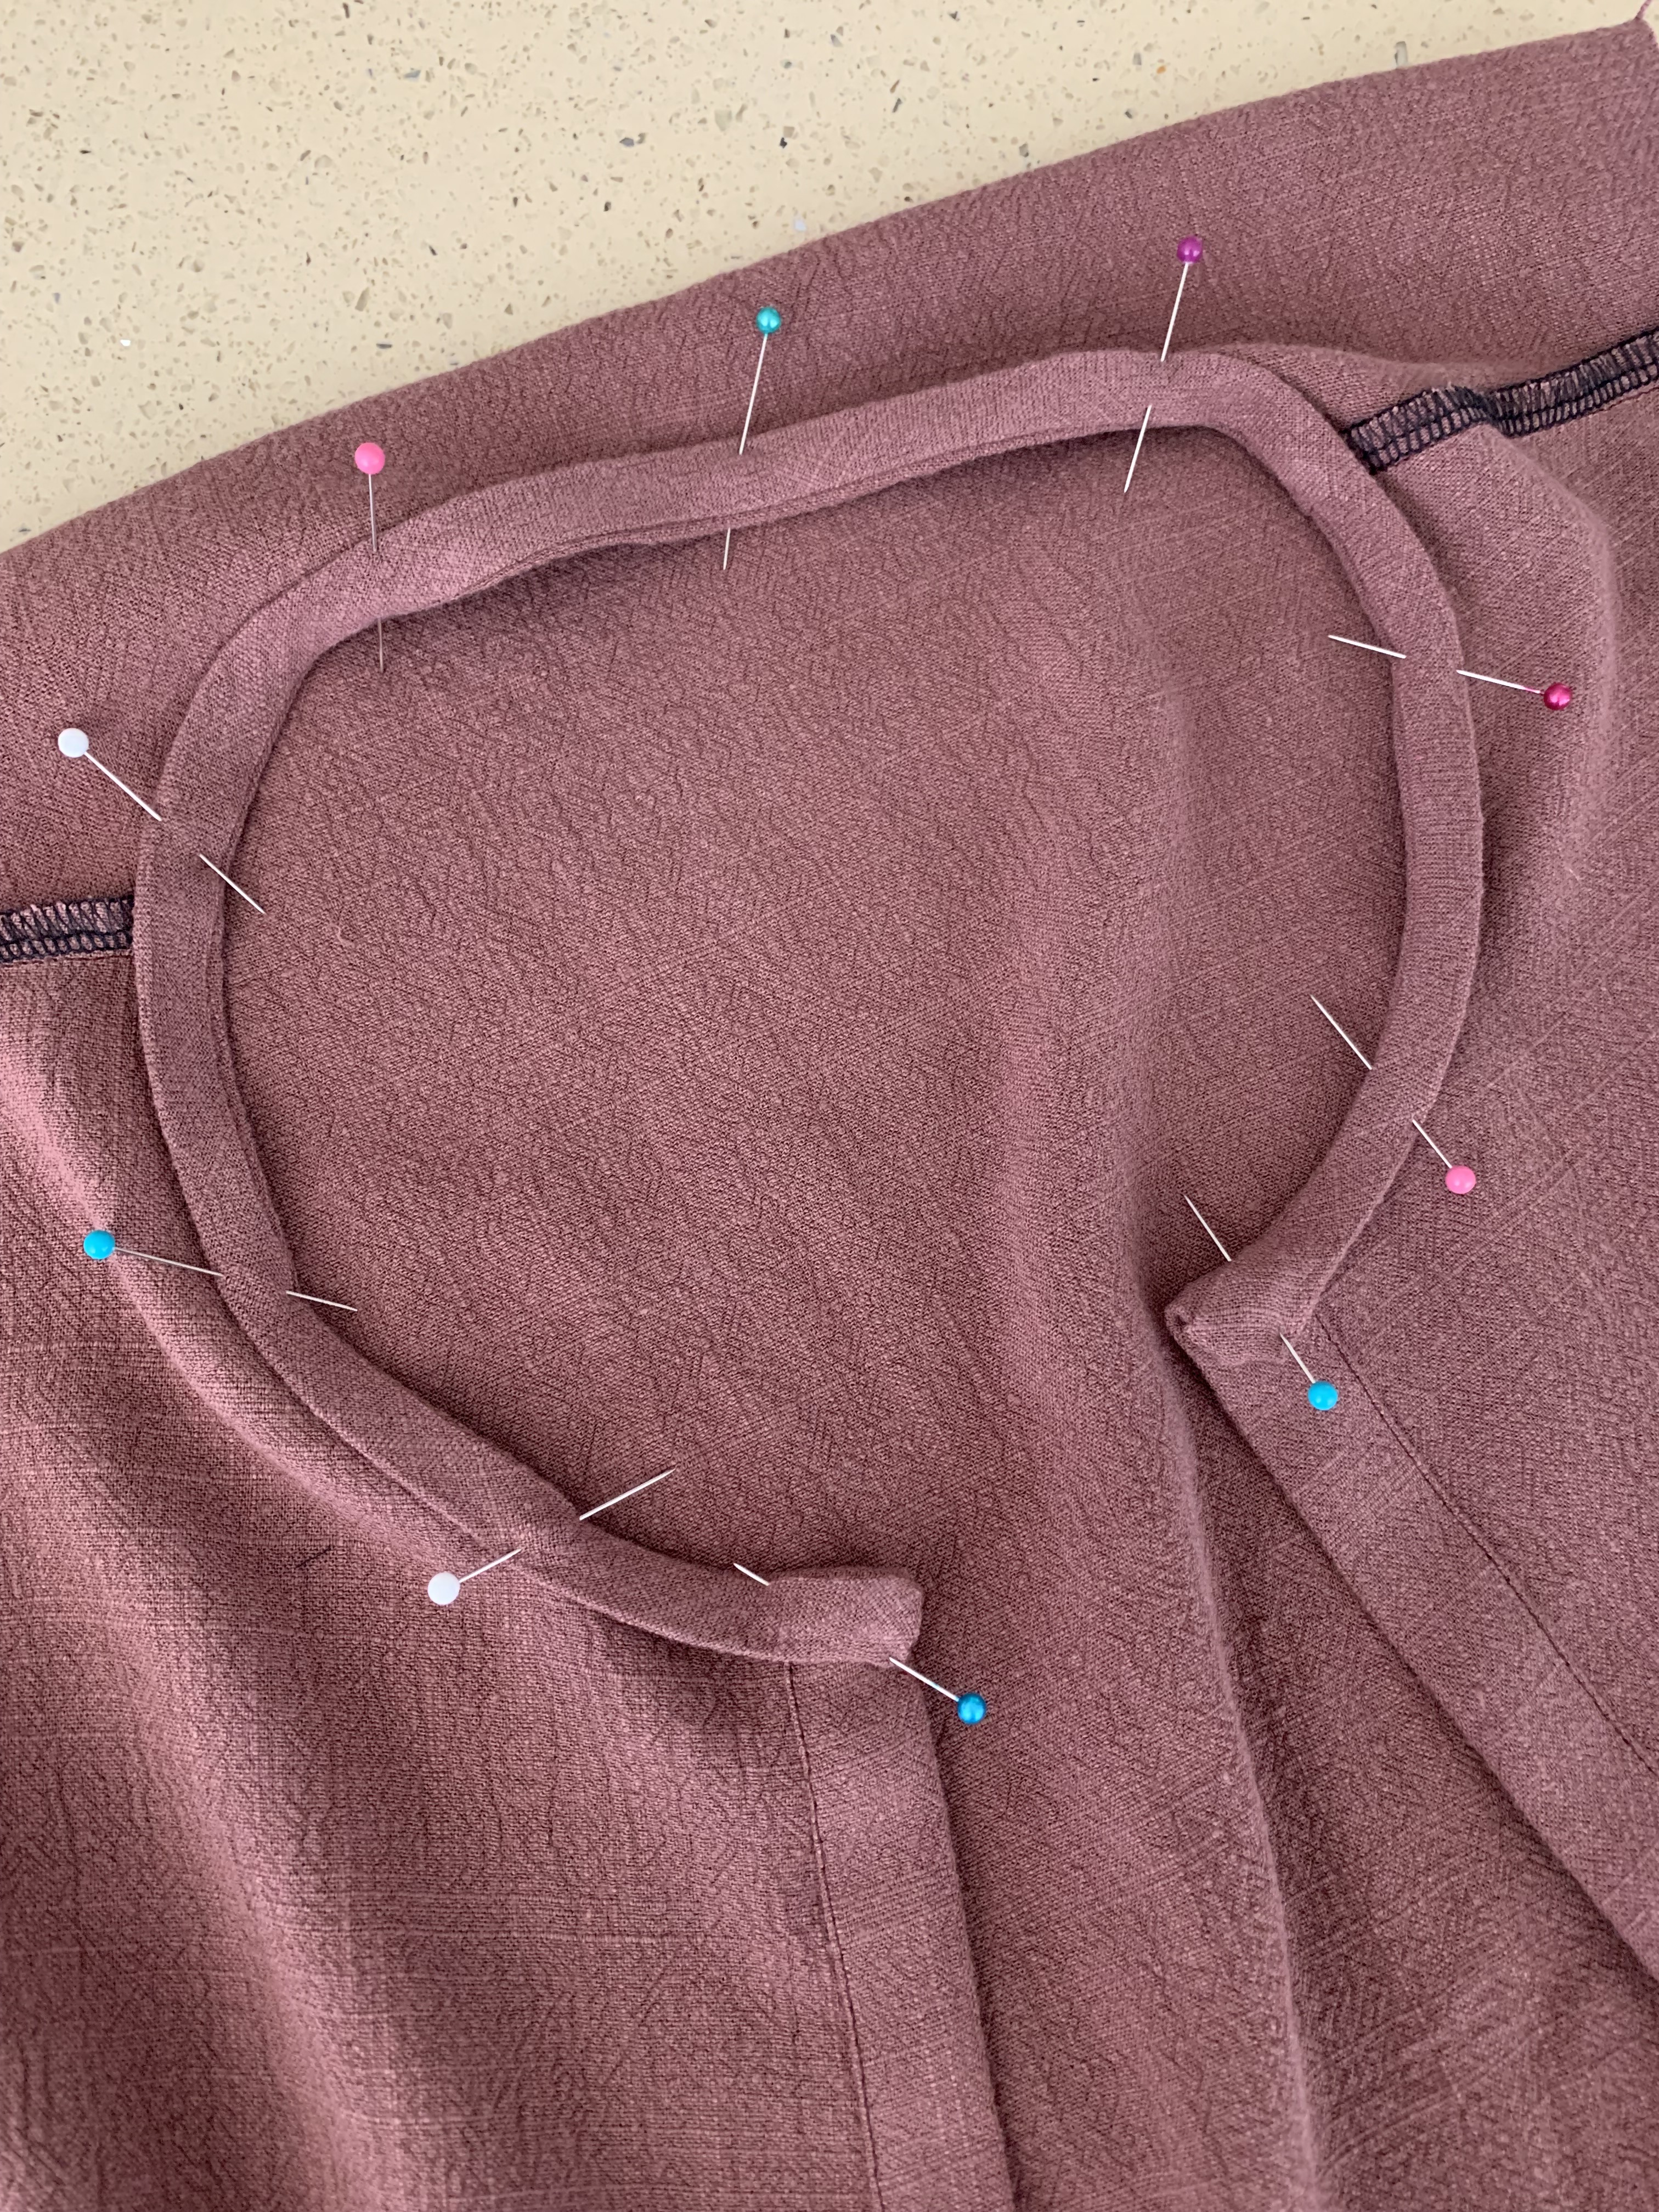
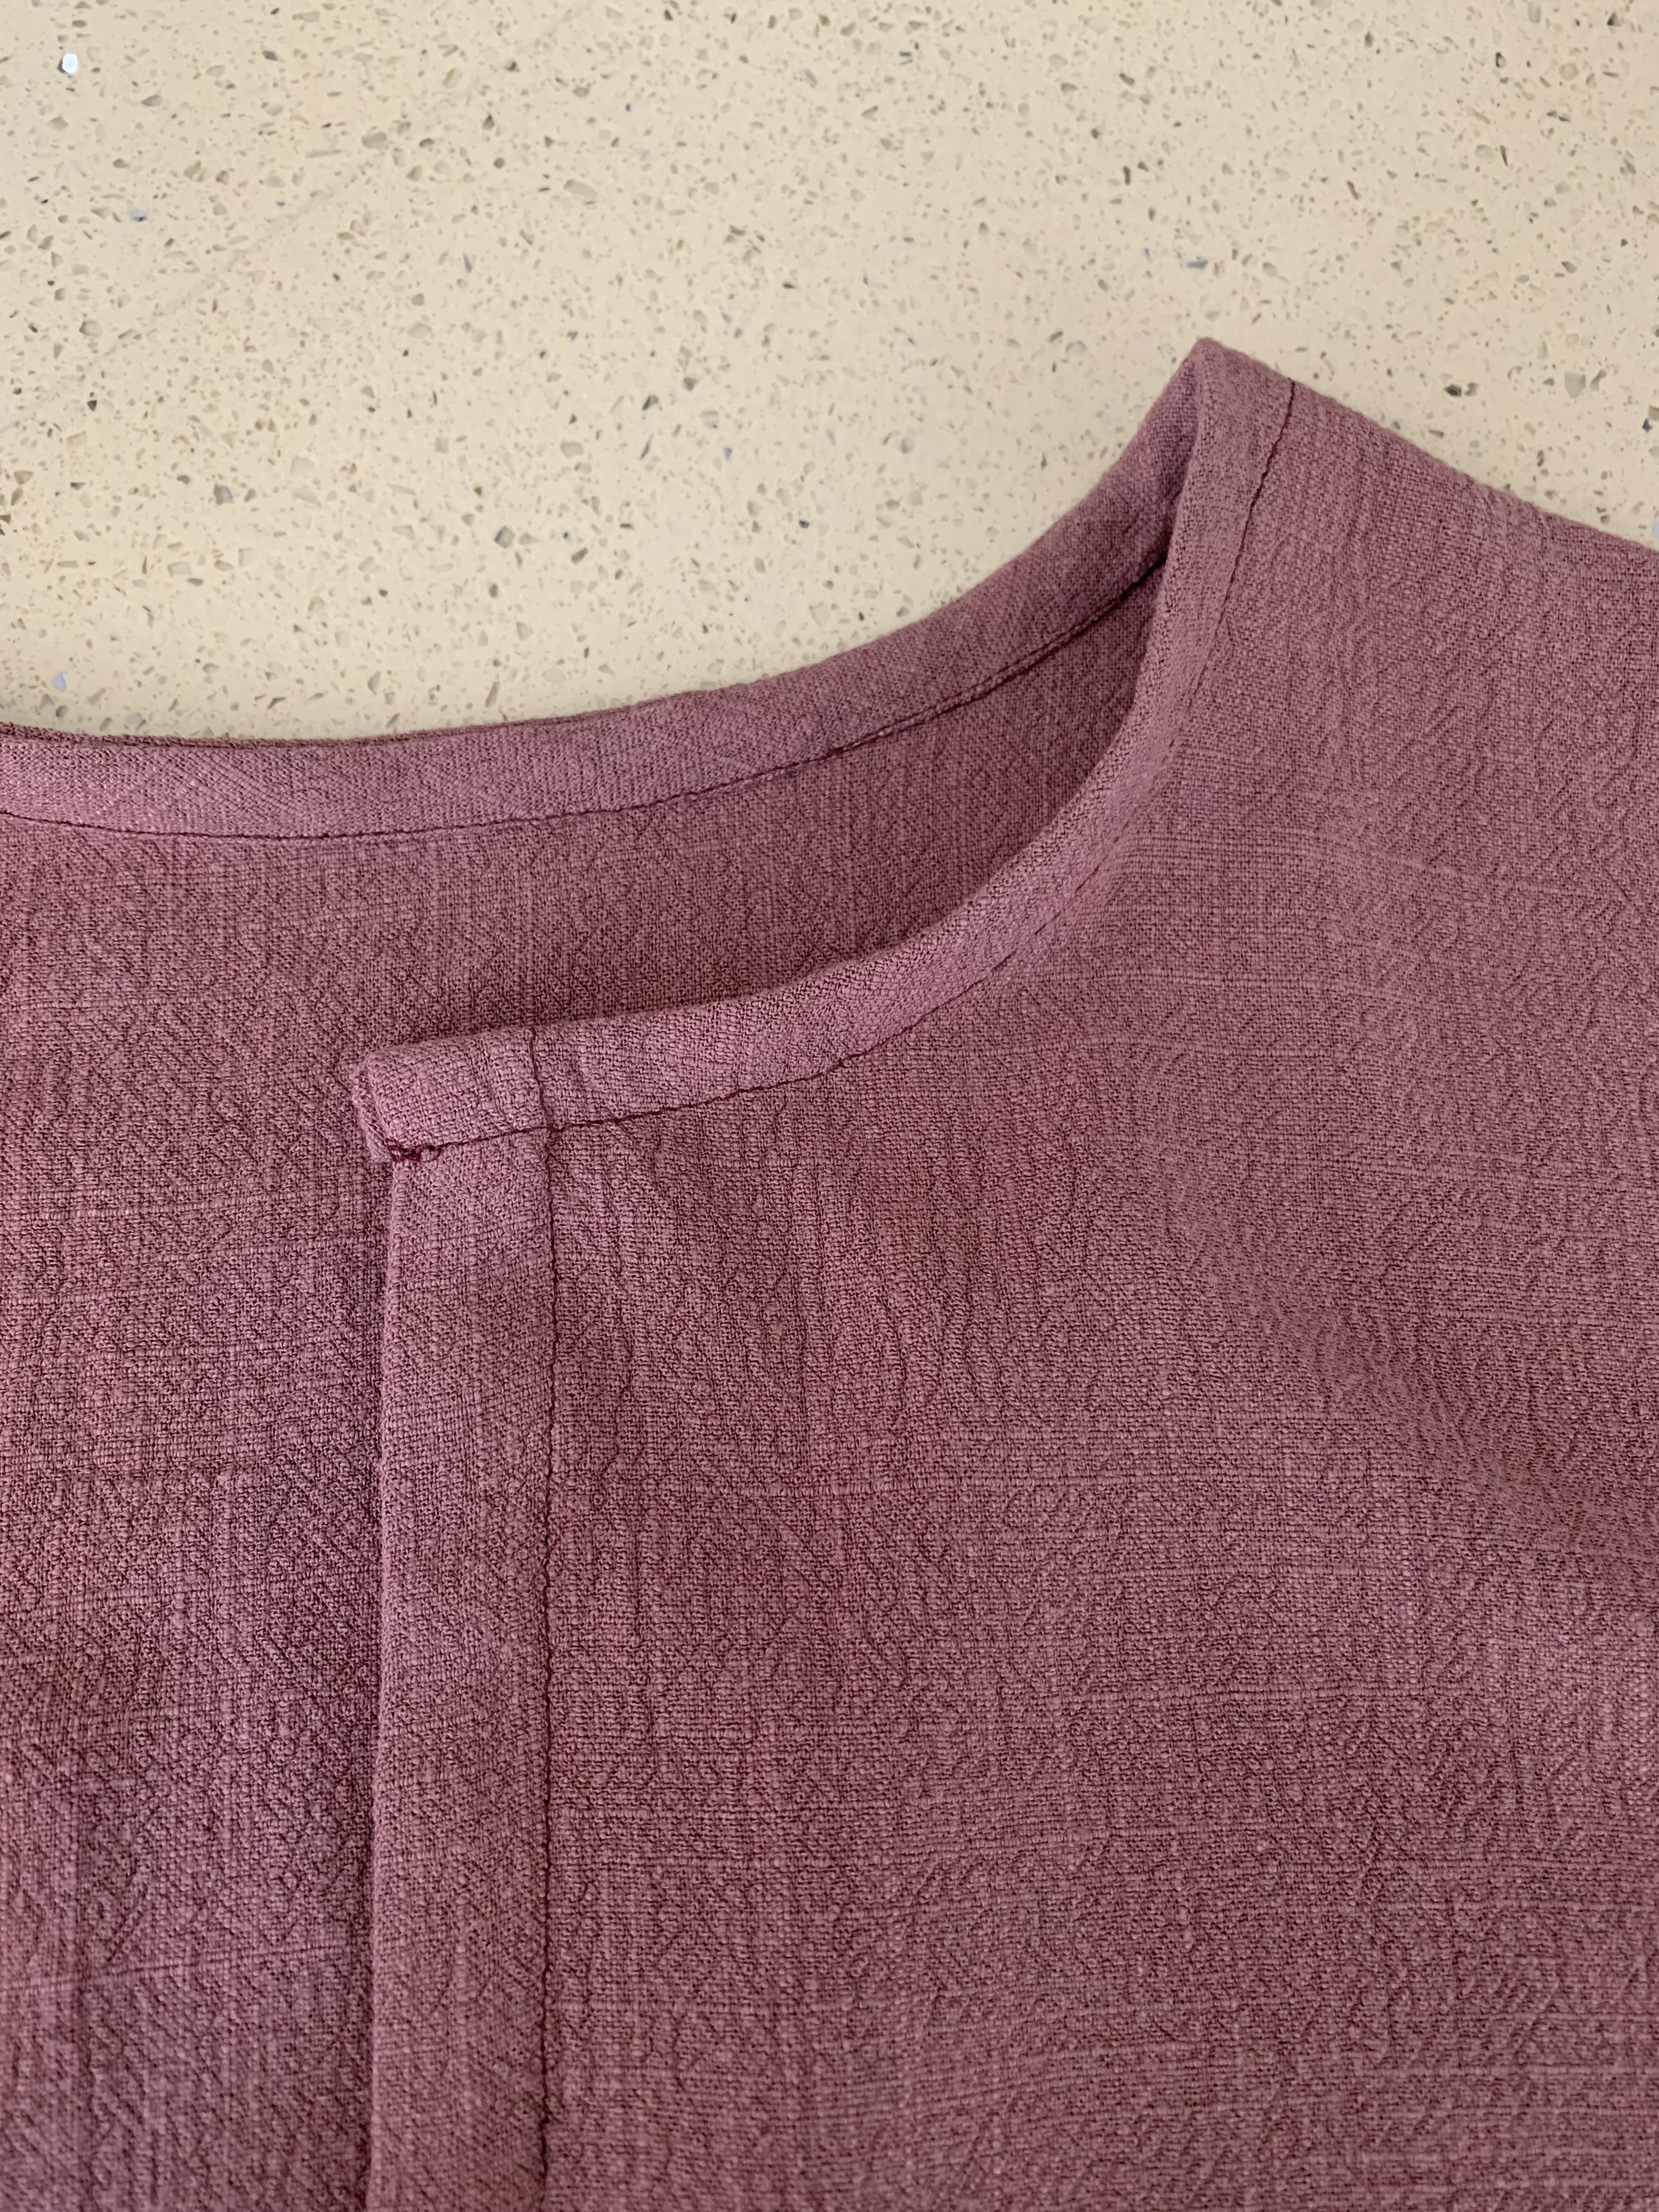
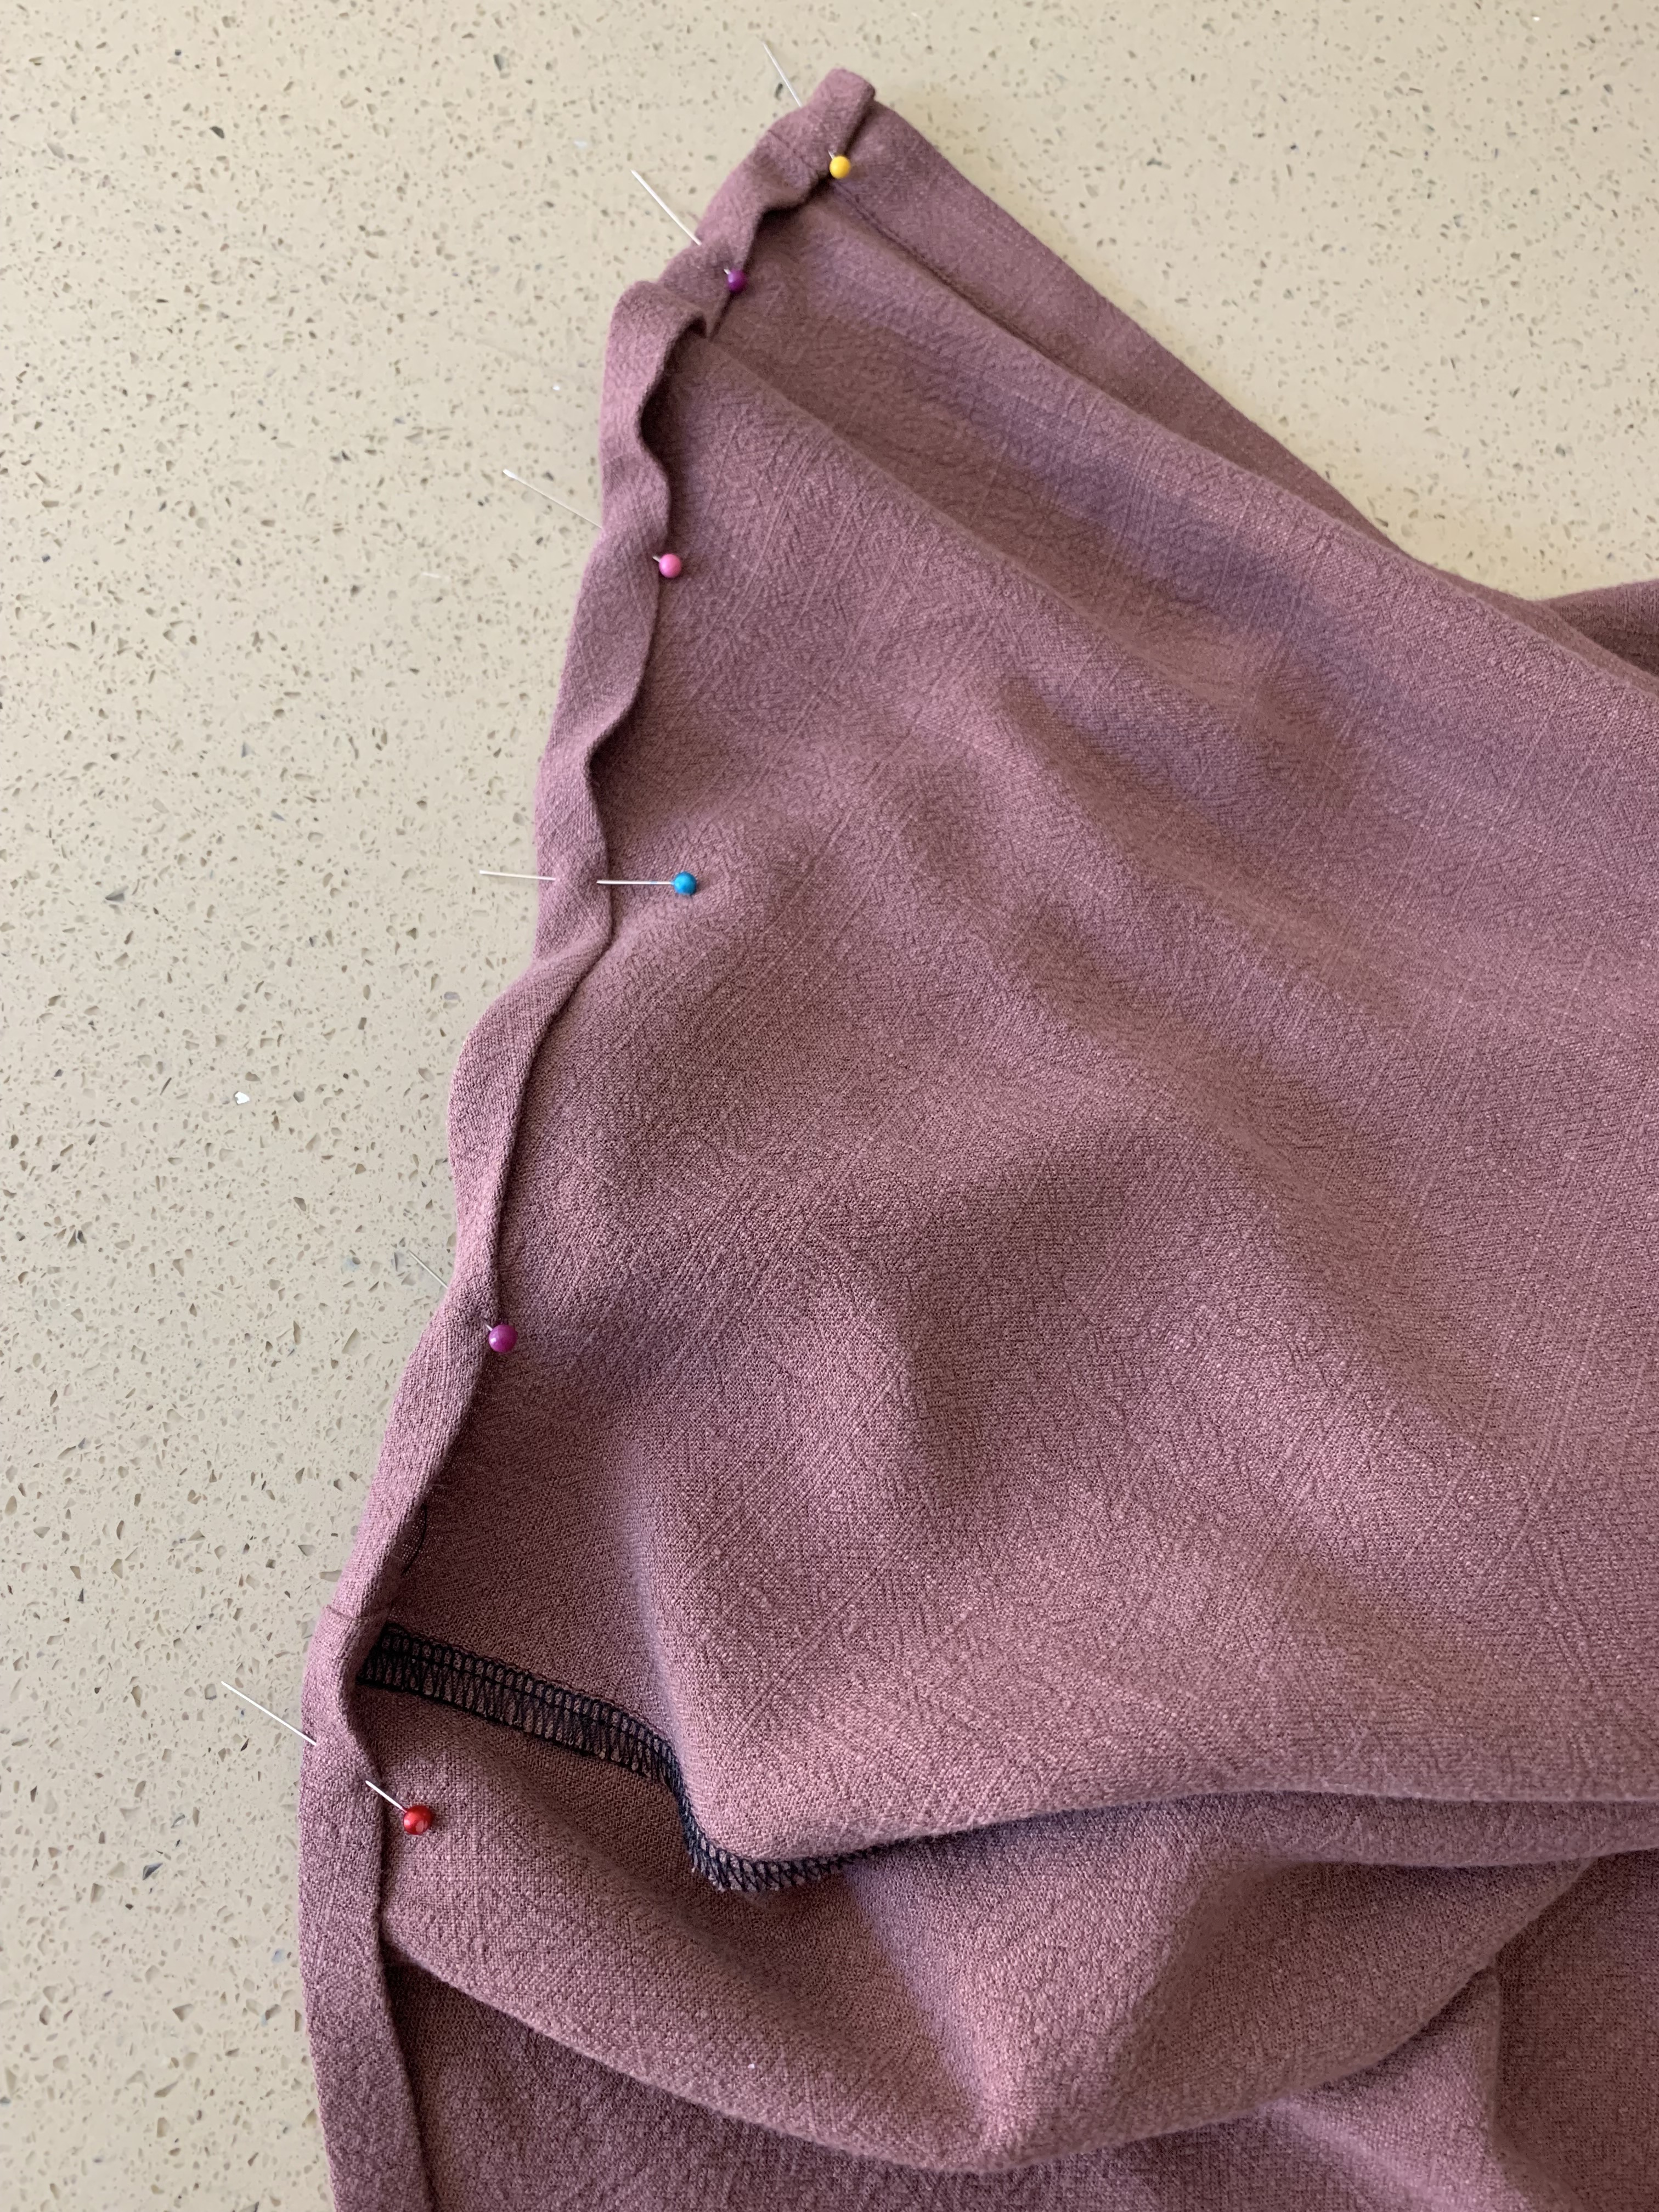
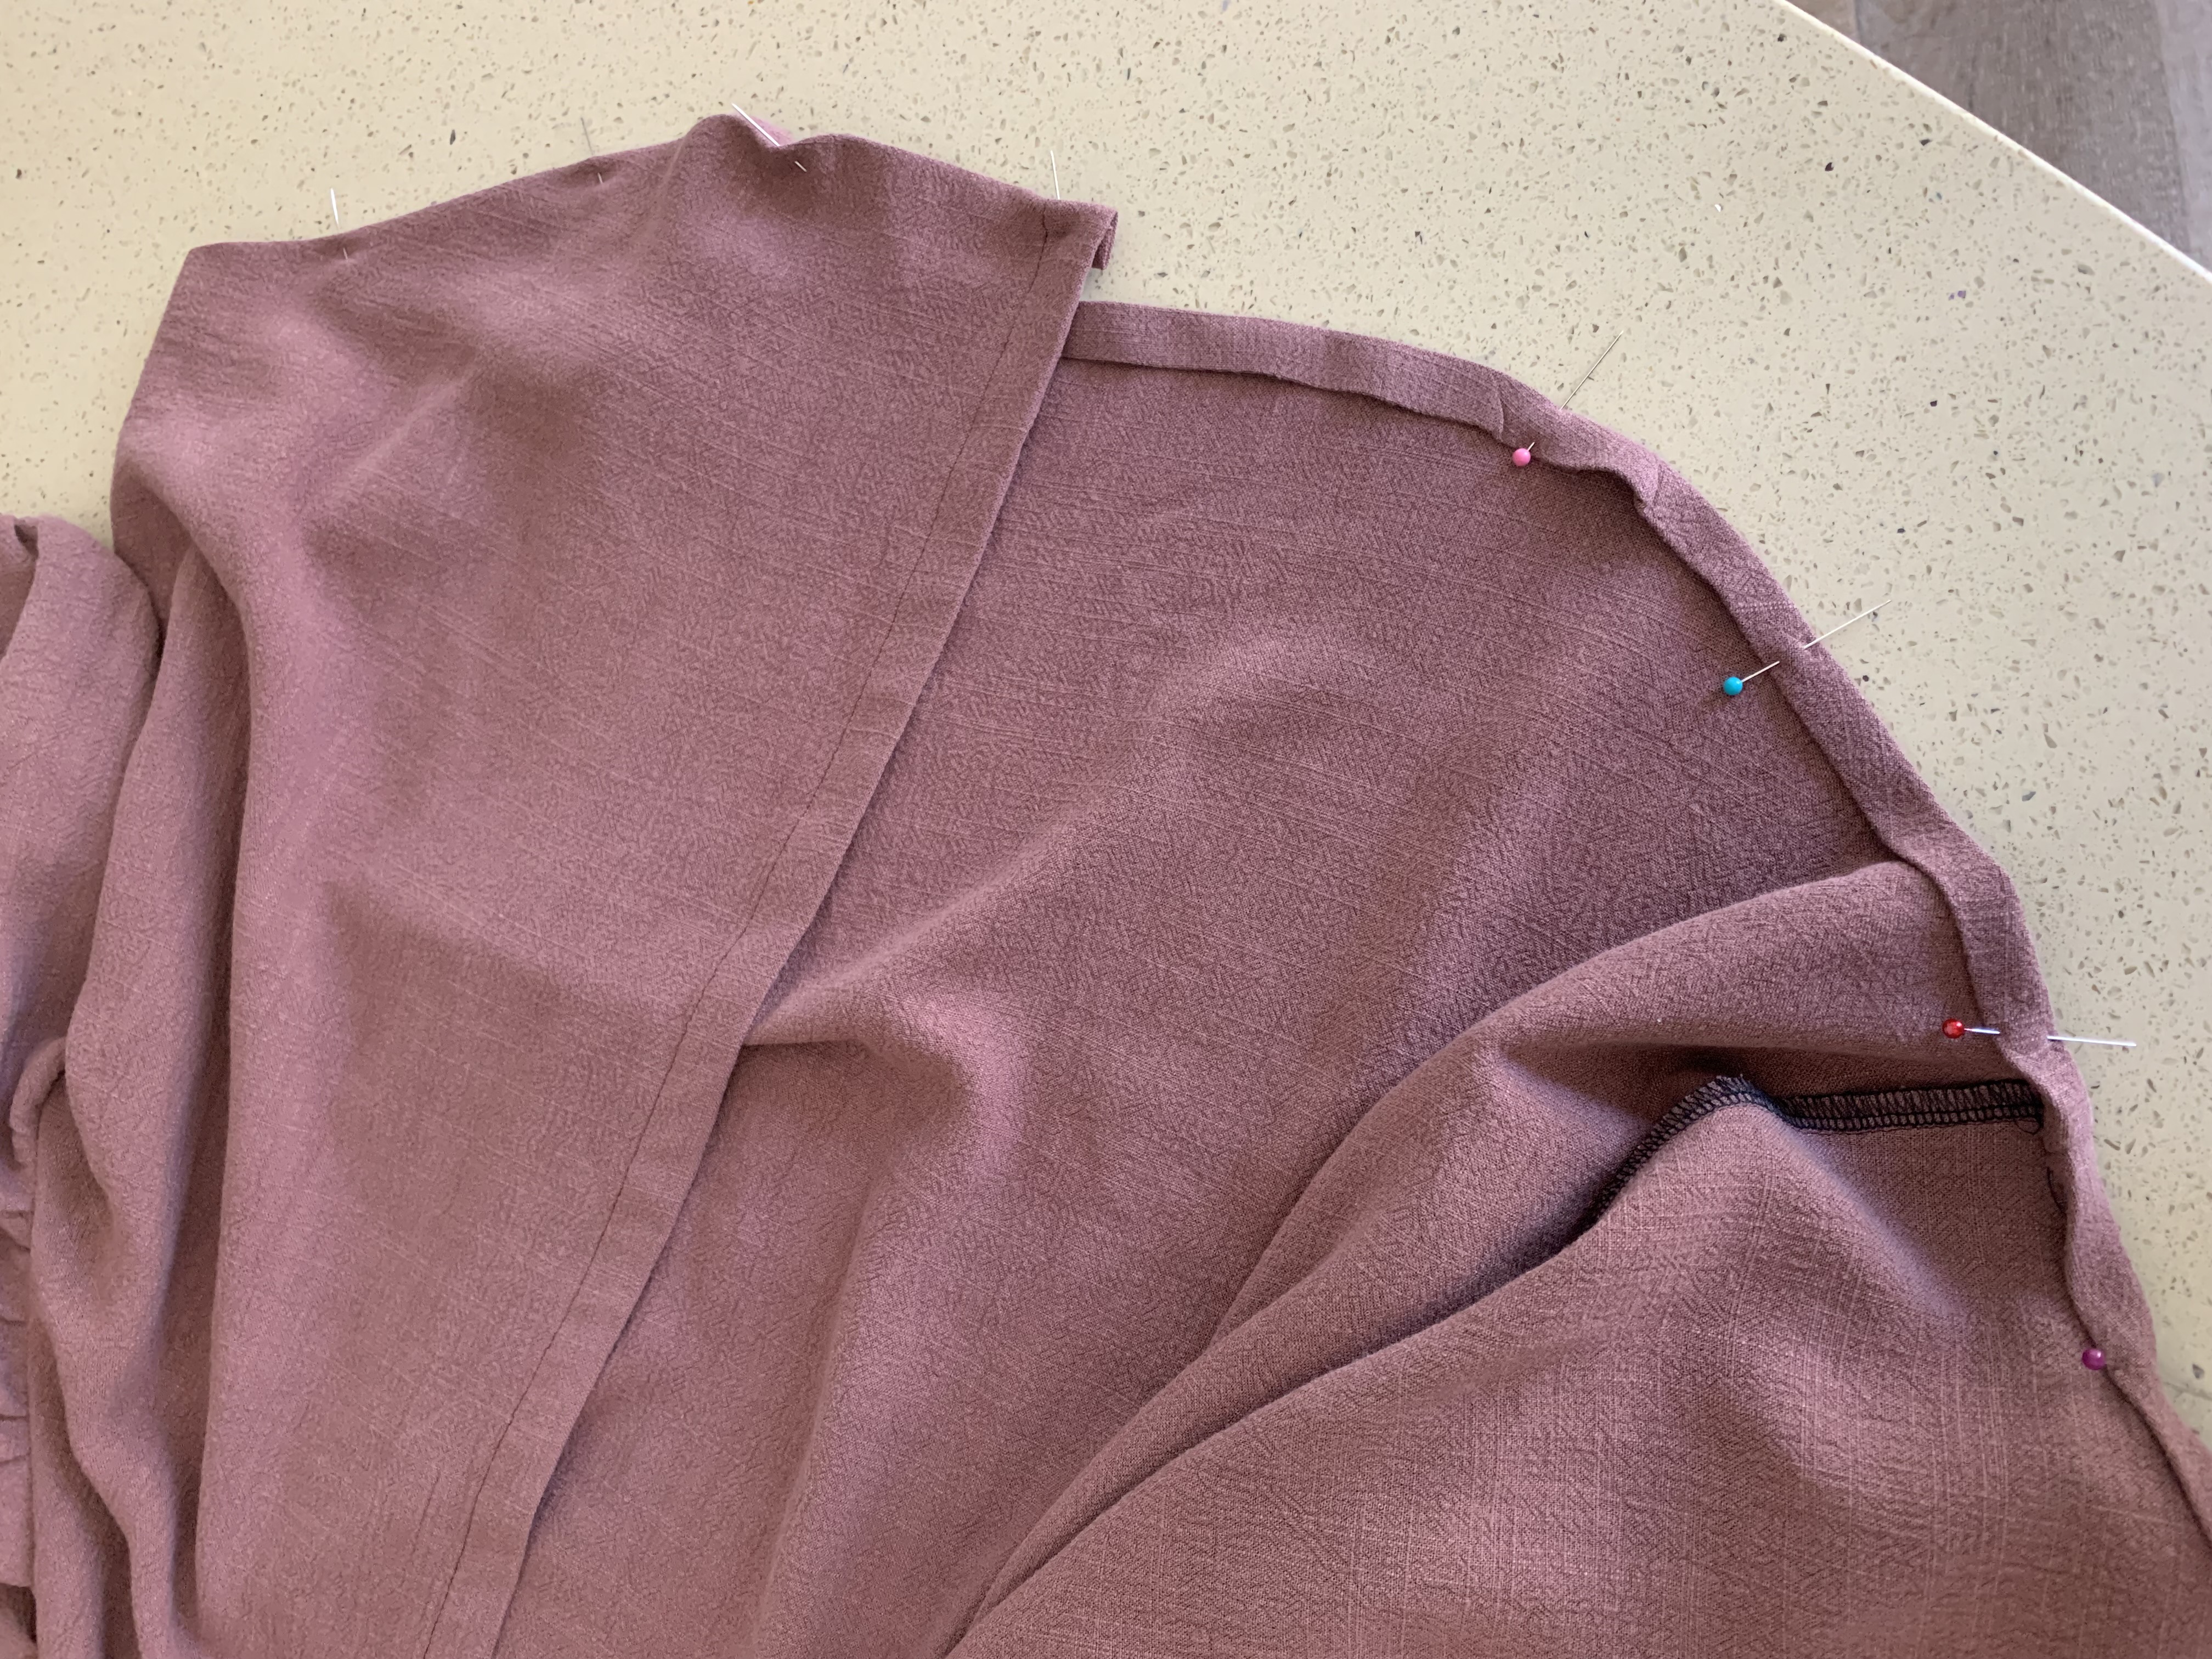
Step 5: Right sides together, and leaving 1/2″ extended past neckline edge, pin the bias binding all around the neckline. Tuck the 1/2 end edges behind the front neckline. Sew at 3/8ths.
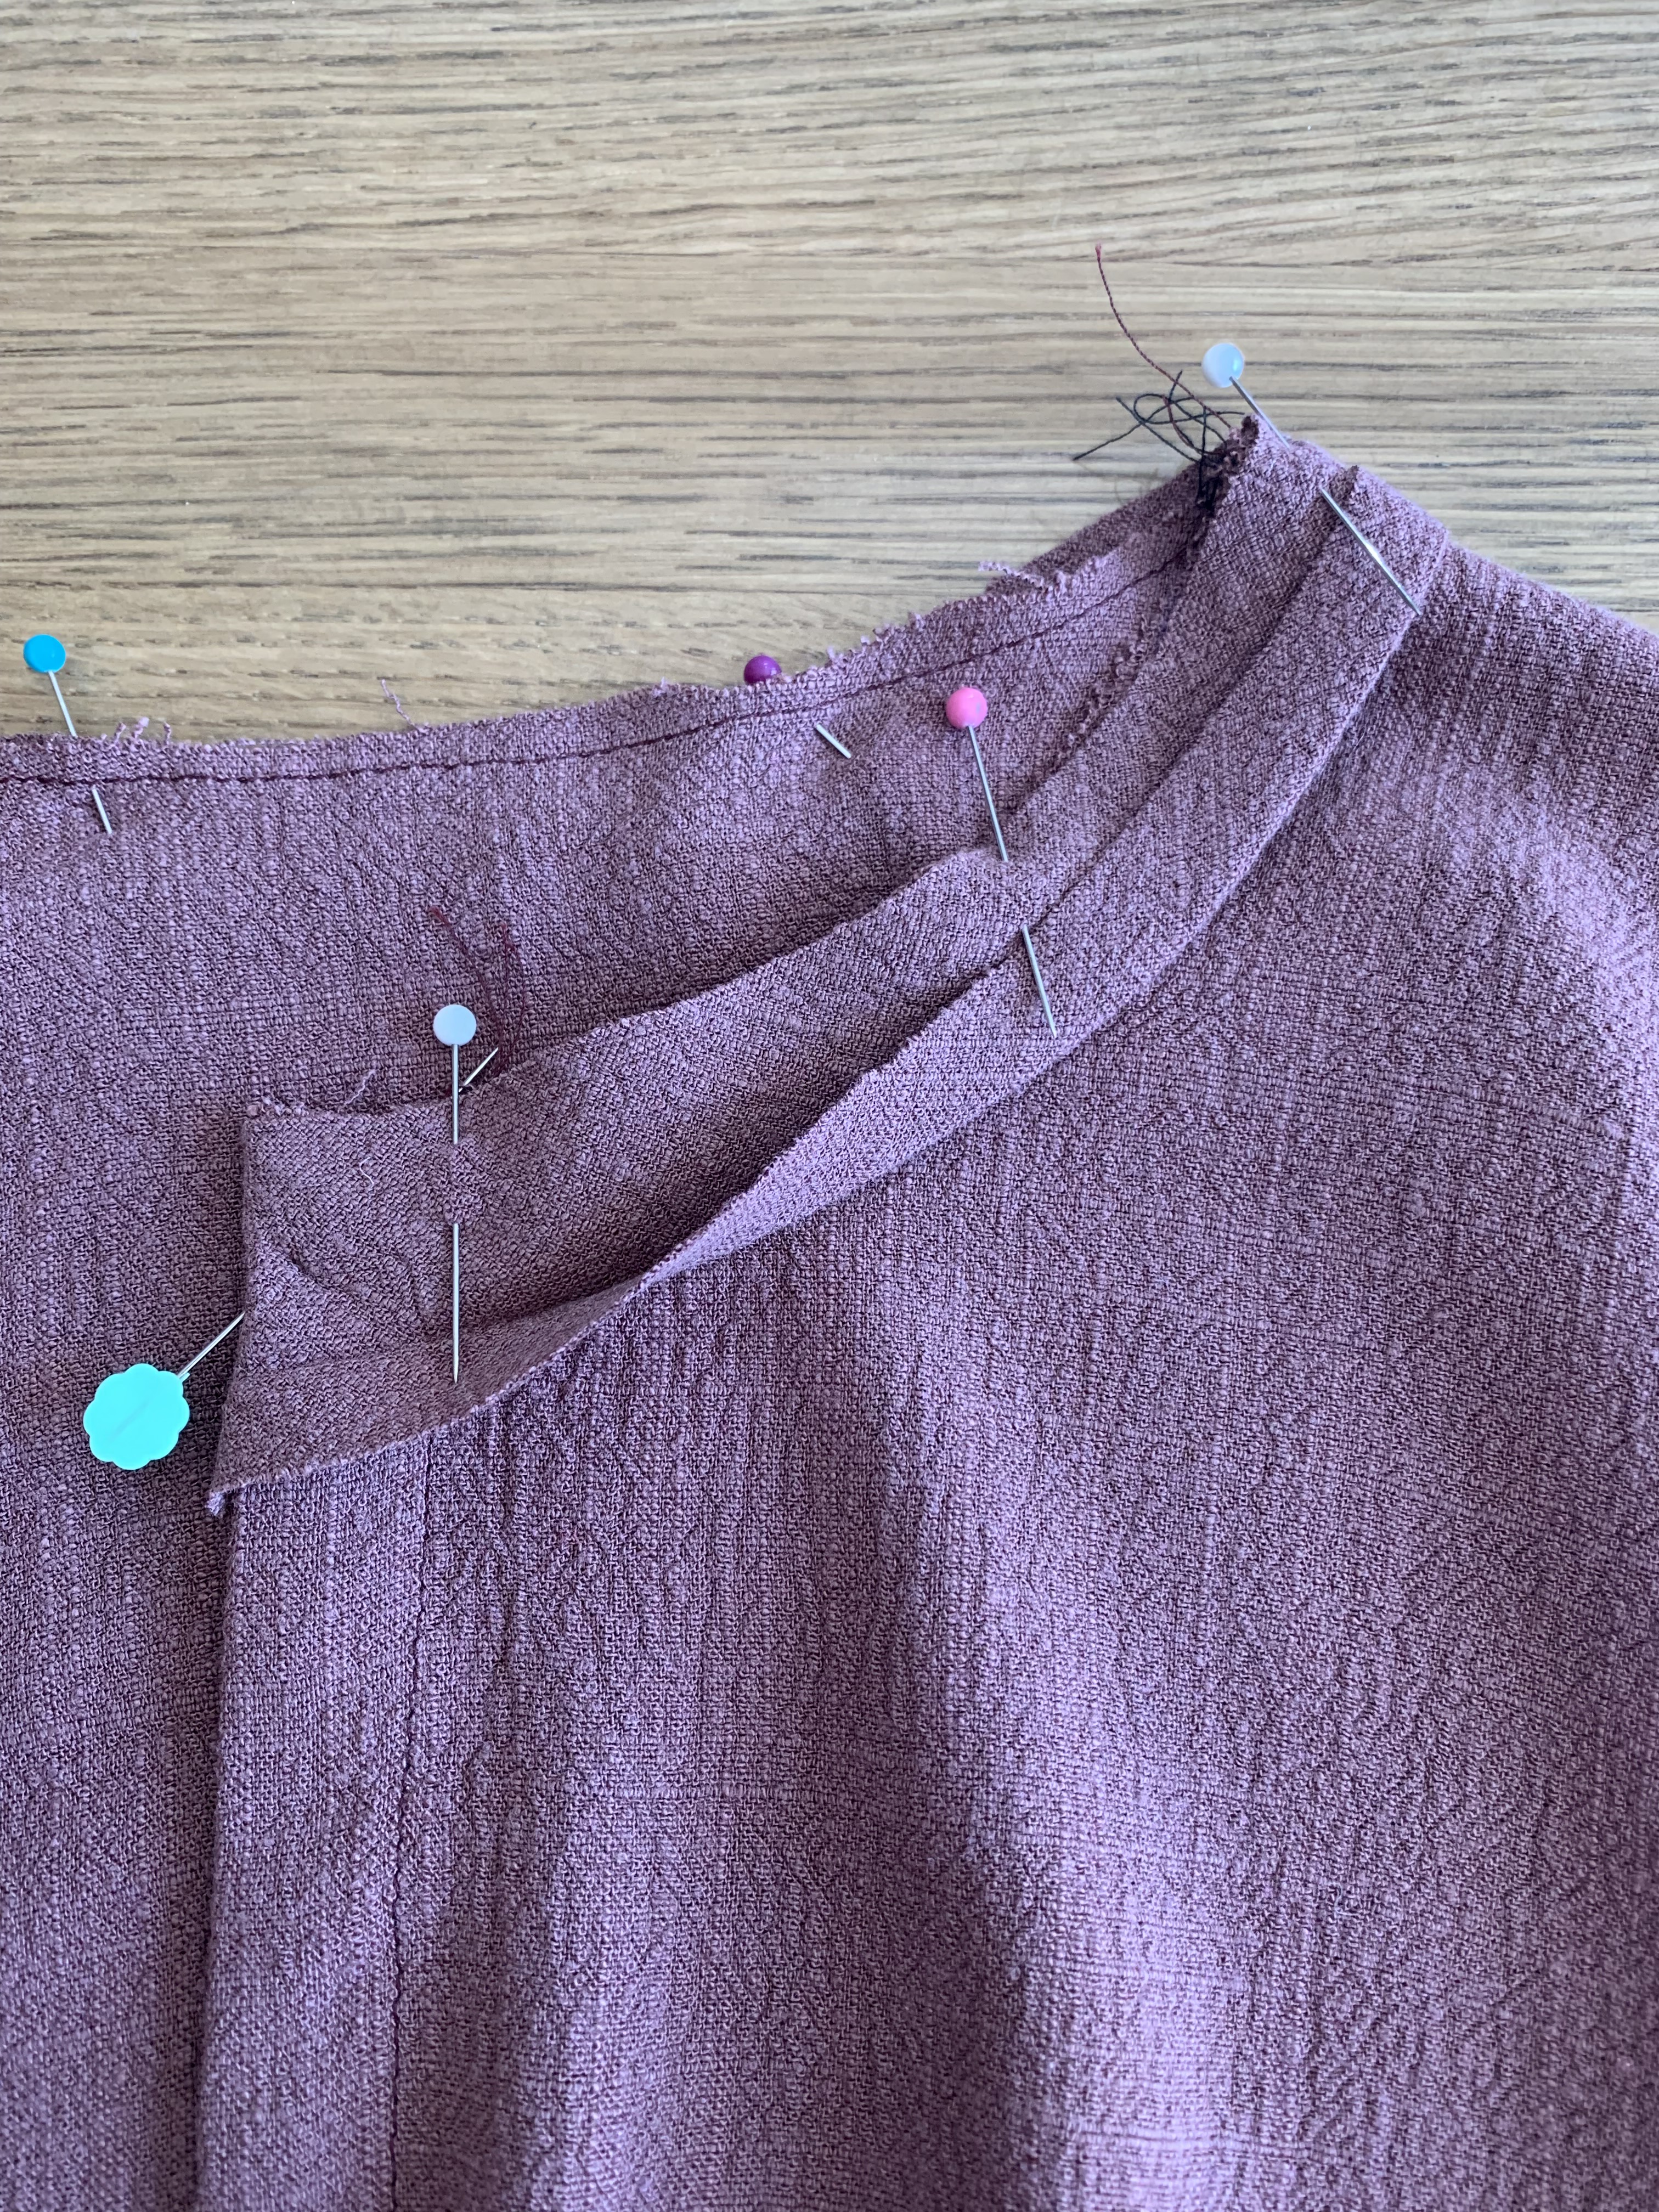
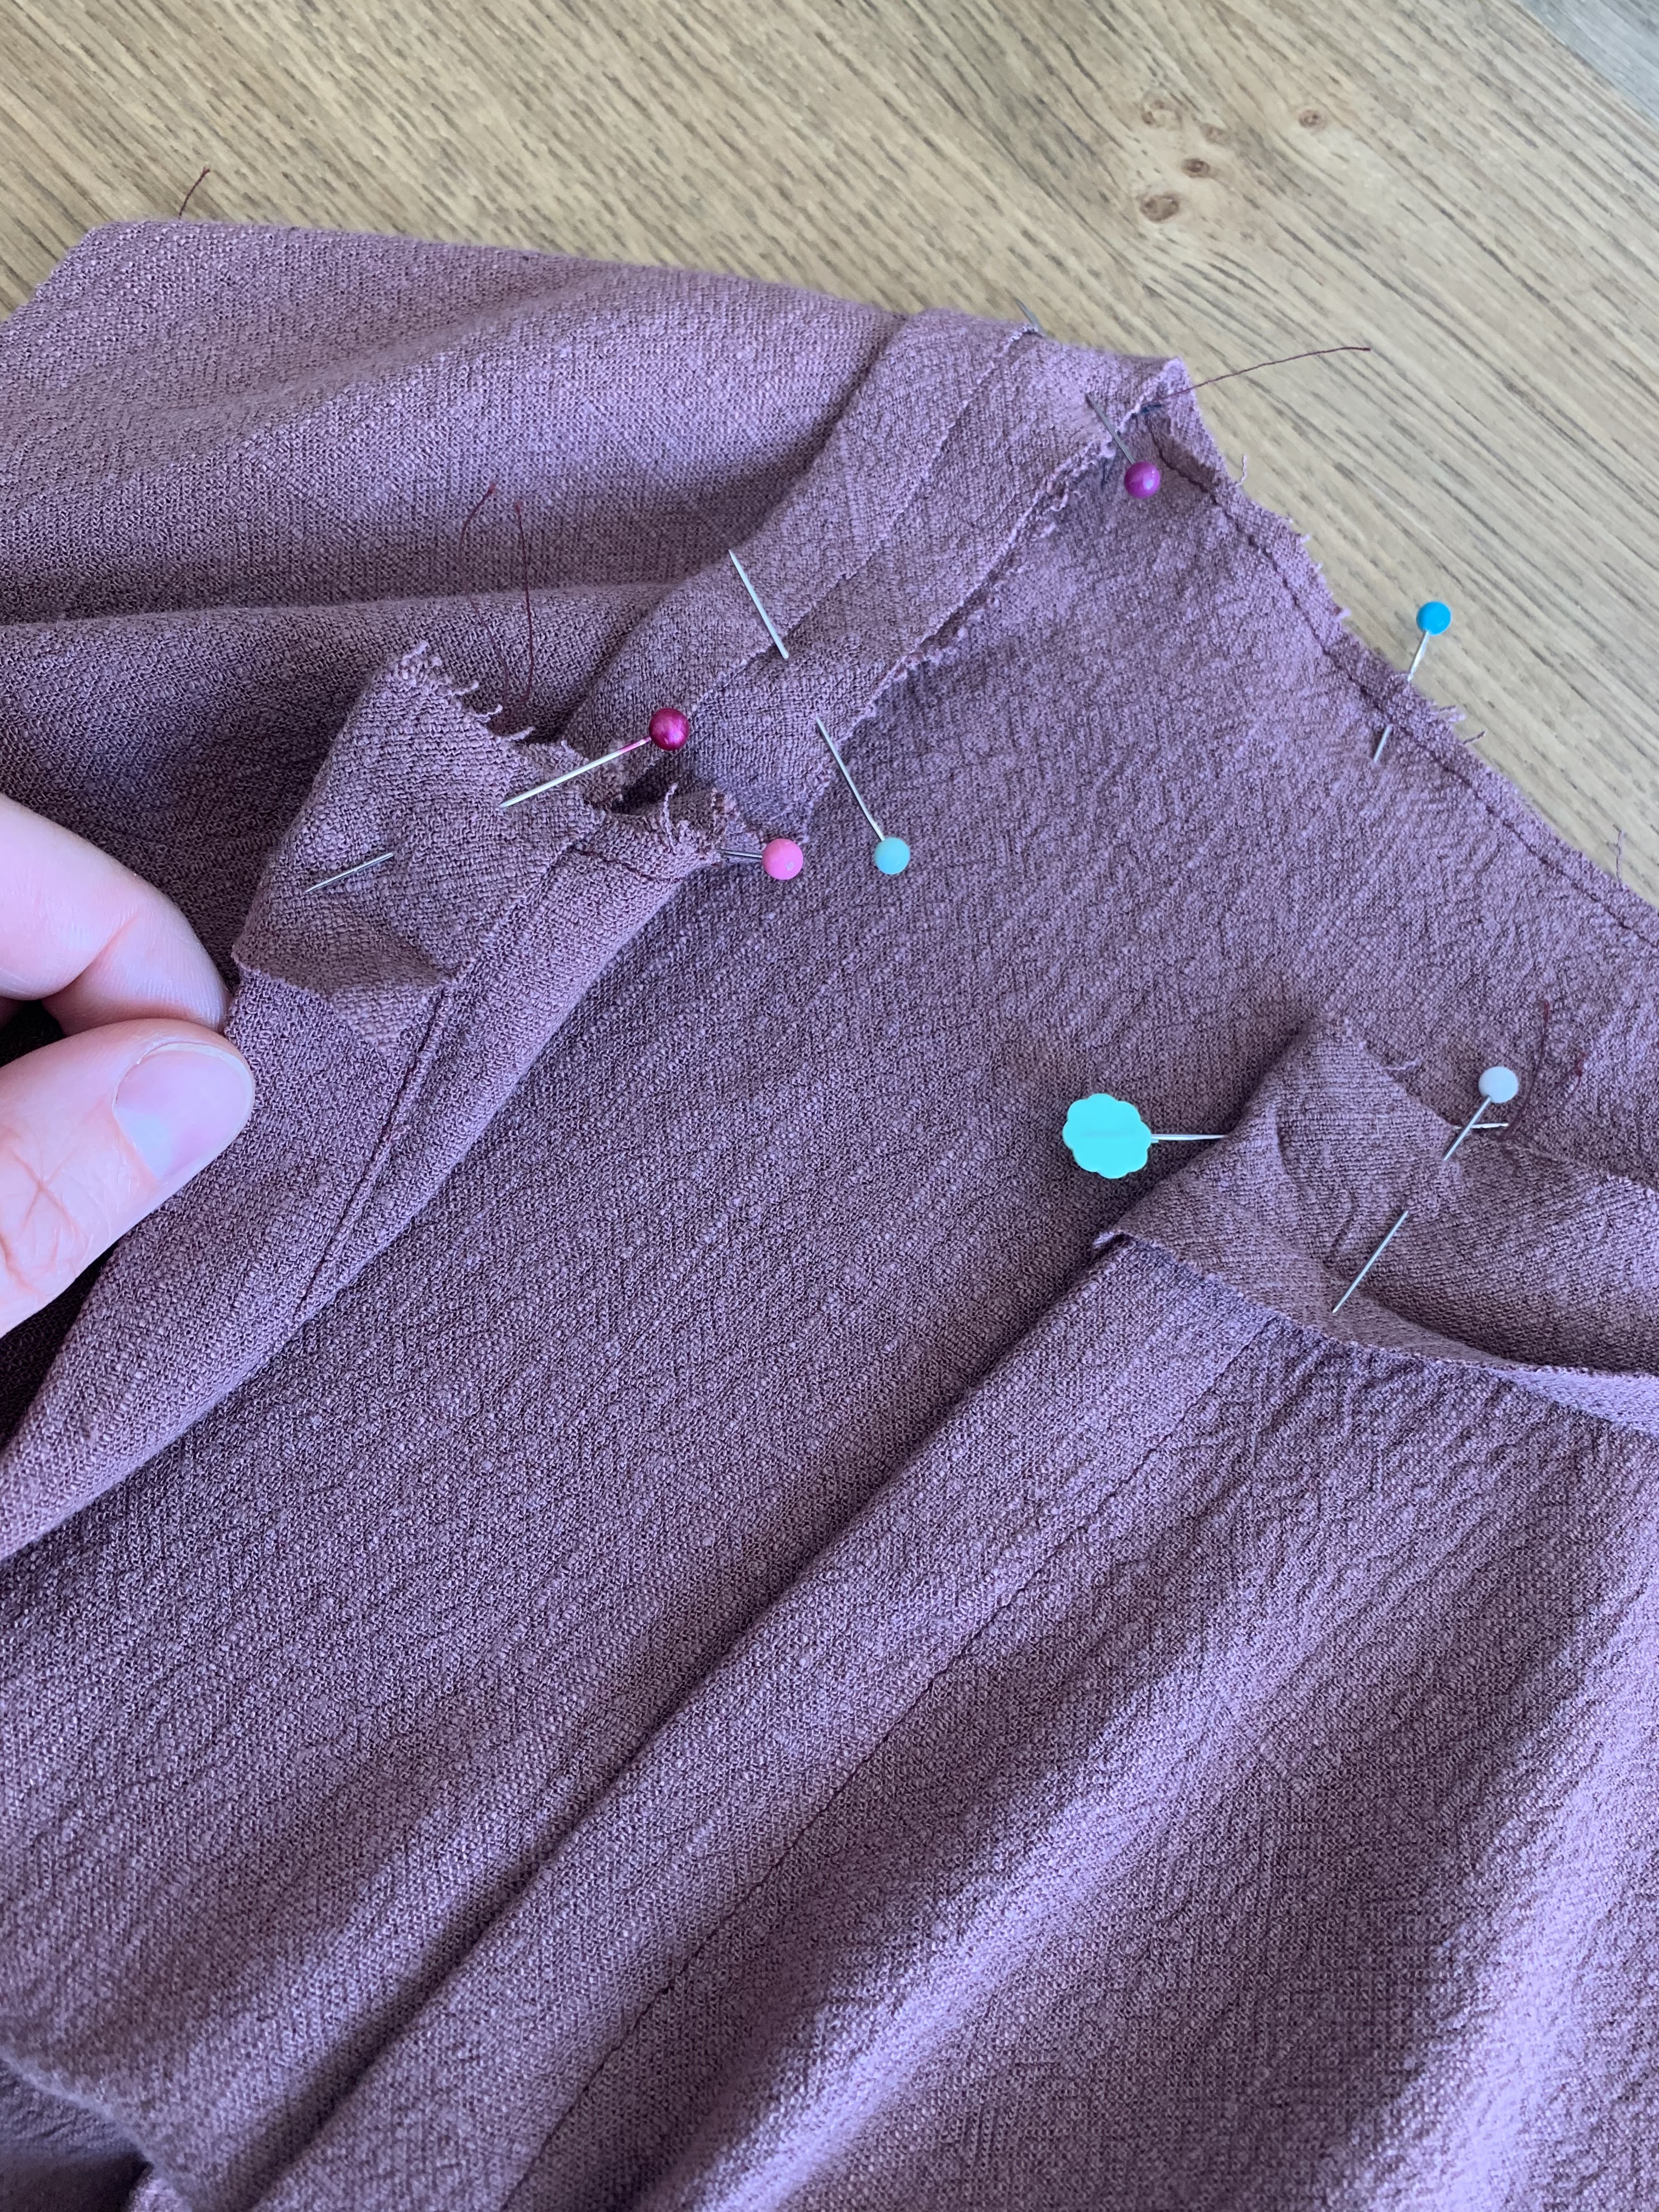
Step 5: Trim the seam allowance, and fold and press the bias binding over to the wrong side twice. Pin in place. Sew along the edge to secure in place.
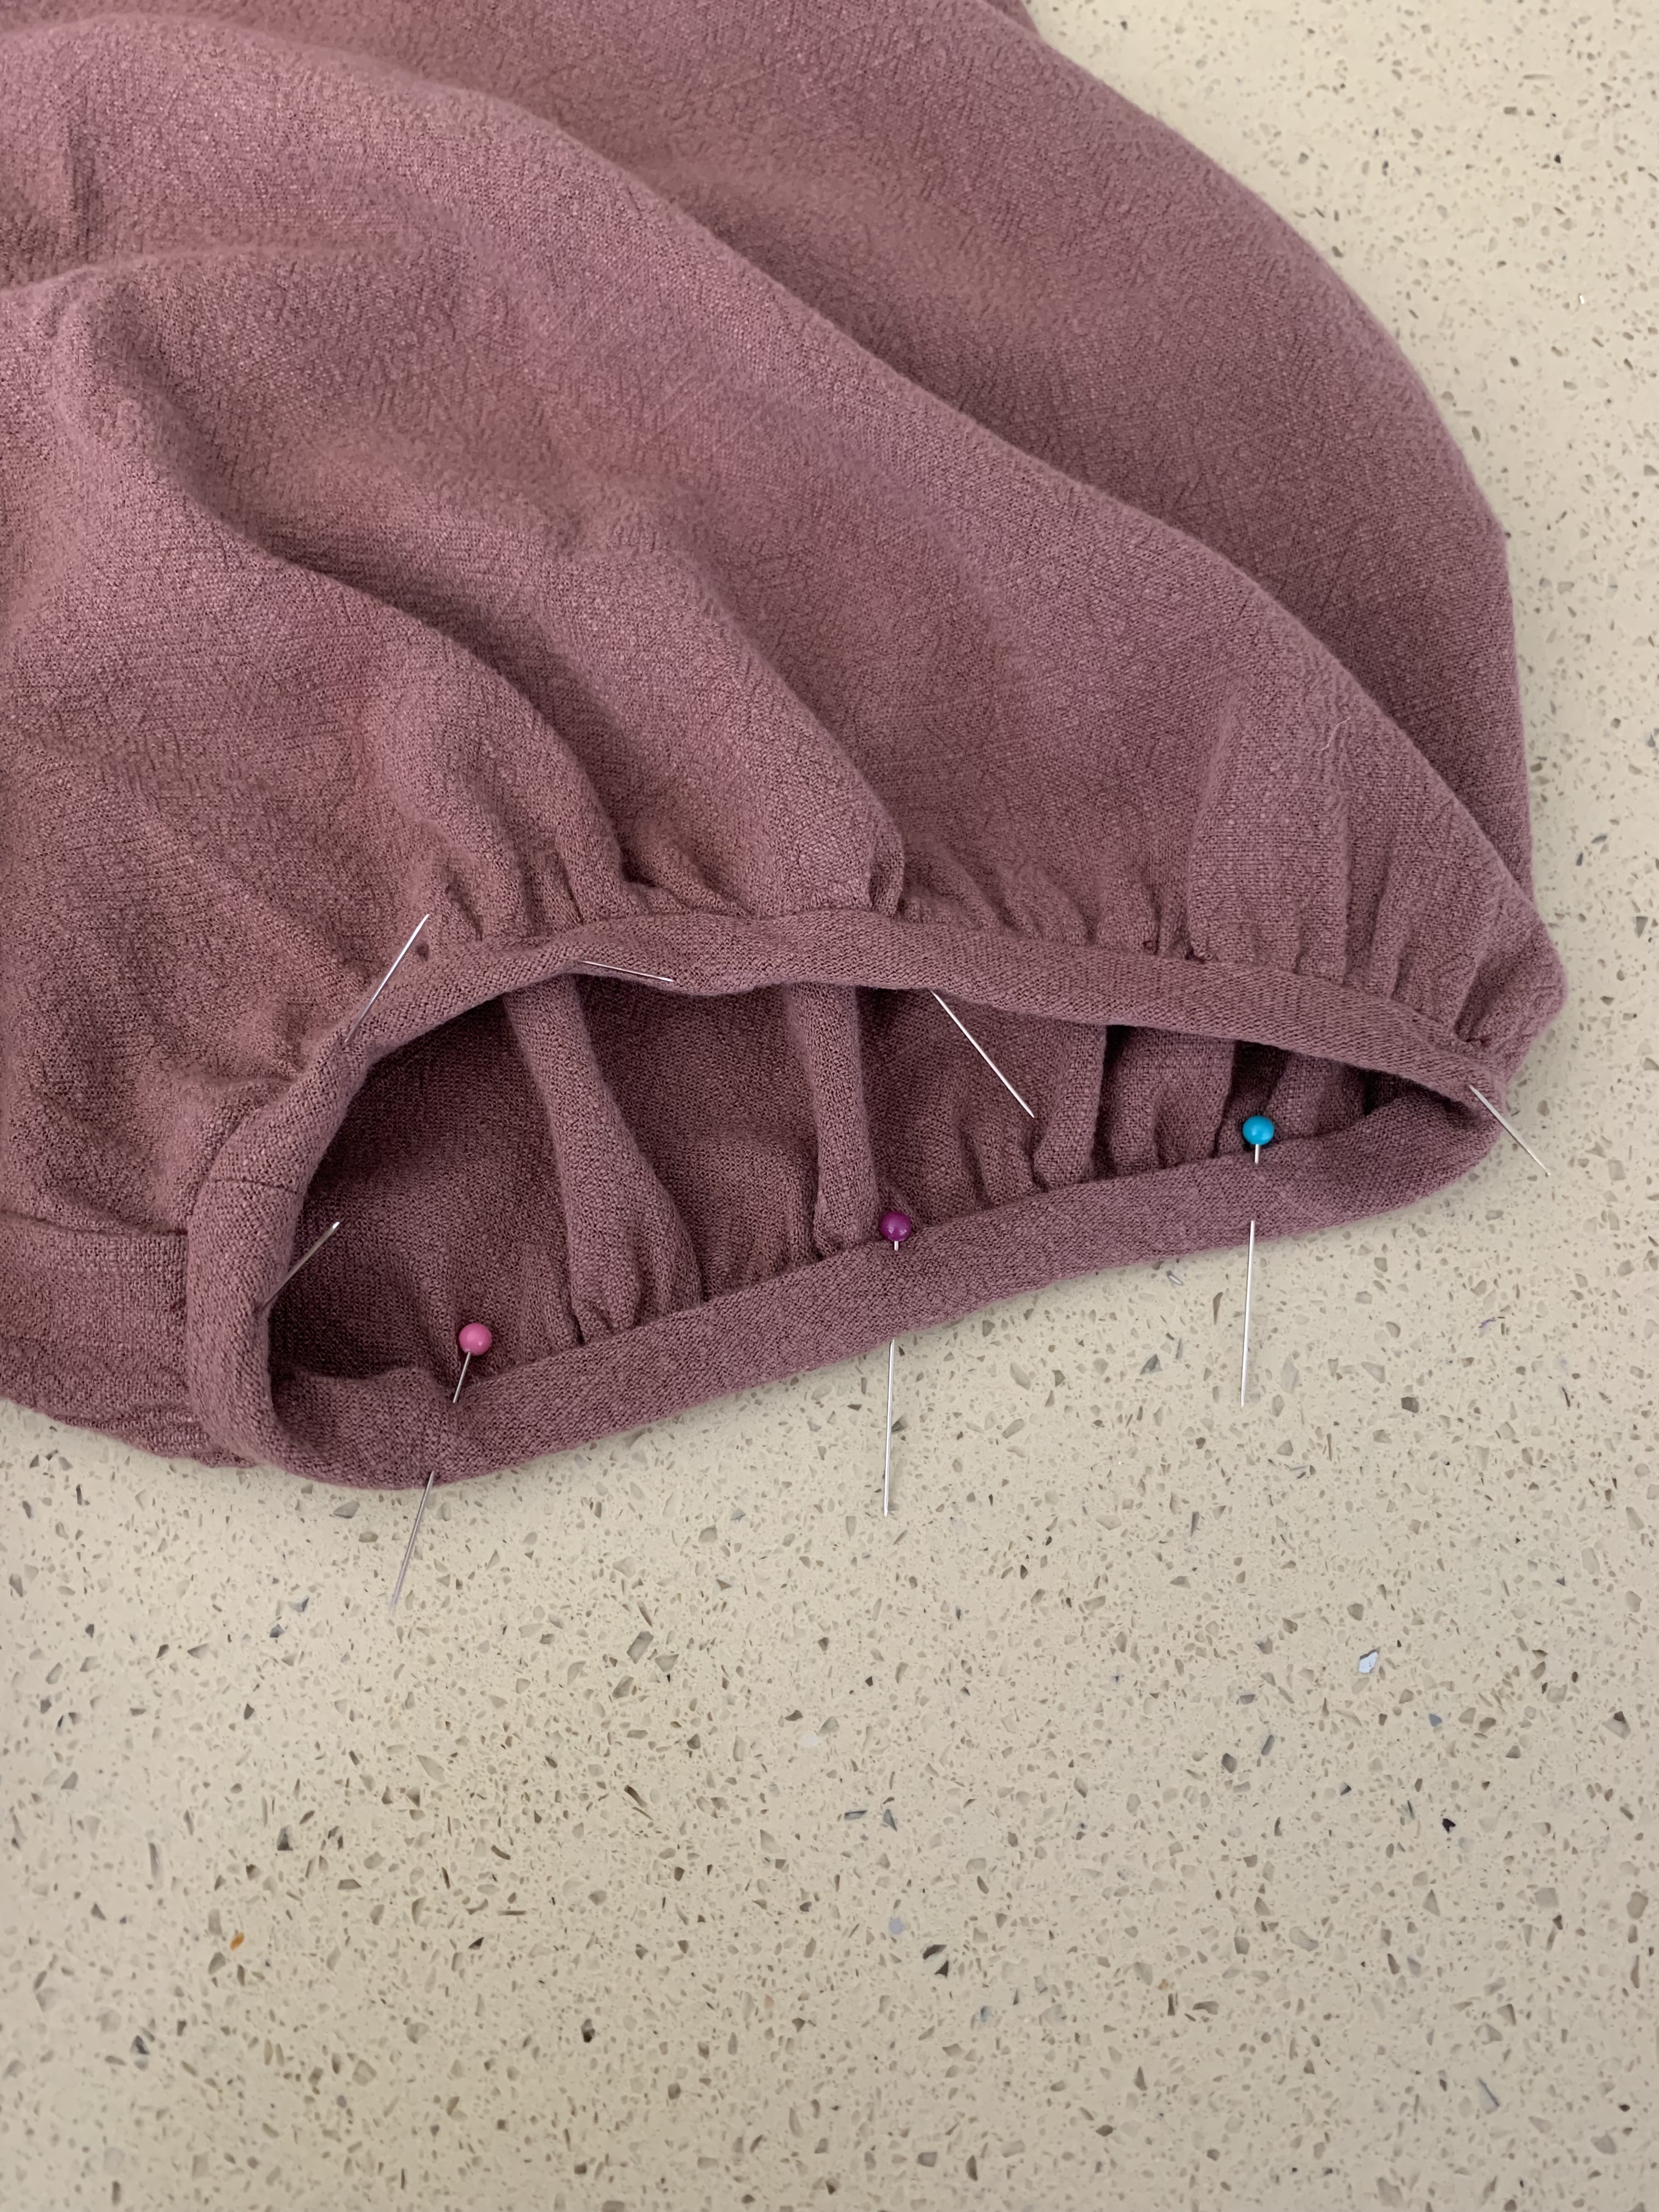
Step 6: Time to prep the sleeves! First, sew two rows of basting stitches along the top and bottom of the sleeve.
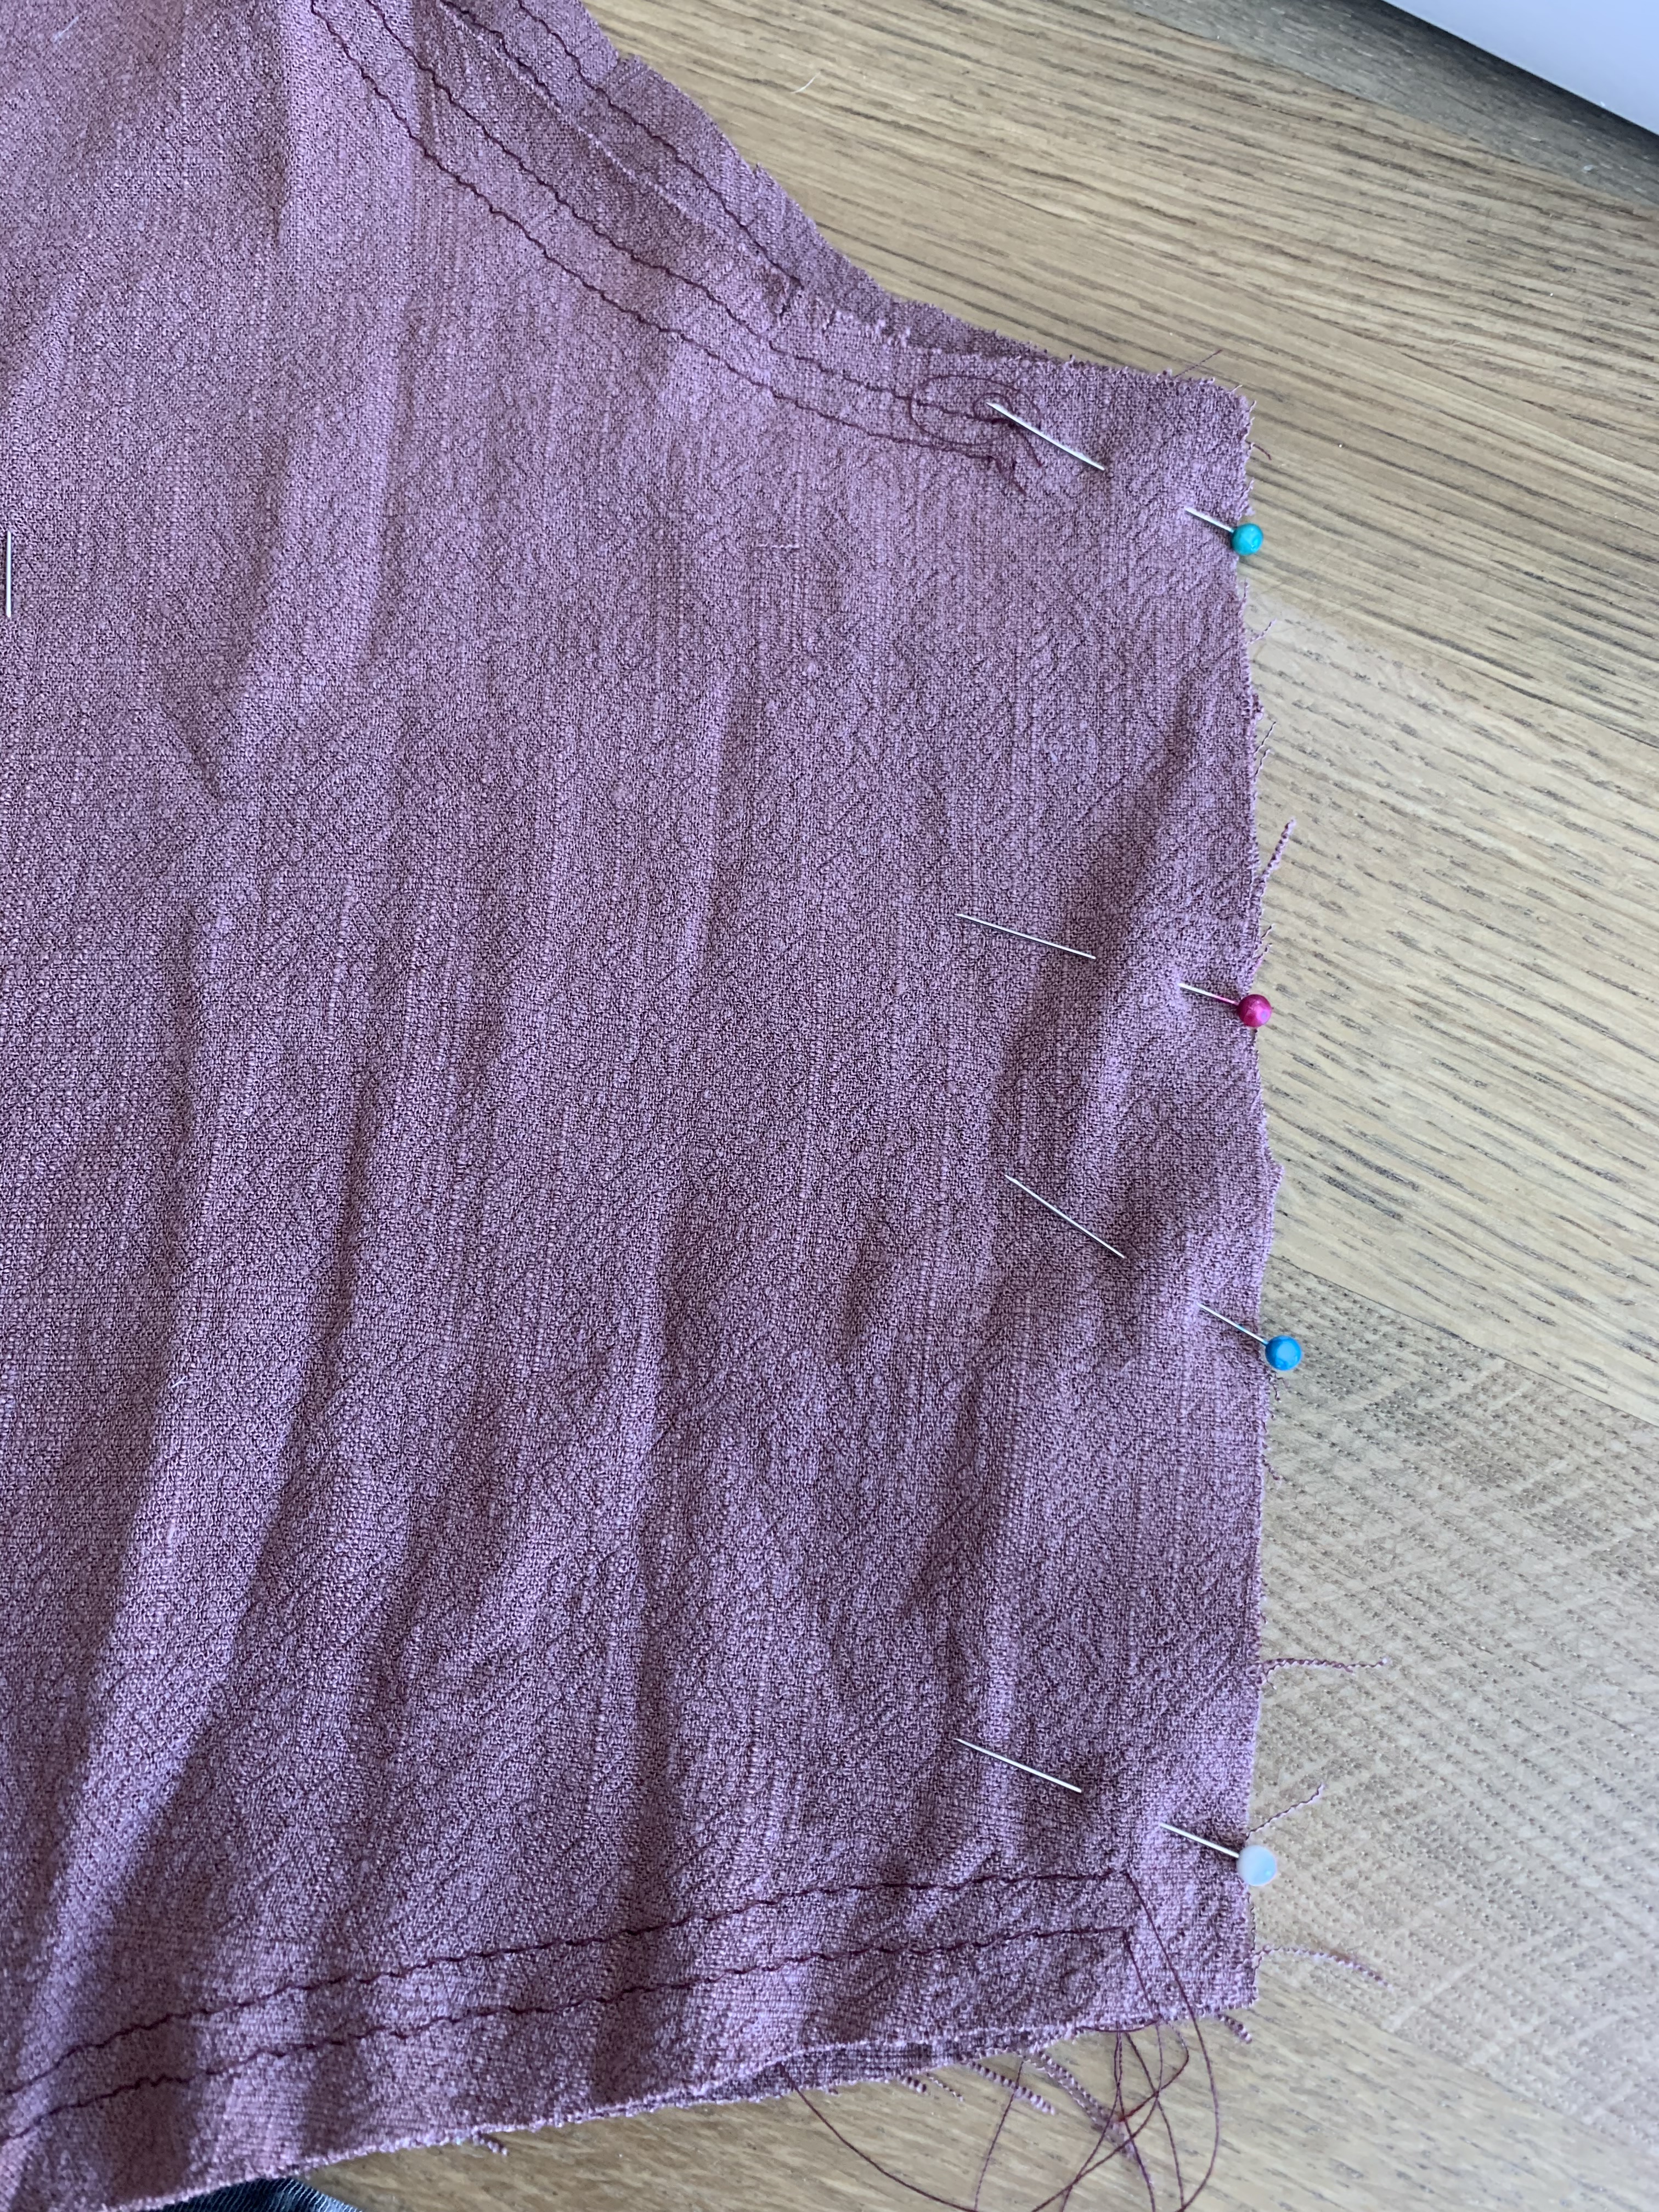
Step 7: Pin the sleeve seams right sides together. Sew at 1/2″ and finish.
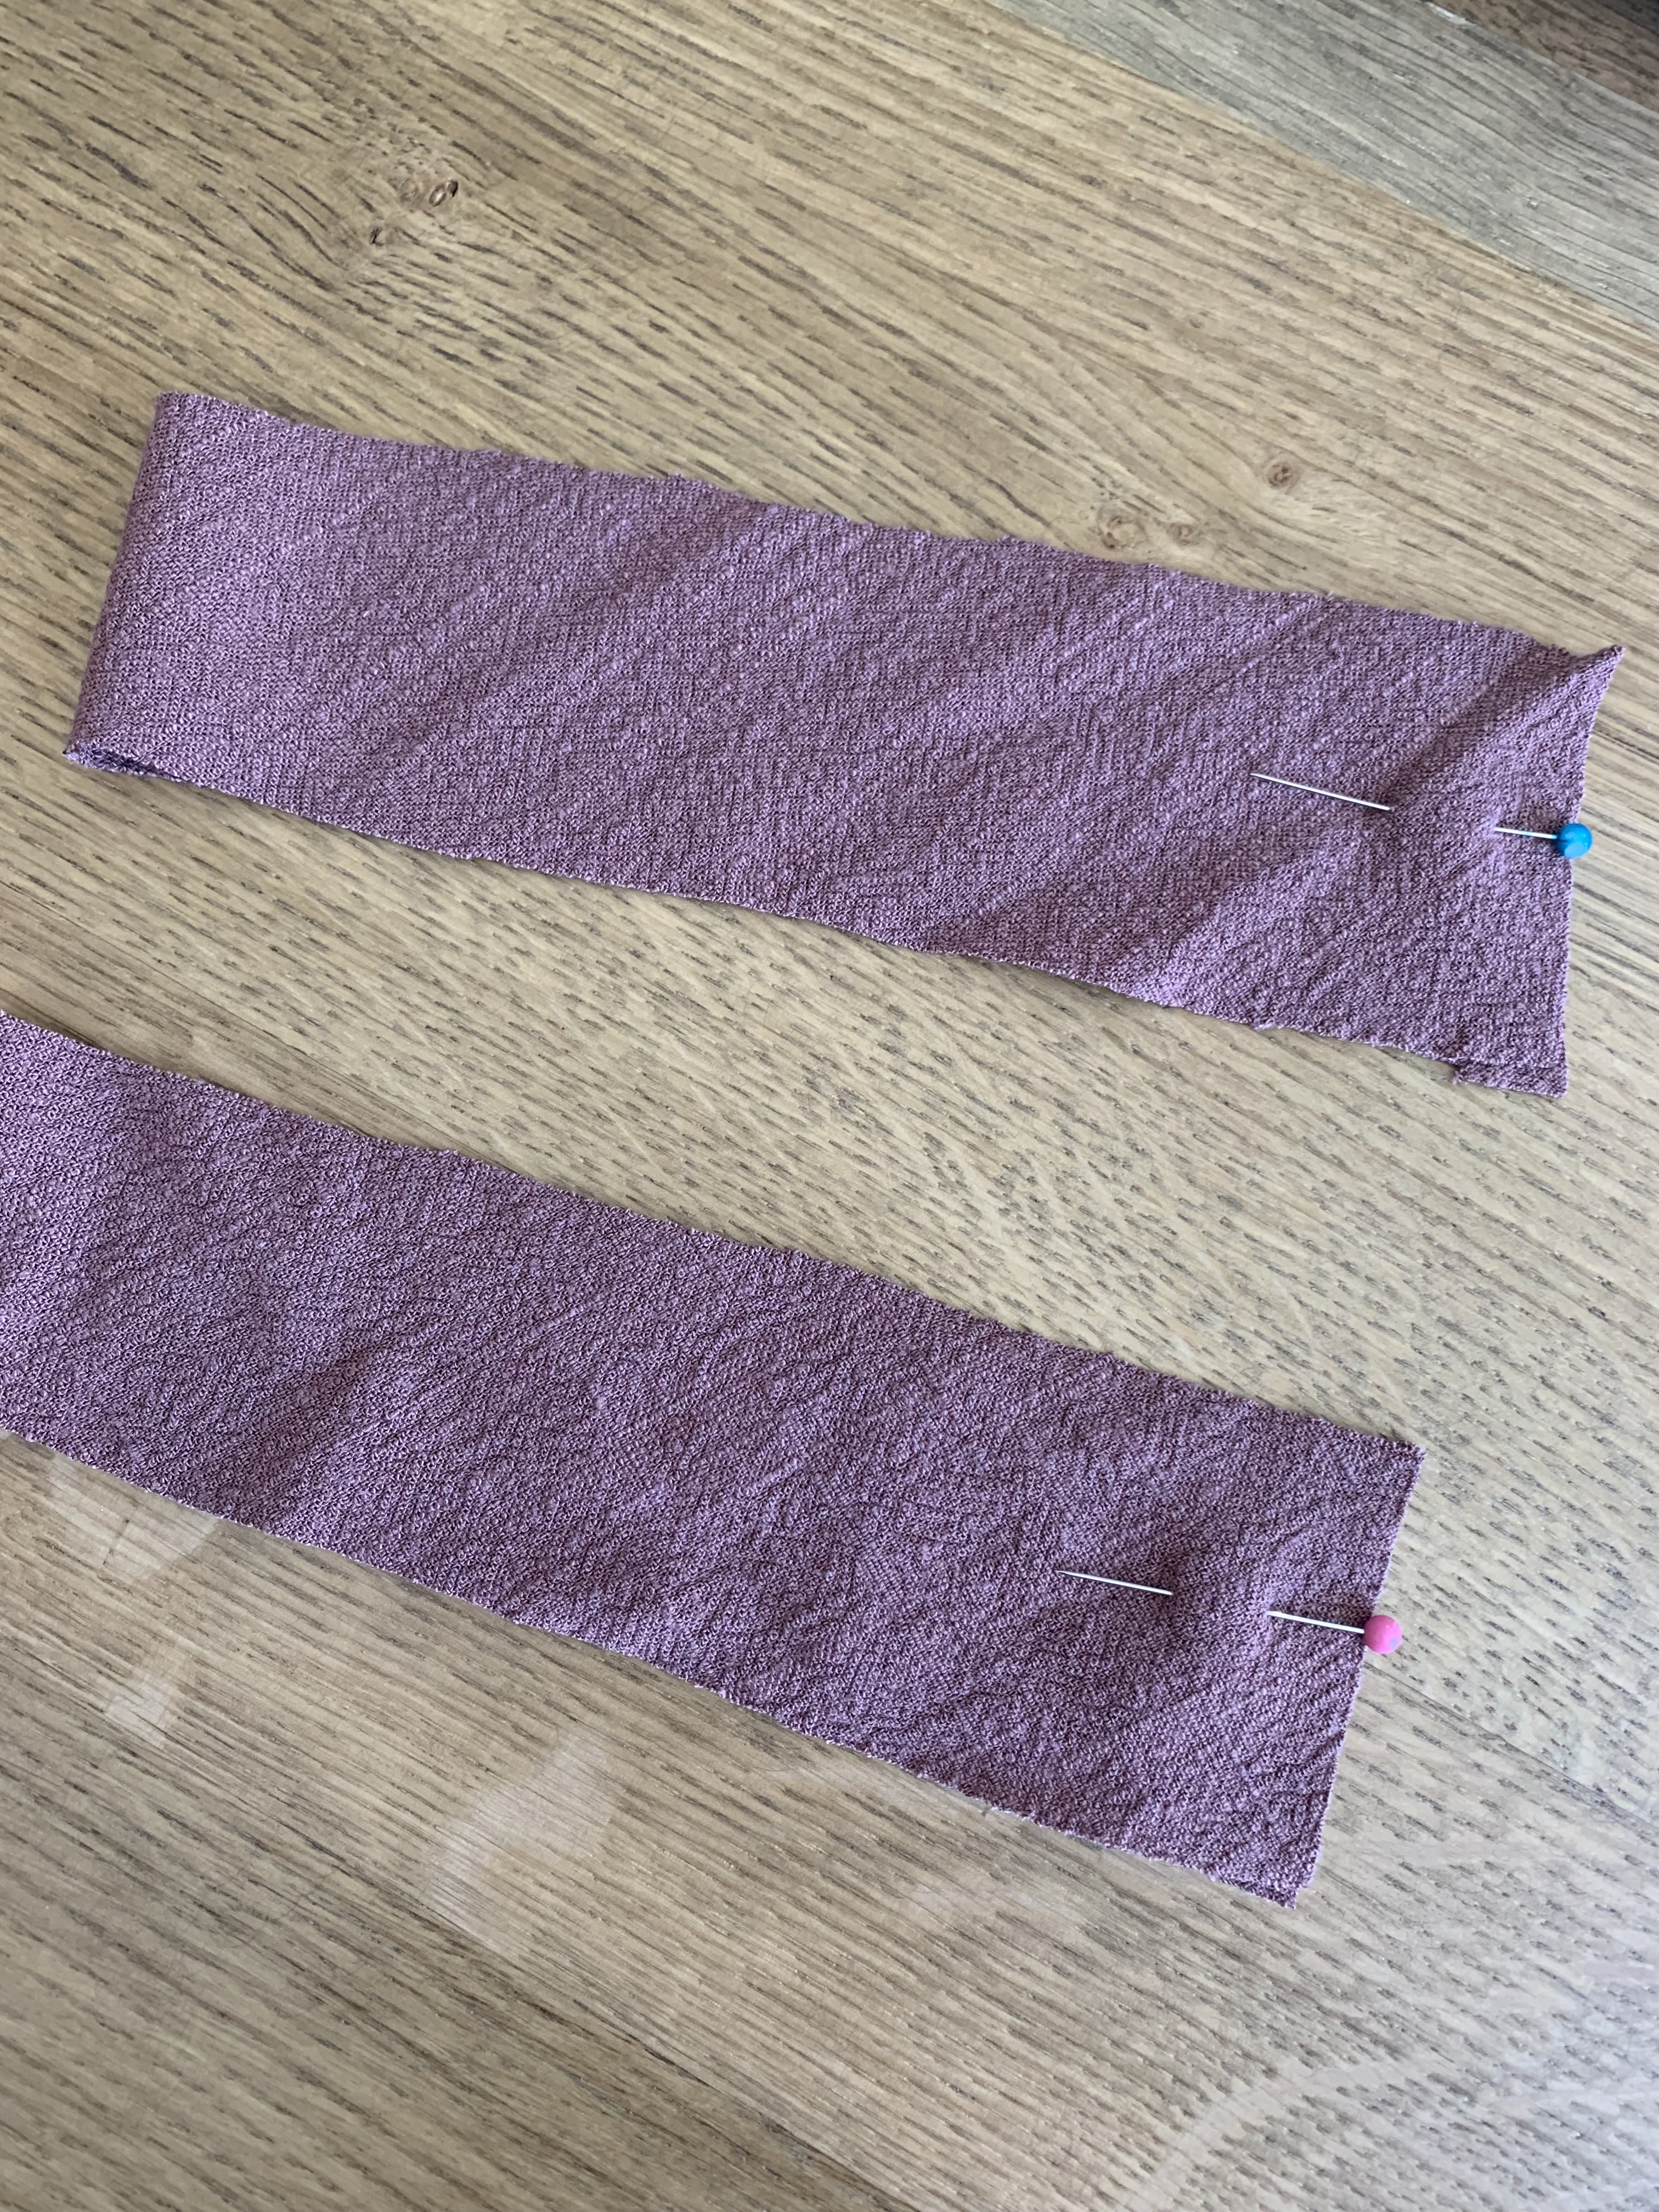
Step 8: Prep the sleeve binding by sewing the short edges right sides together, press open.
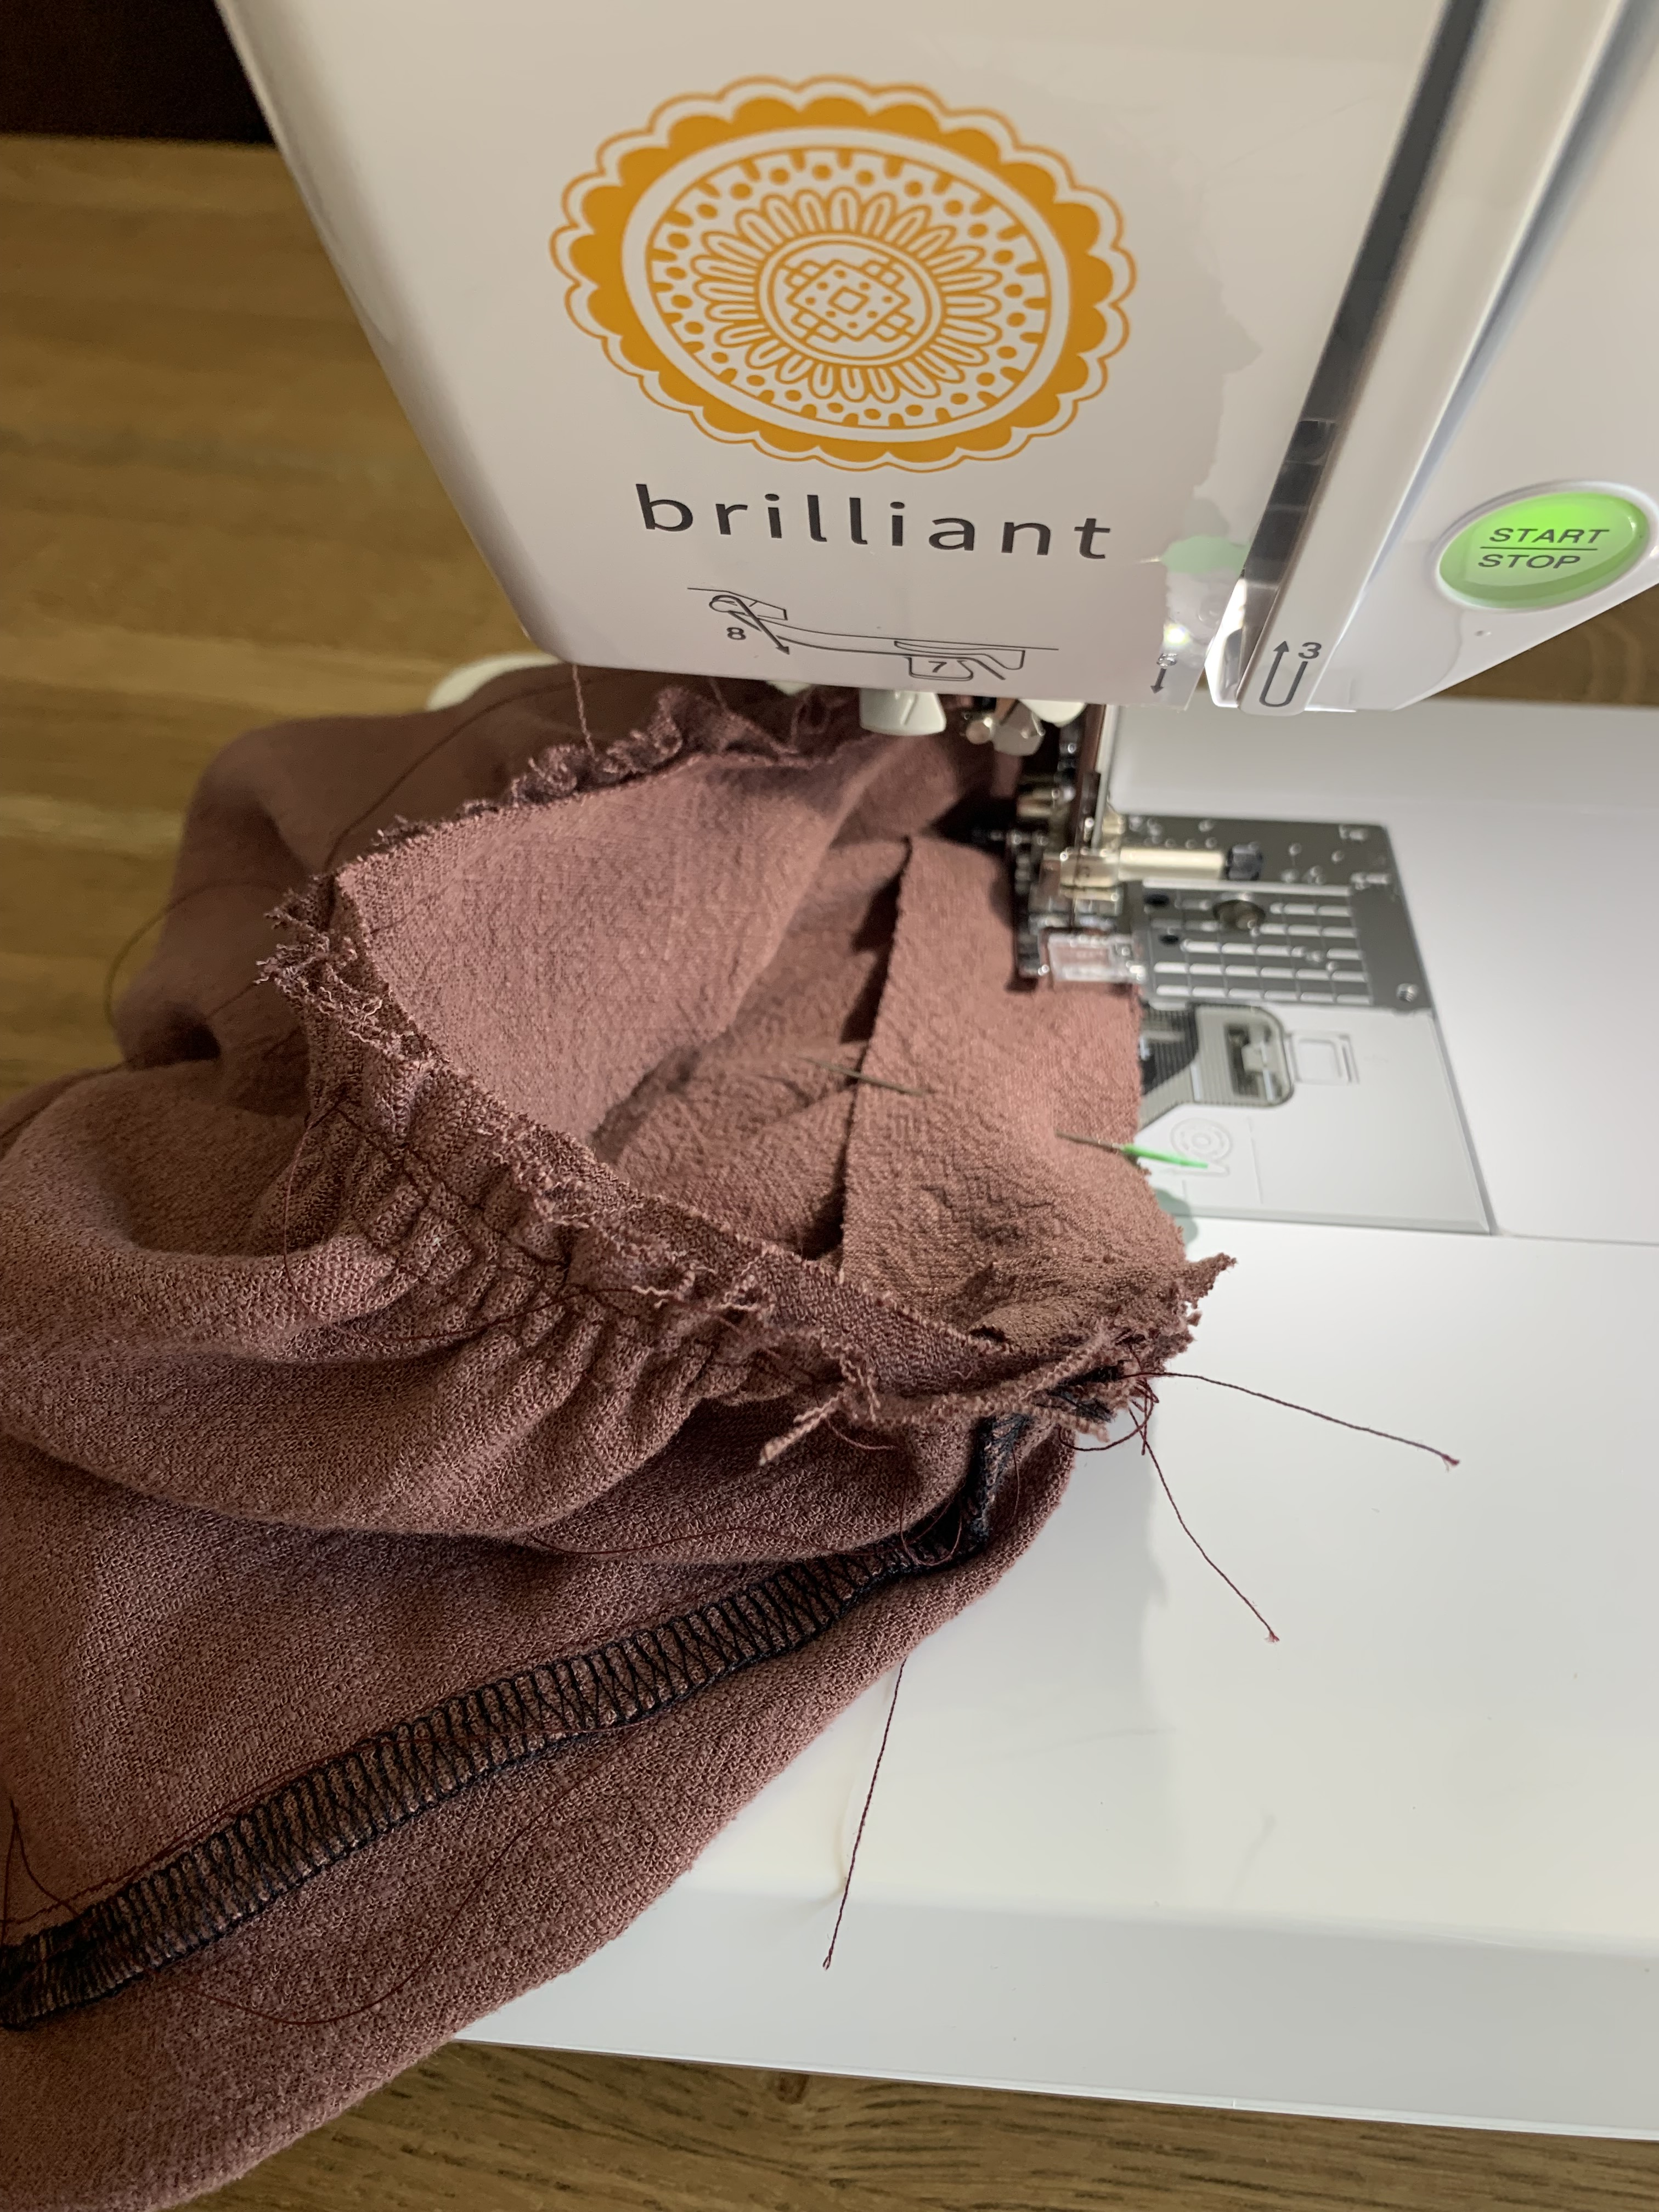
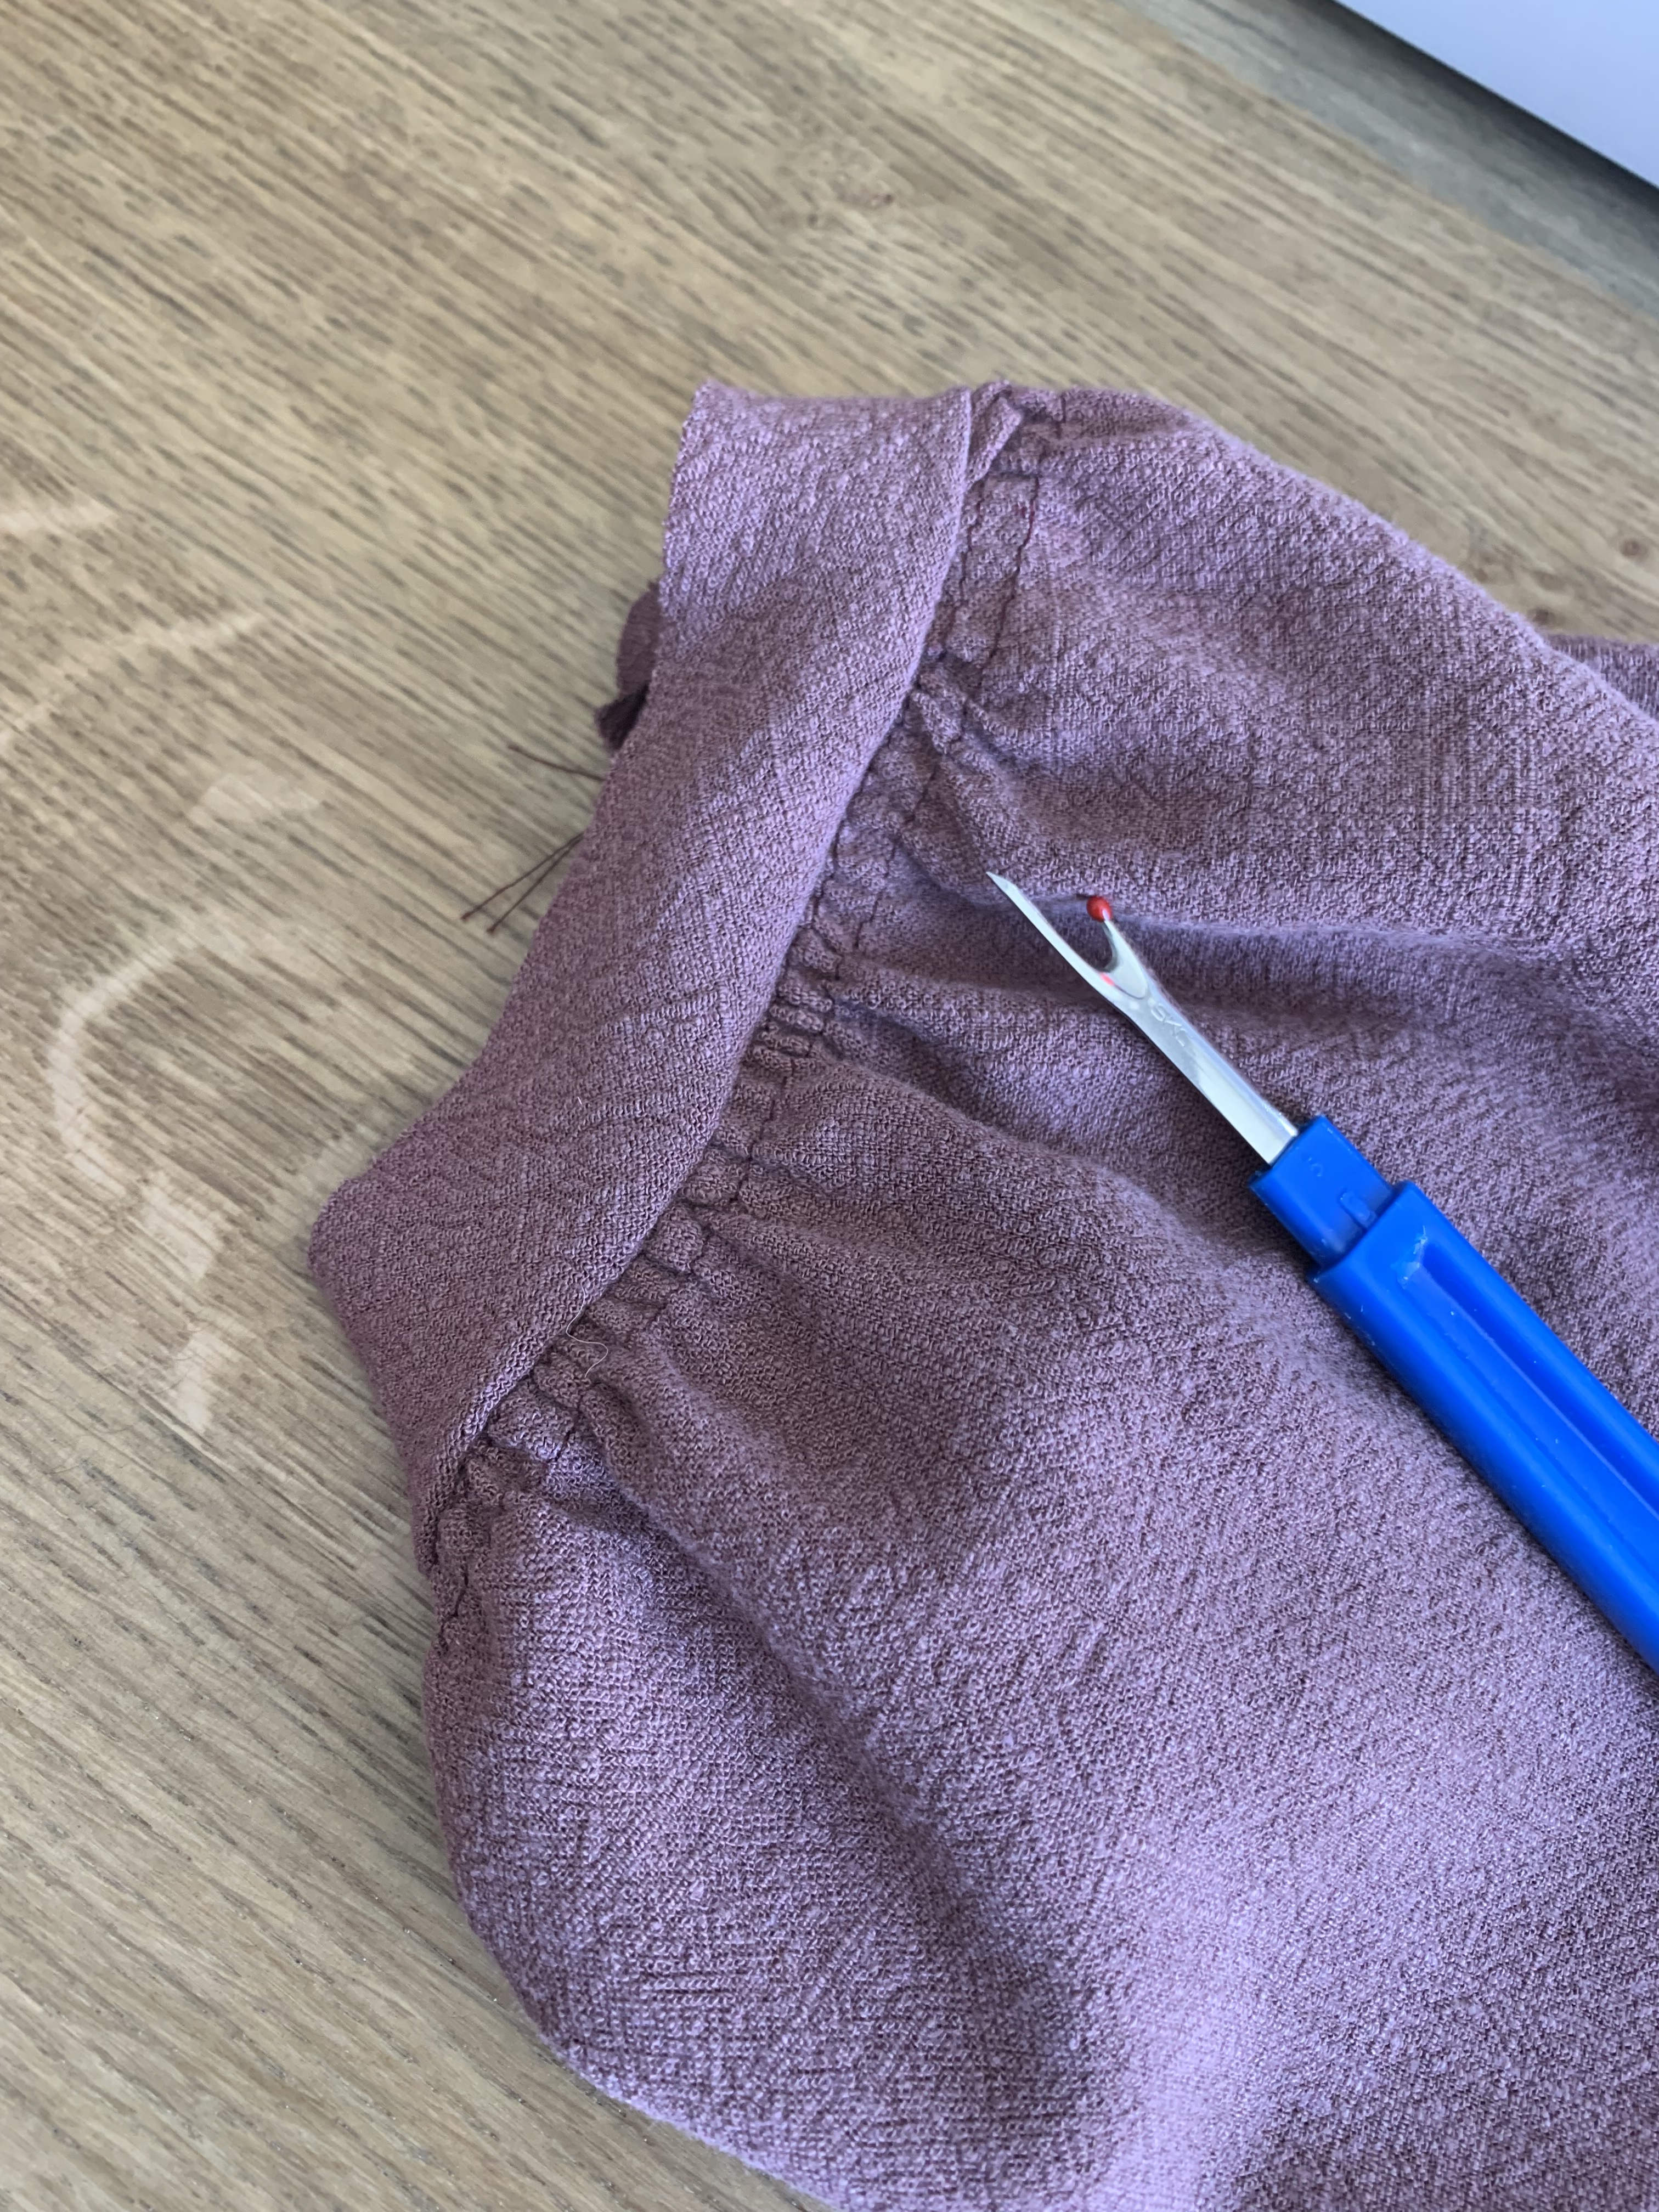
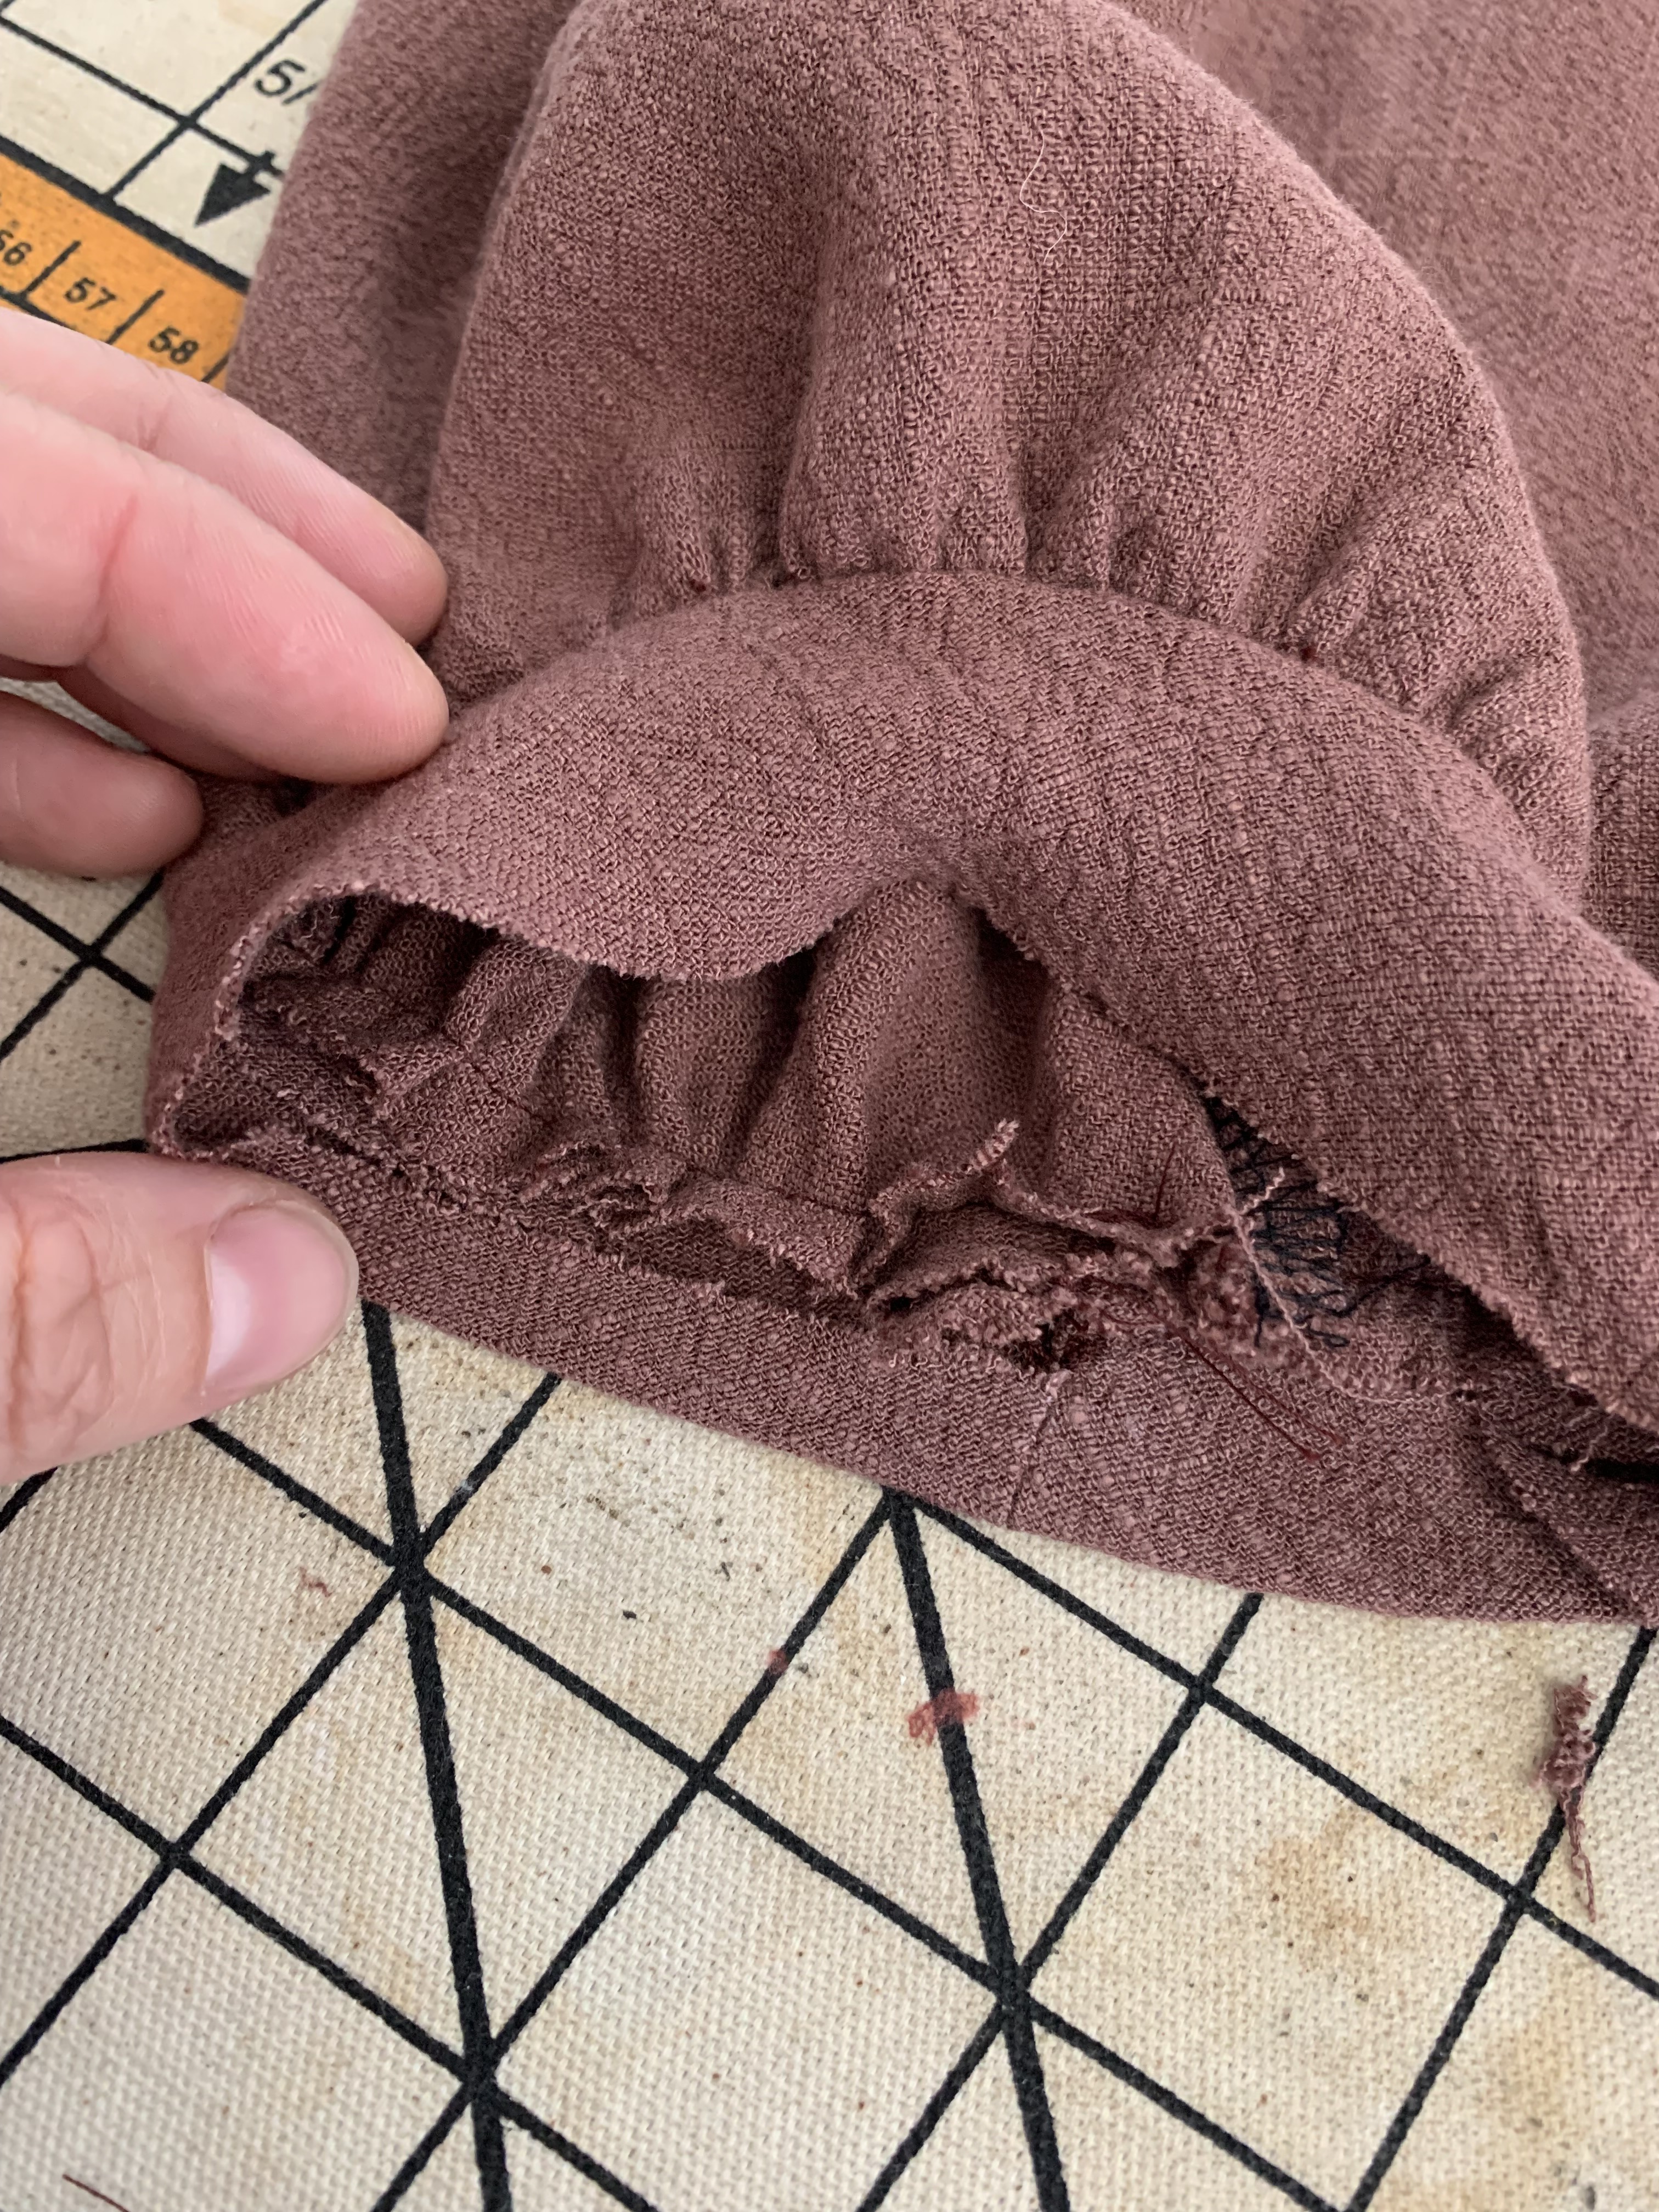
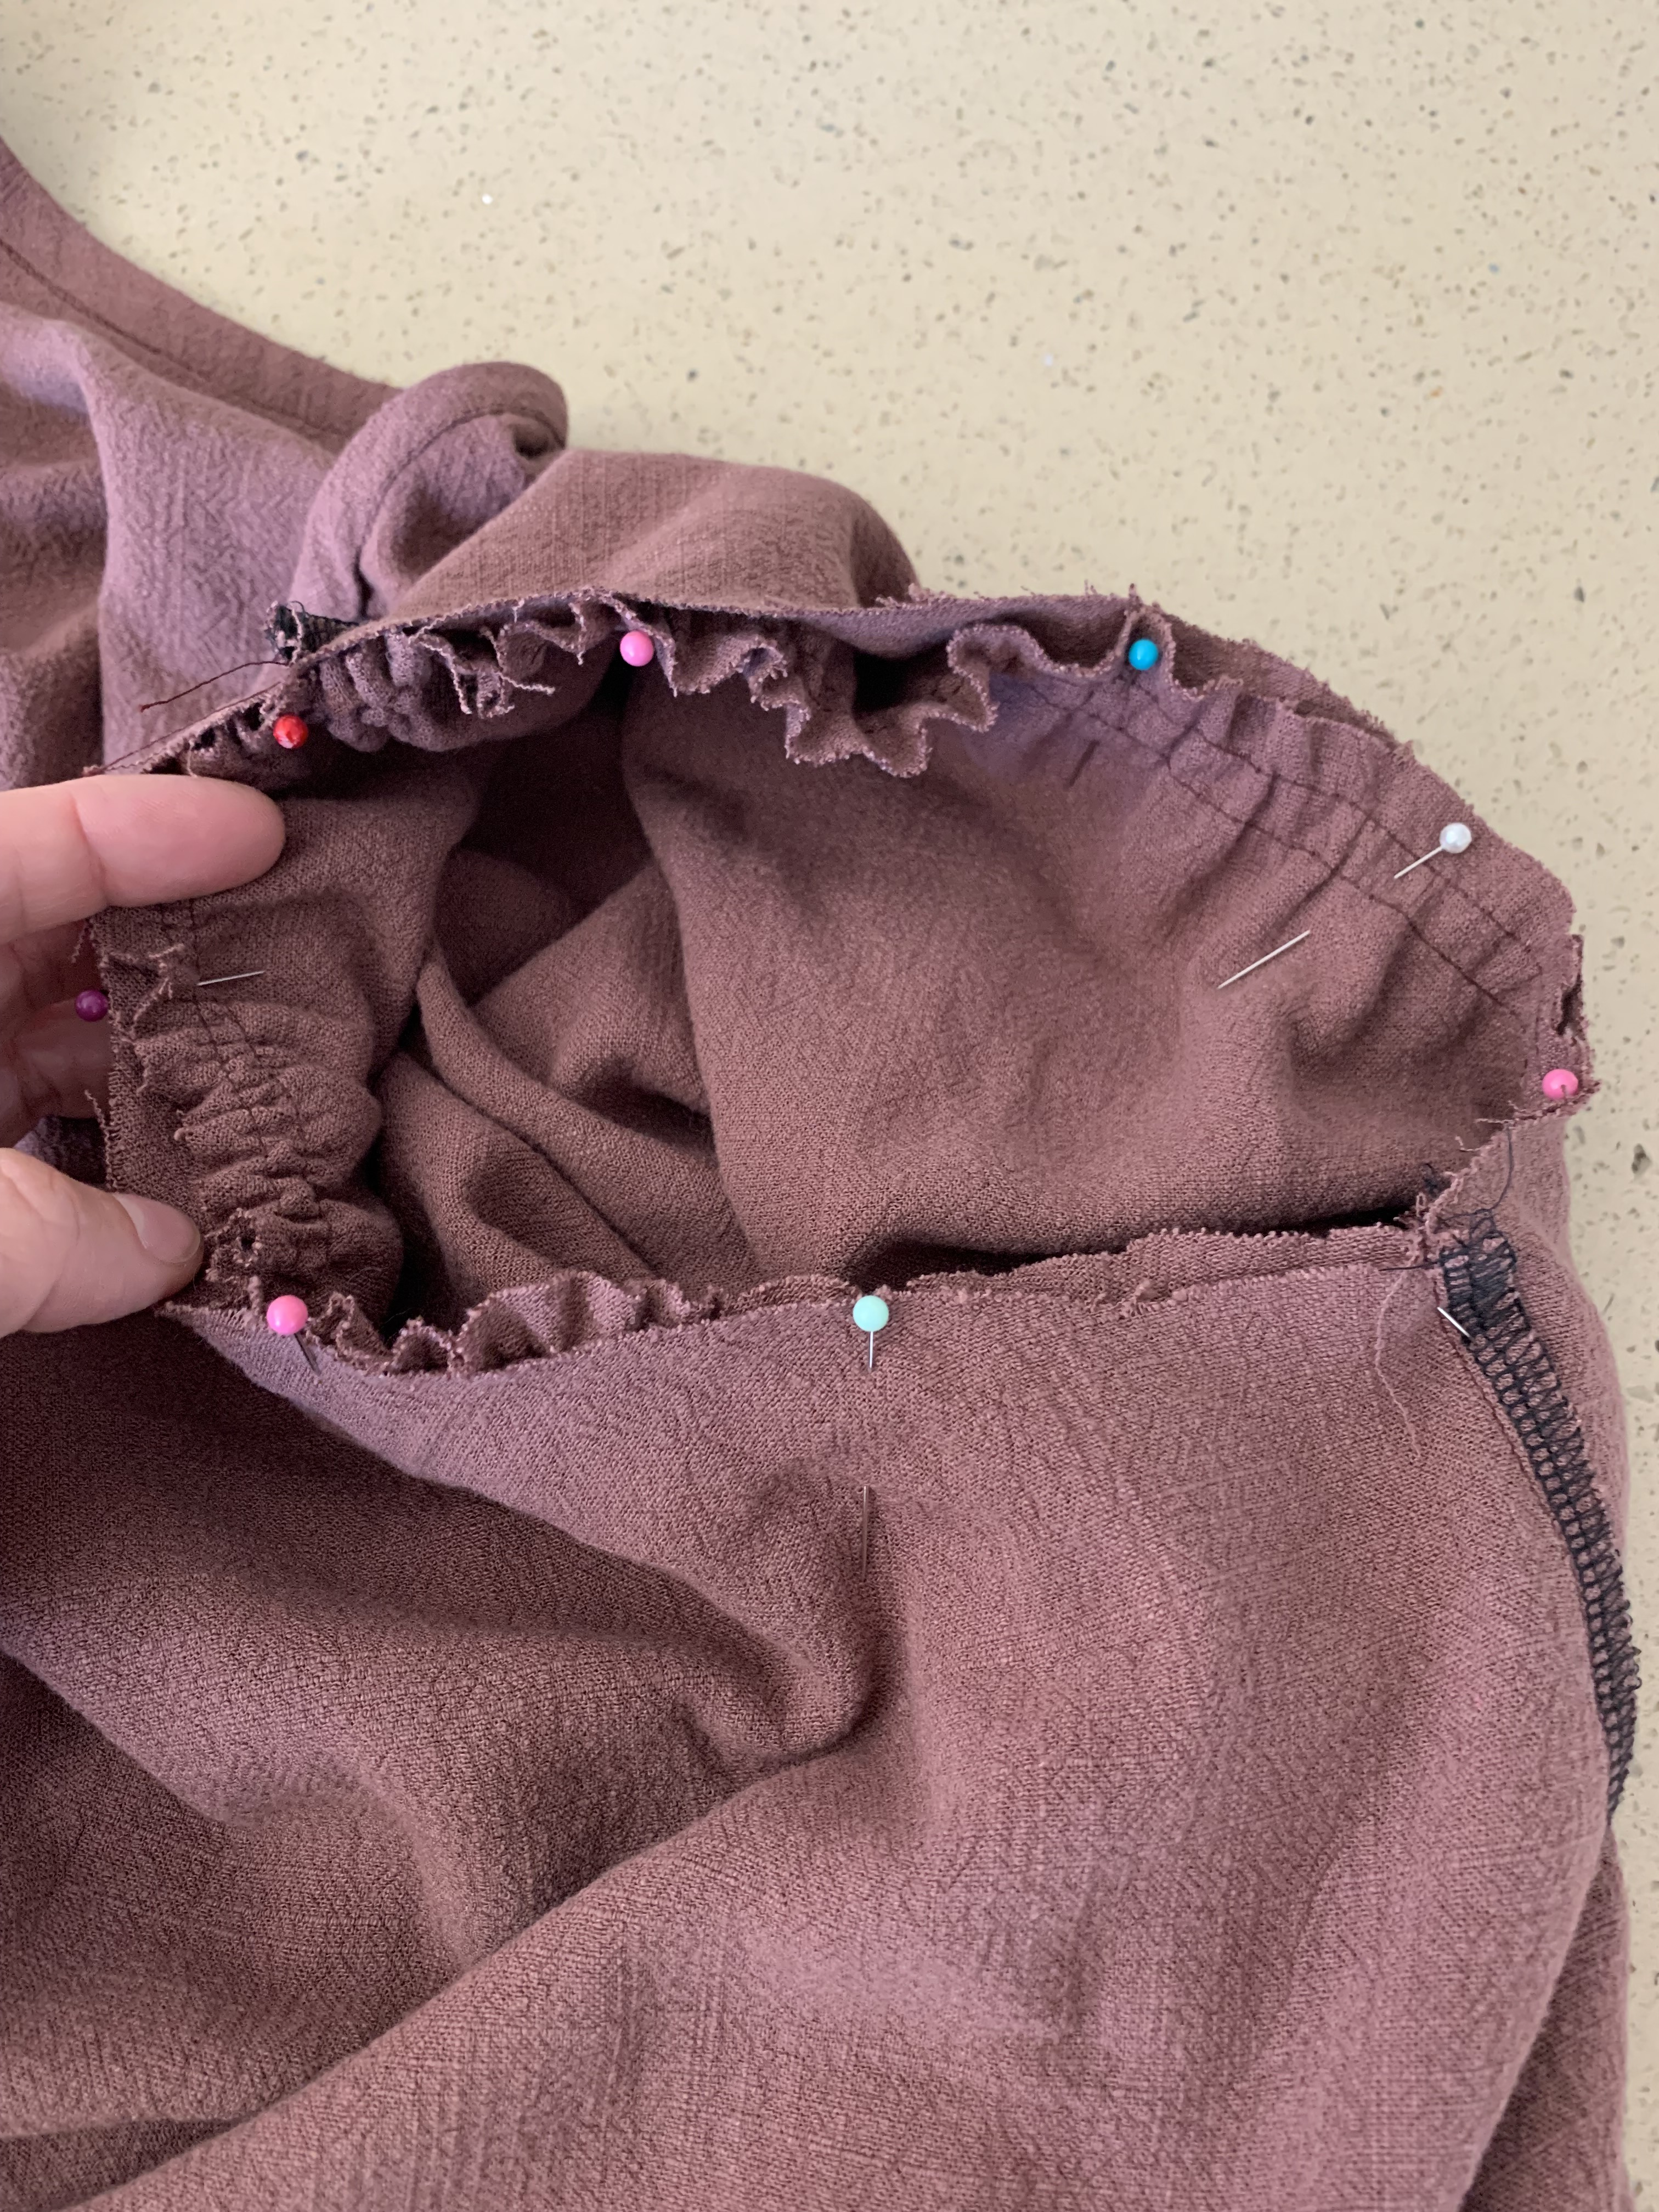
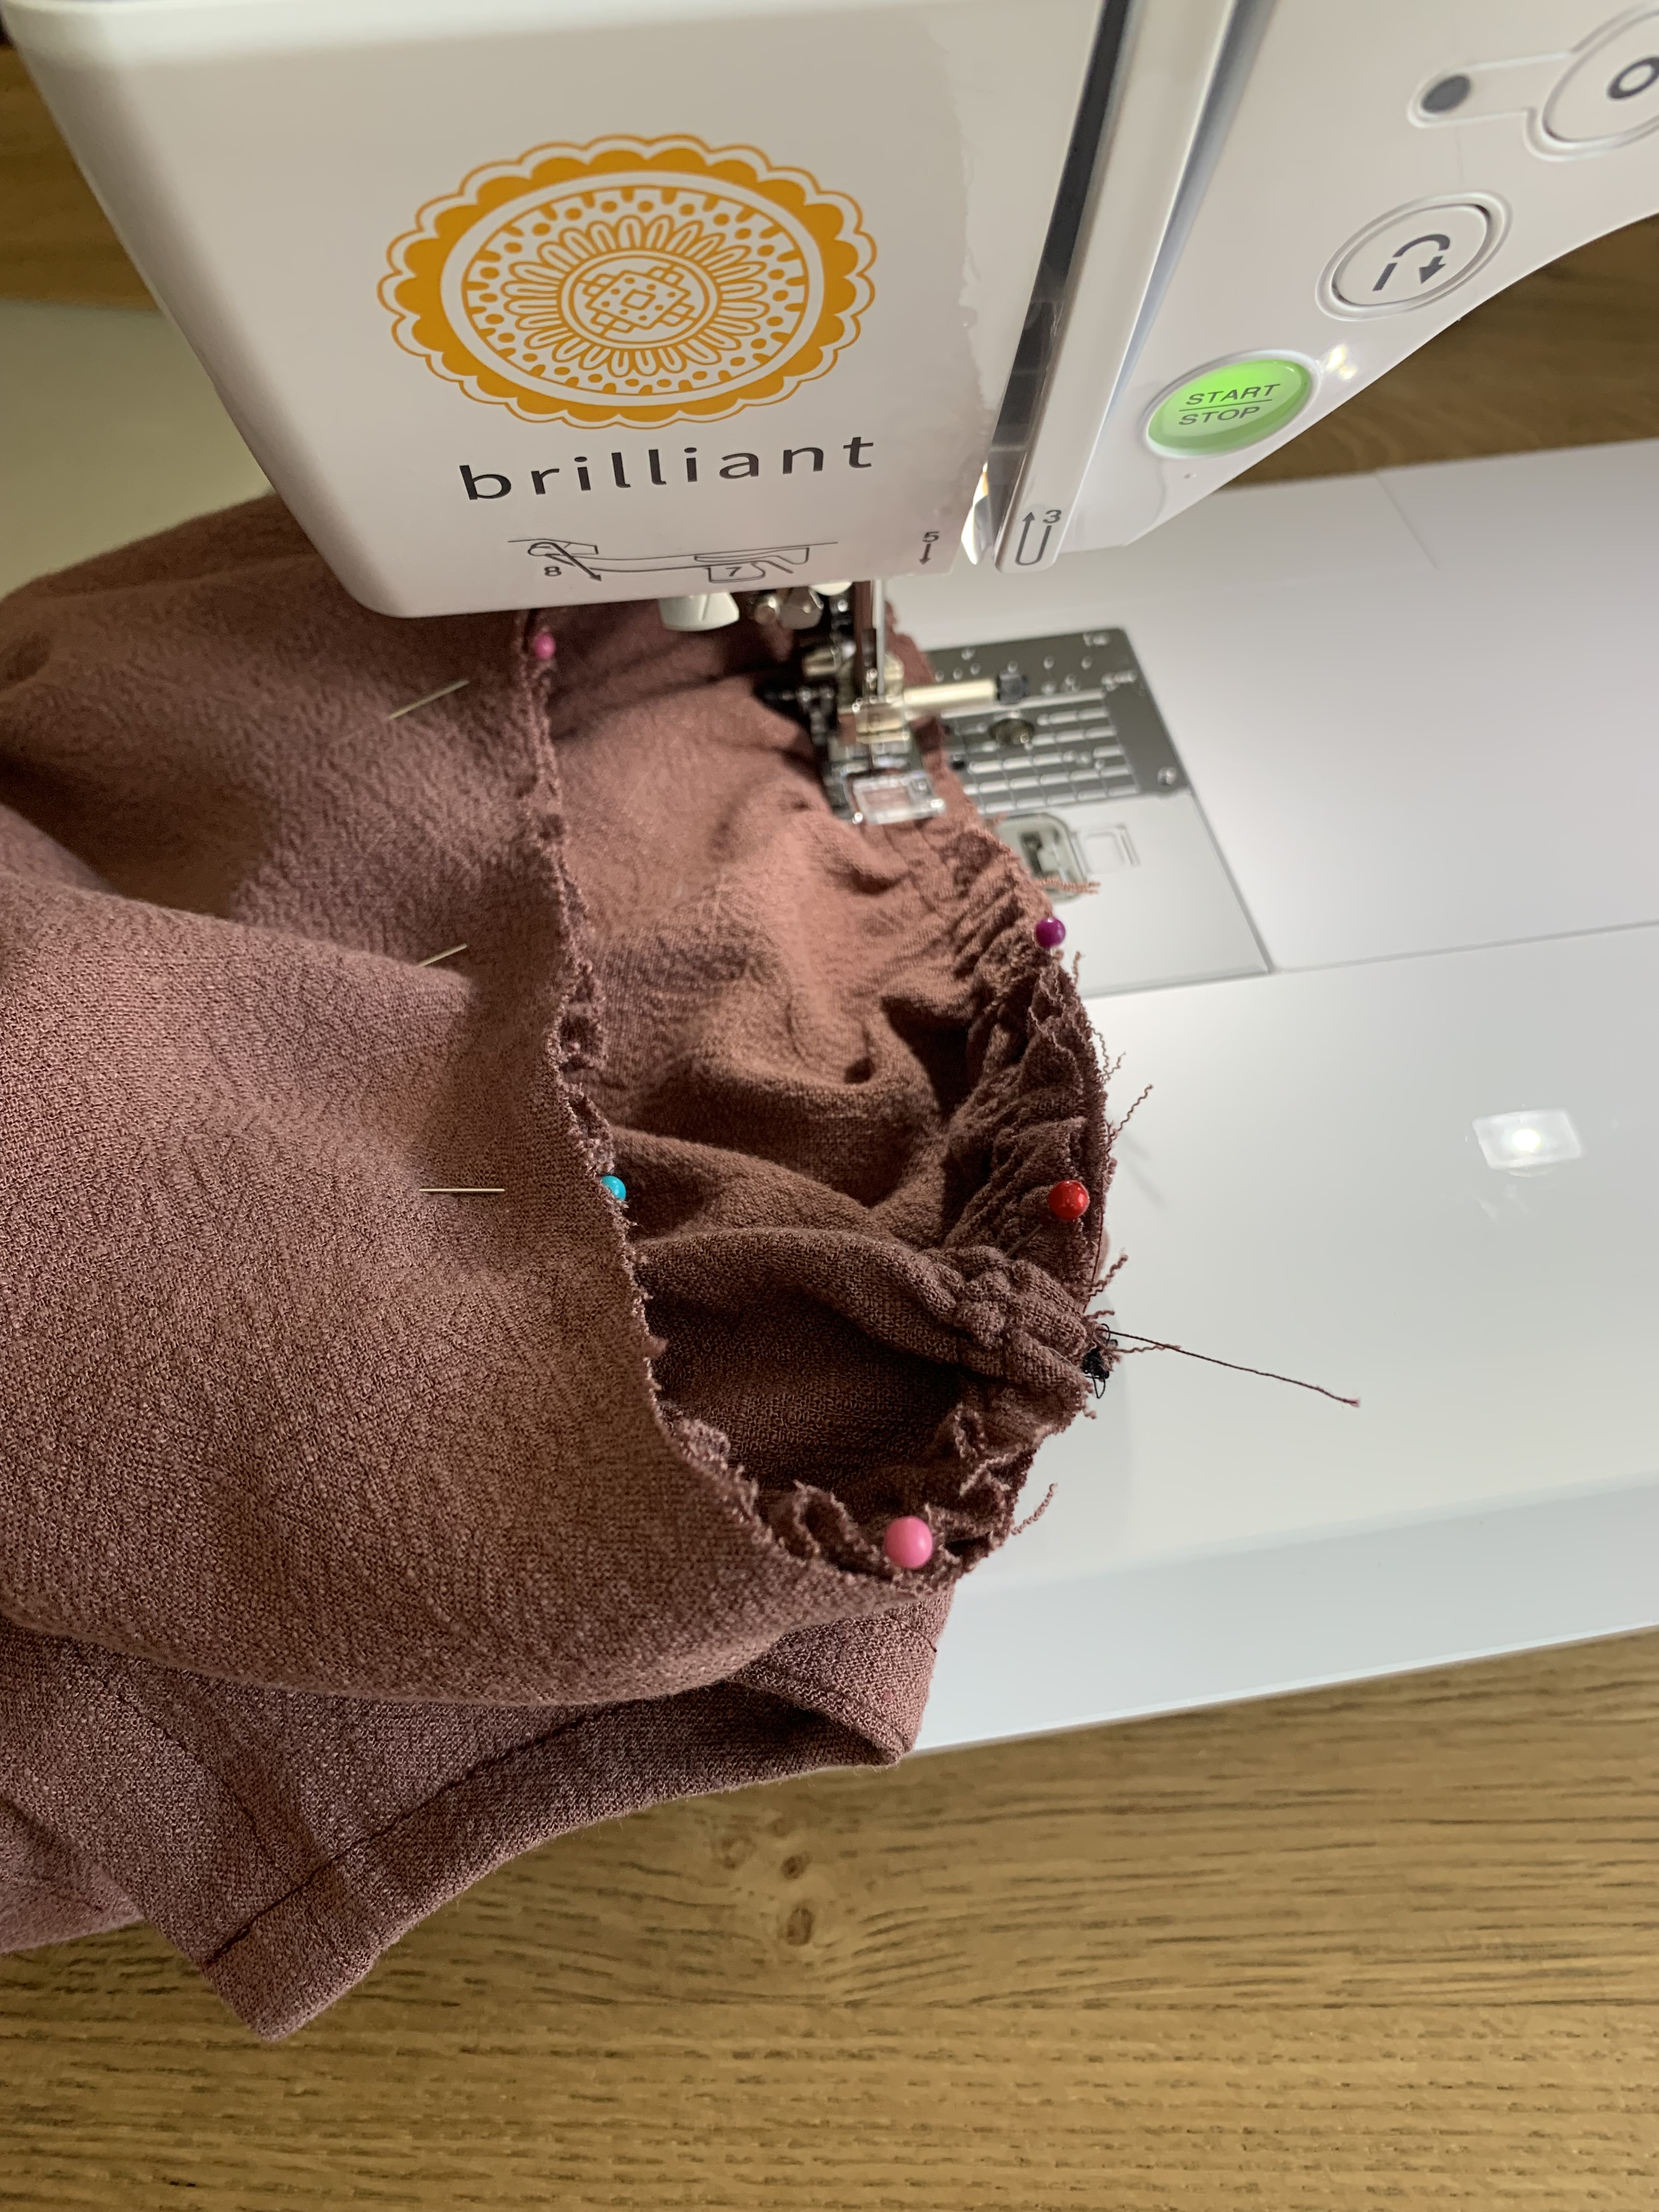
Step 9: Pin the sleeve binding to the bottom of the sleeve right sides together. I like to break it into 4ths and pin in place. Gently pull basting threads until bottom of sleeve fits into the sleeve binding. Distribute gathers evenly, pin and sew at 3/8″. Remove basting stitches that show on the right side. Fold and press the binding over twice to the inside of the sleeve and pin in place. Sew along the edge to secure. Remove basting threads that show on the right side, and give it a really good press.

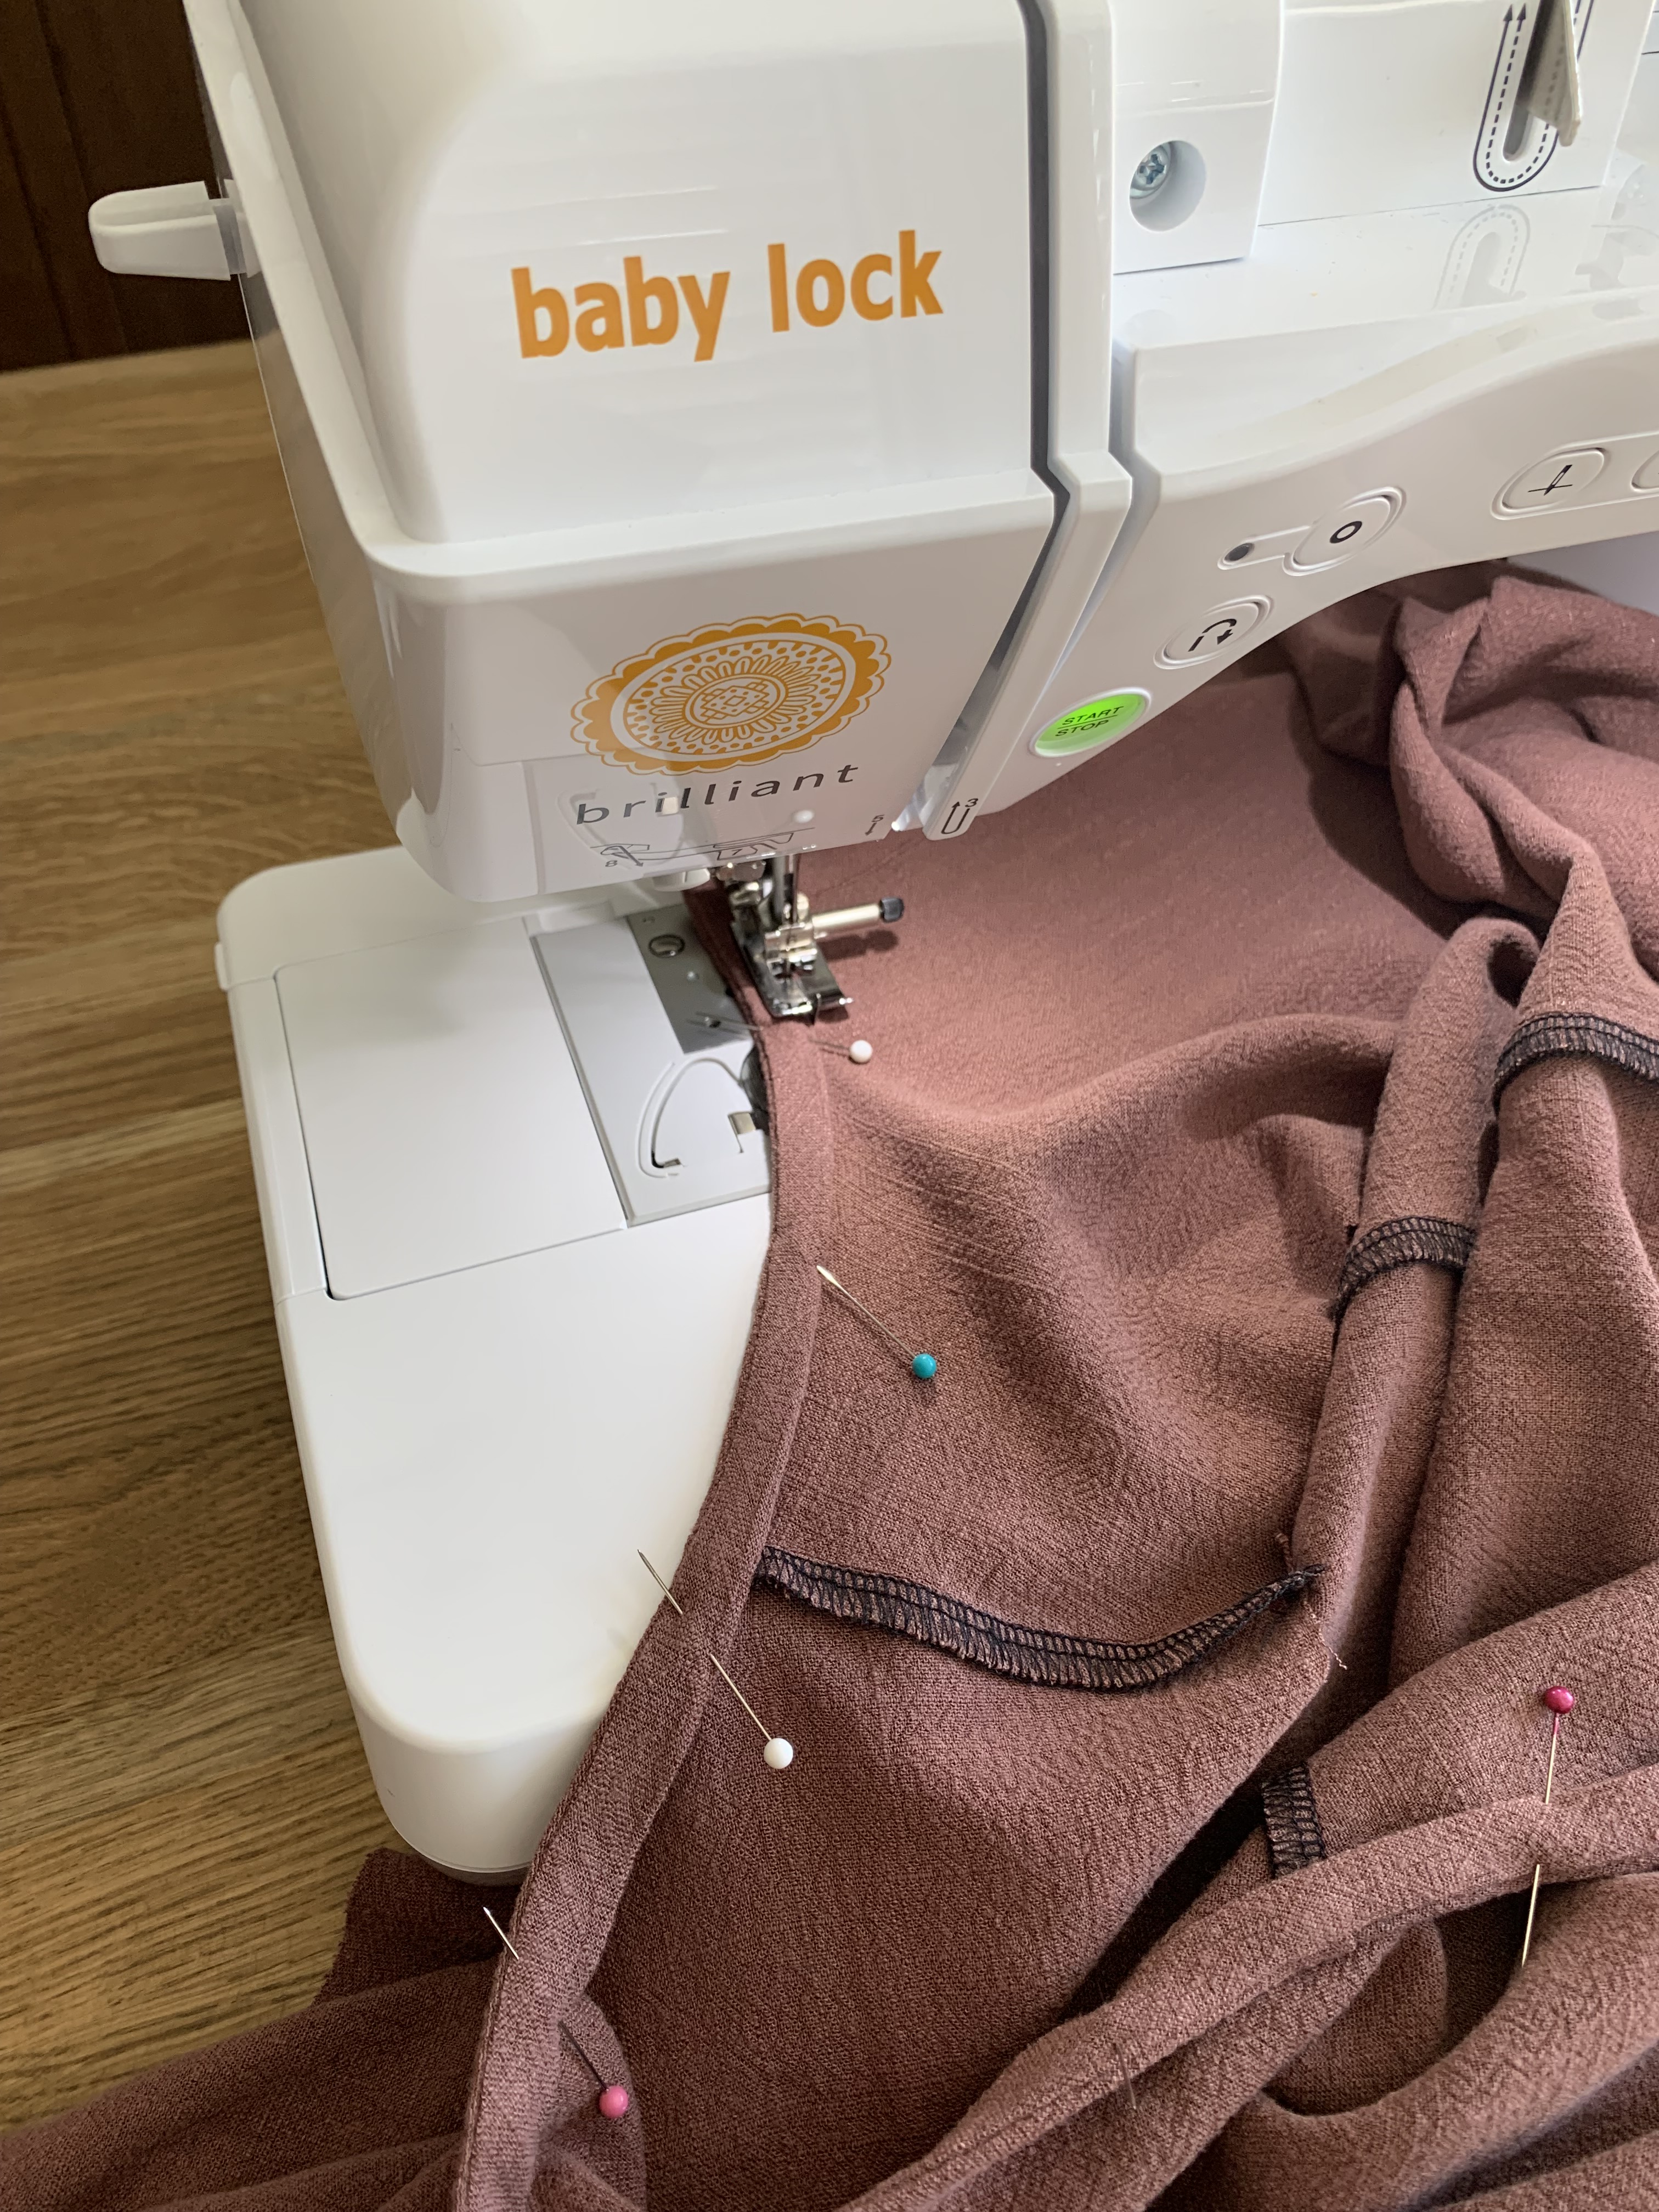
Step 10: Insert the sleeve into the armhole right sides together, matching center notches and seam lines. Gently pull basting threads until sleeve fits in place, and evenly distribute gathers. Sew at 1/2″. Finish as desired.
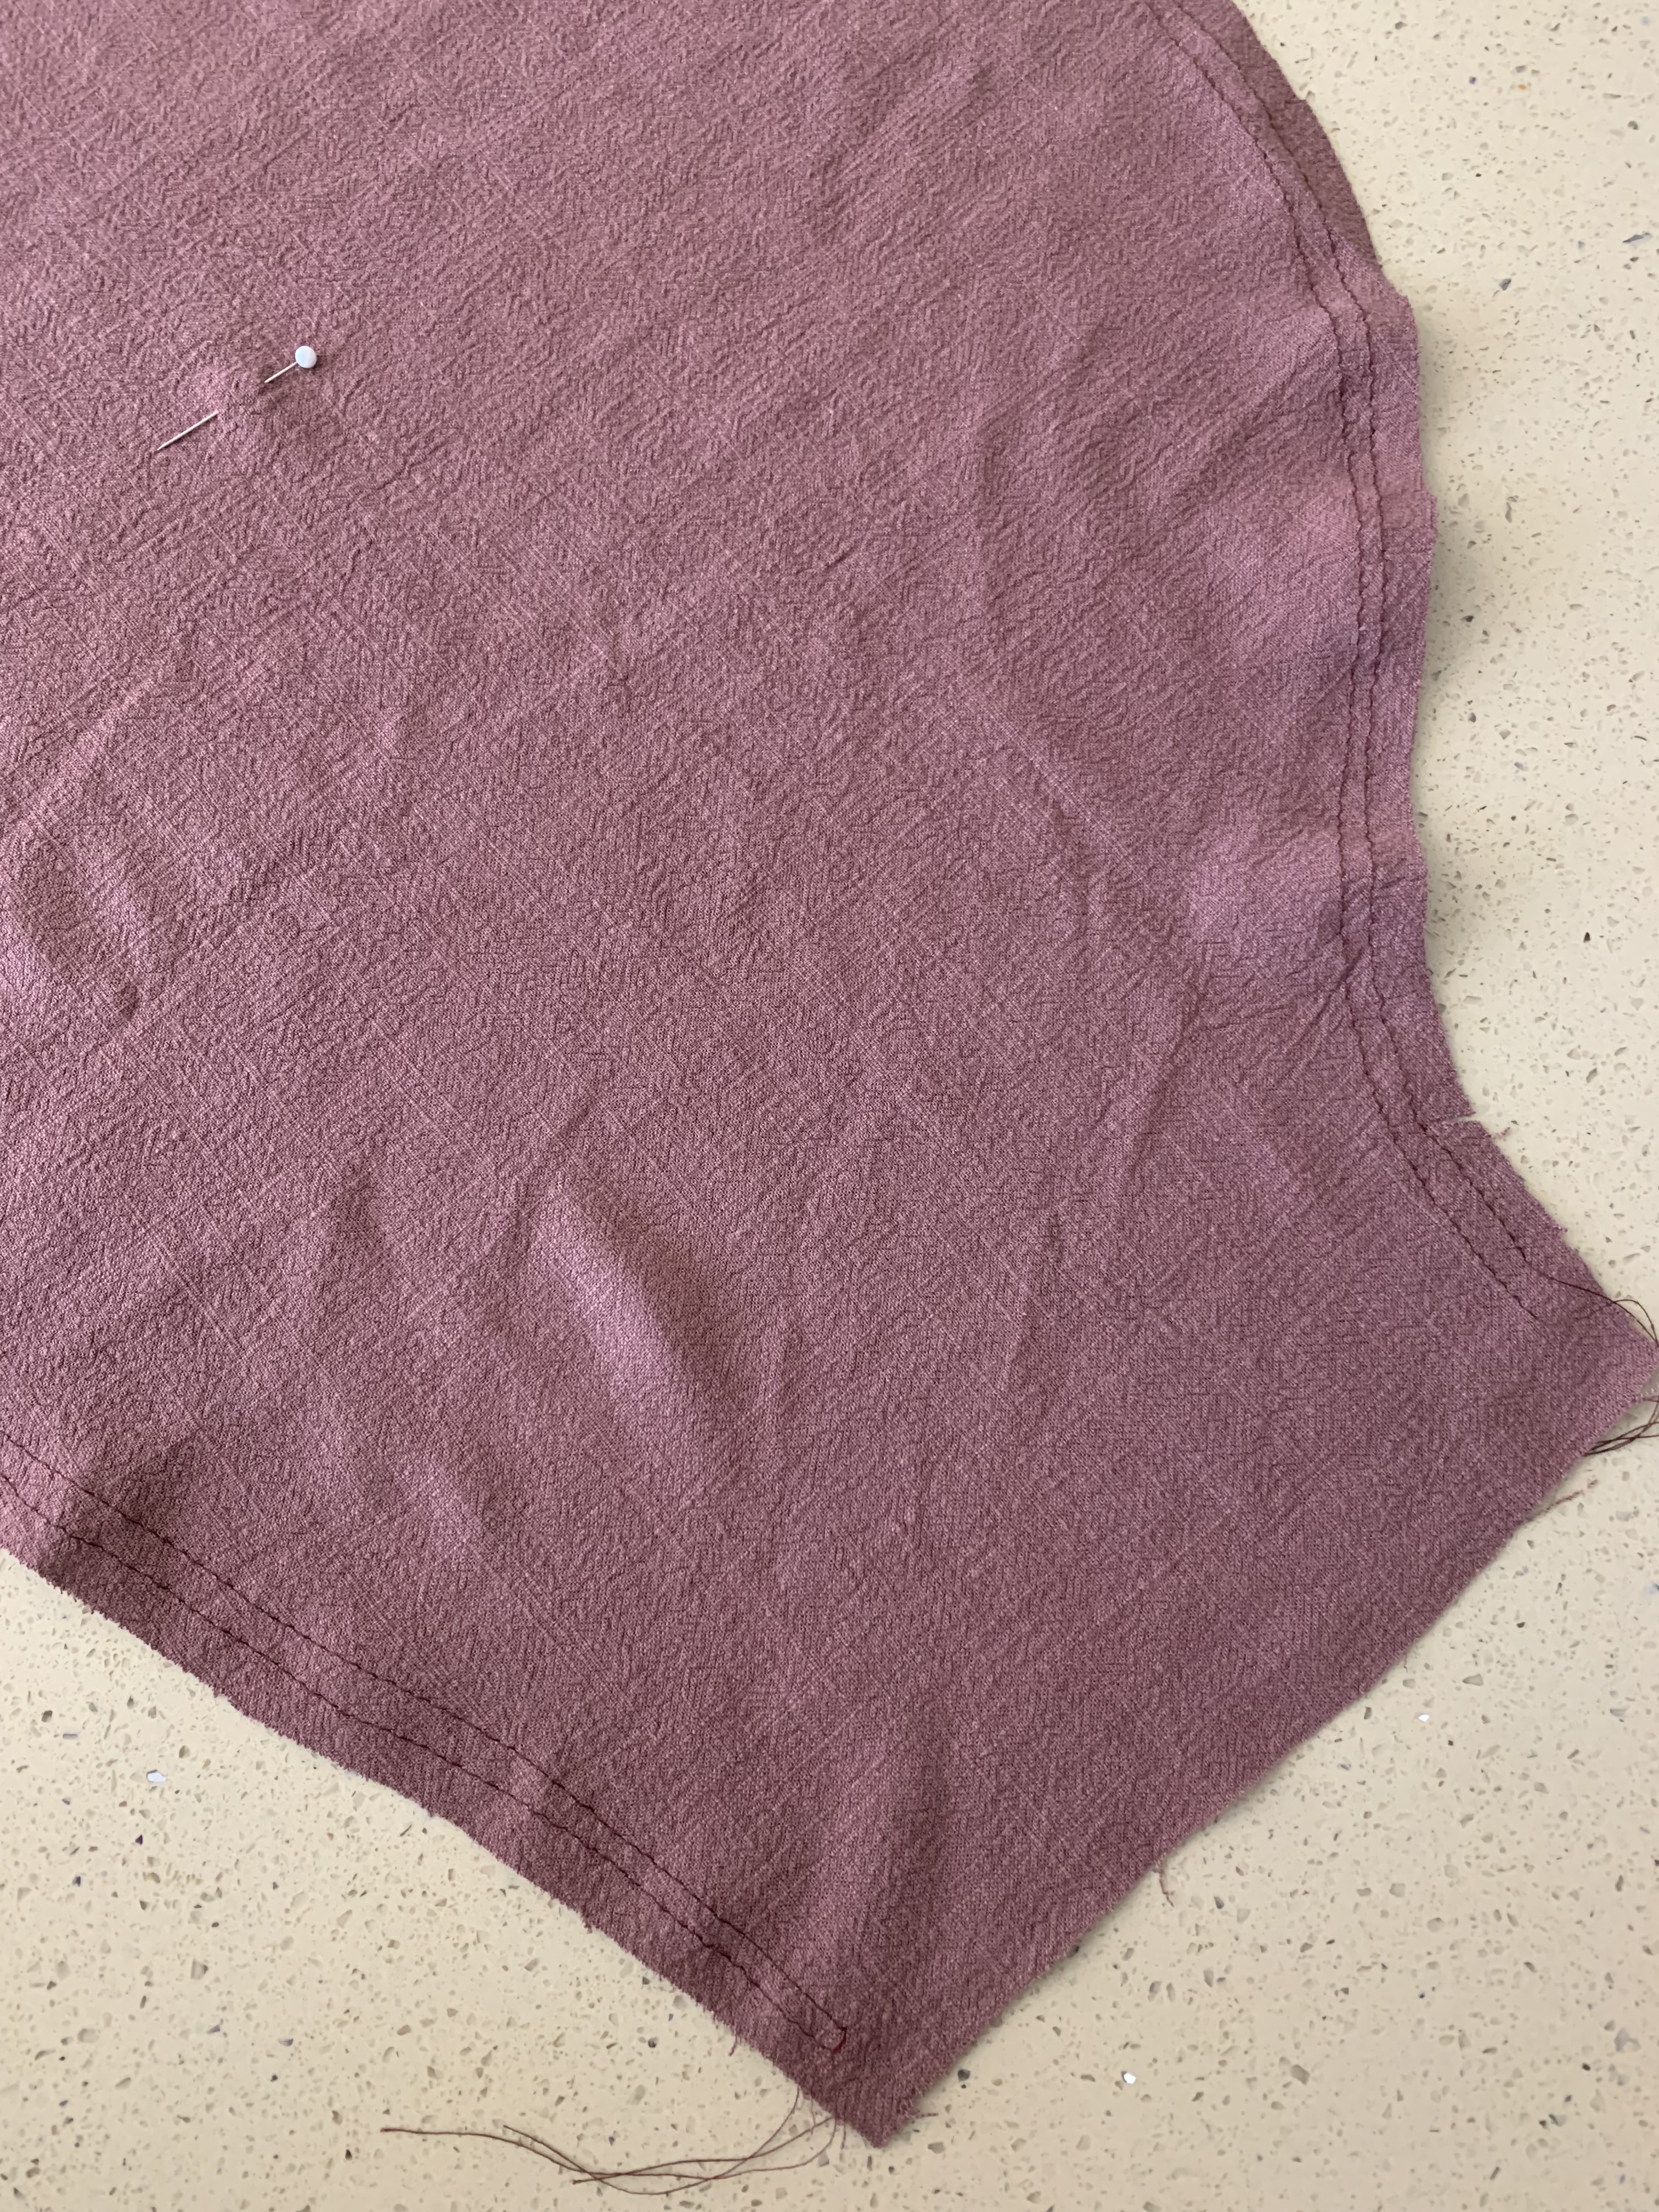
Step 11: Hem the bottom of your shirt by folding and pressing the bottom edge to the wrong side at 1/4″ and then another 3/8″ again. Pin in place and sew along the edge to secure in place.
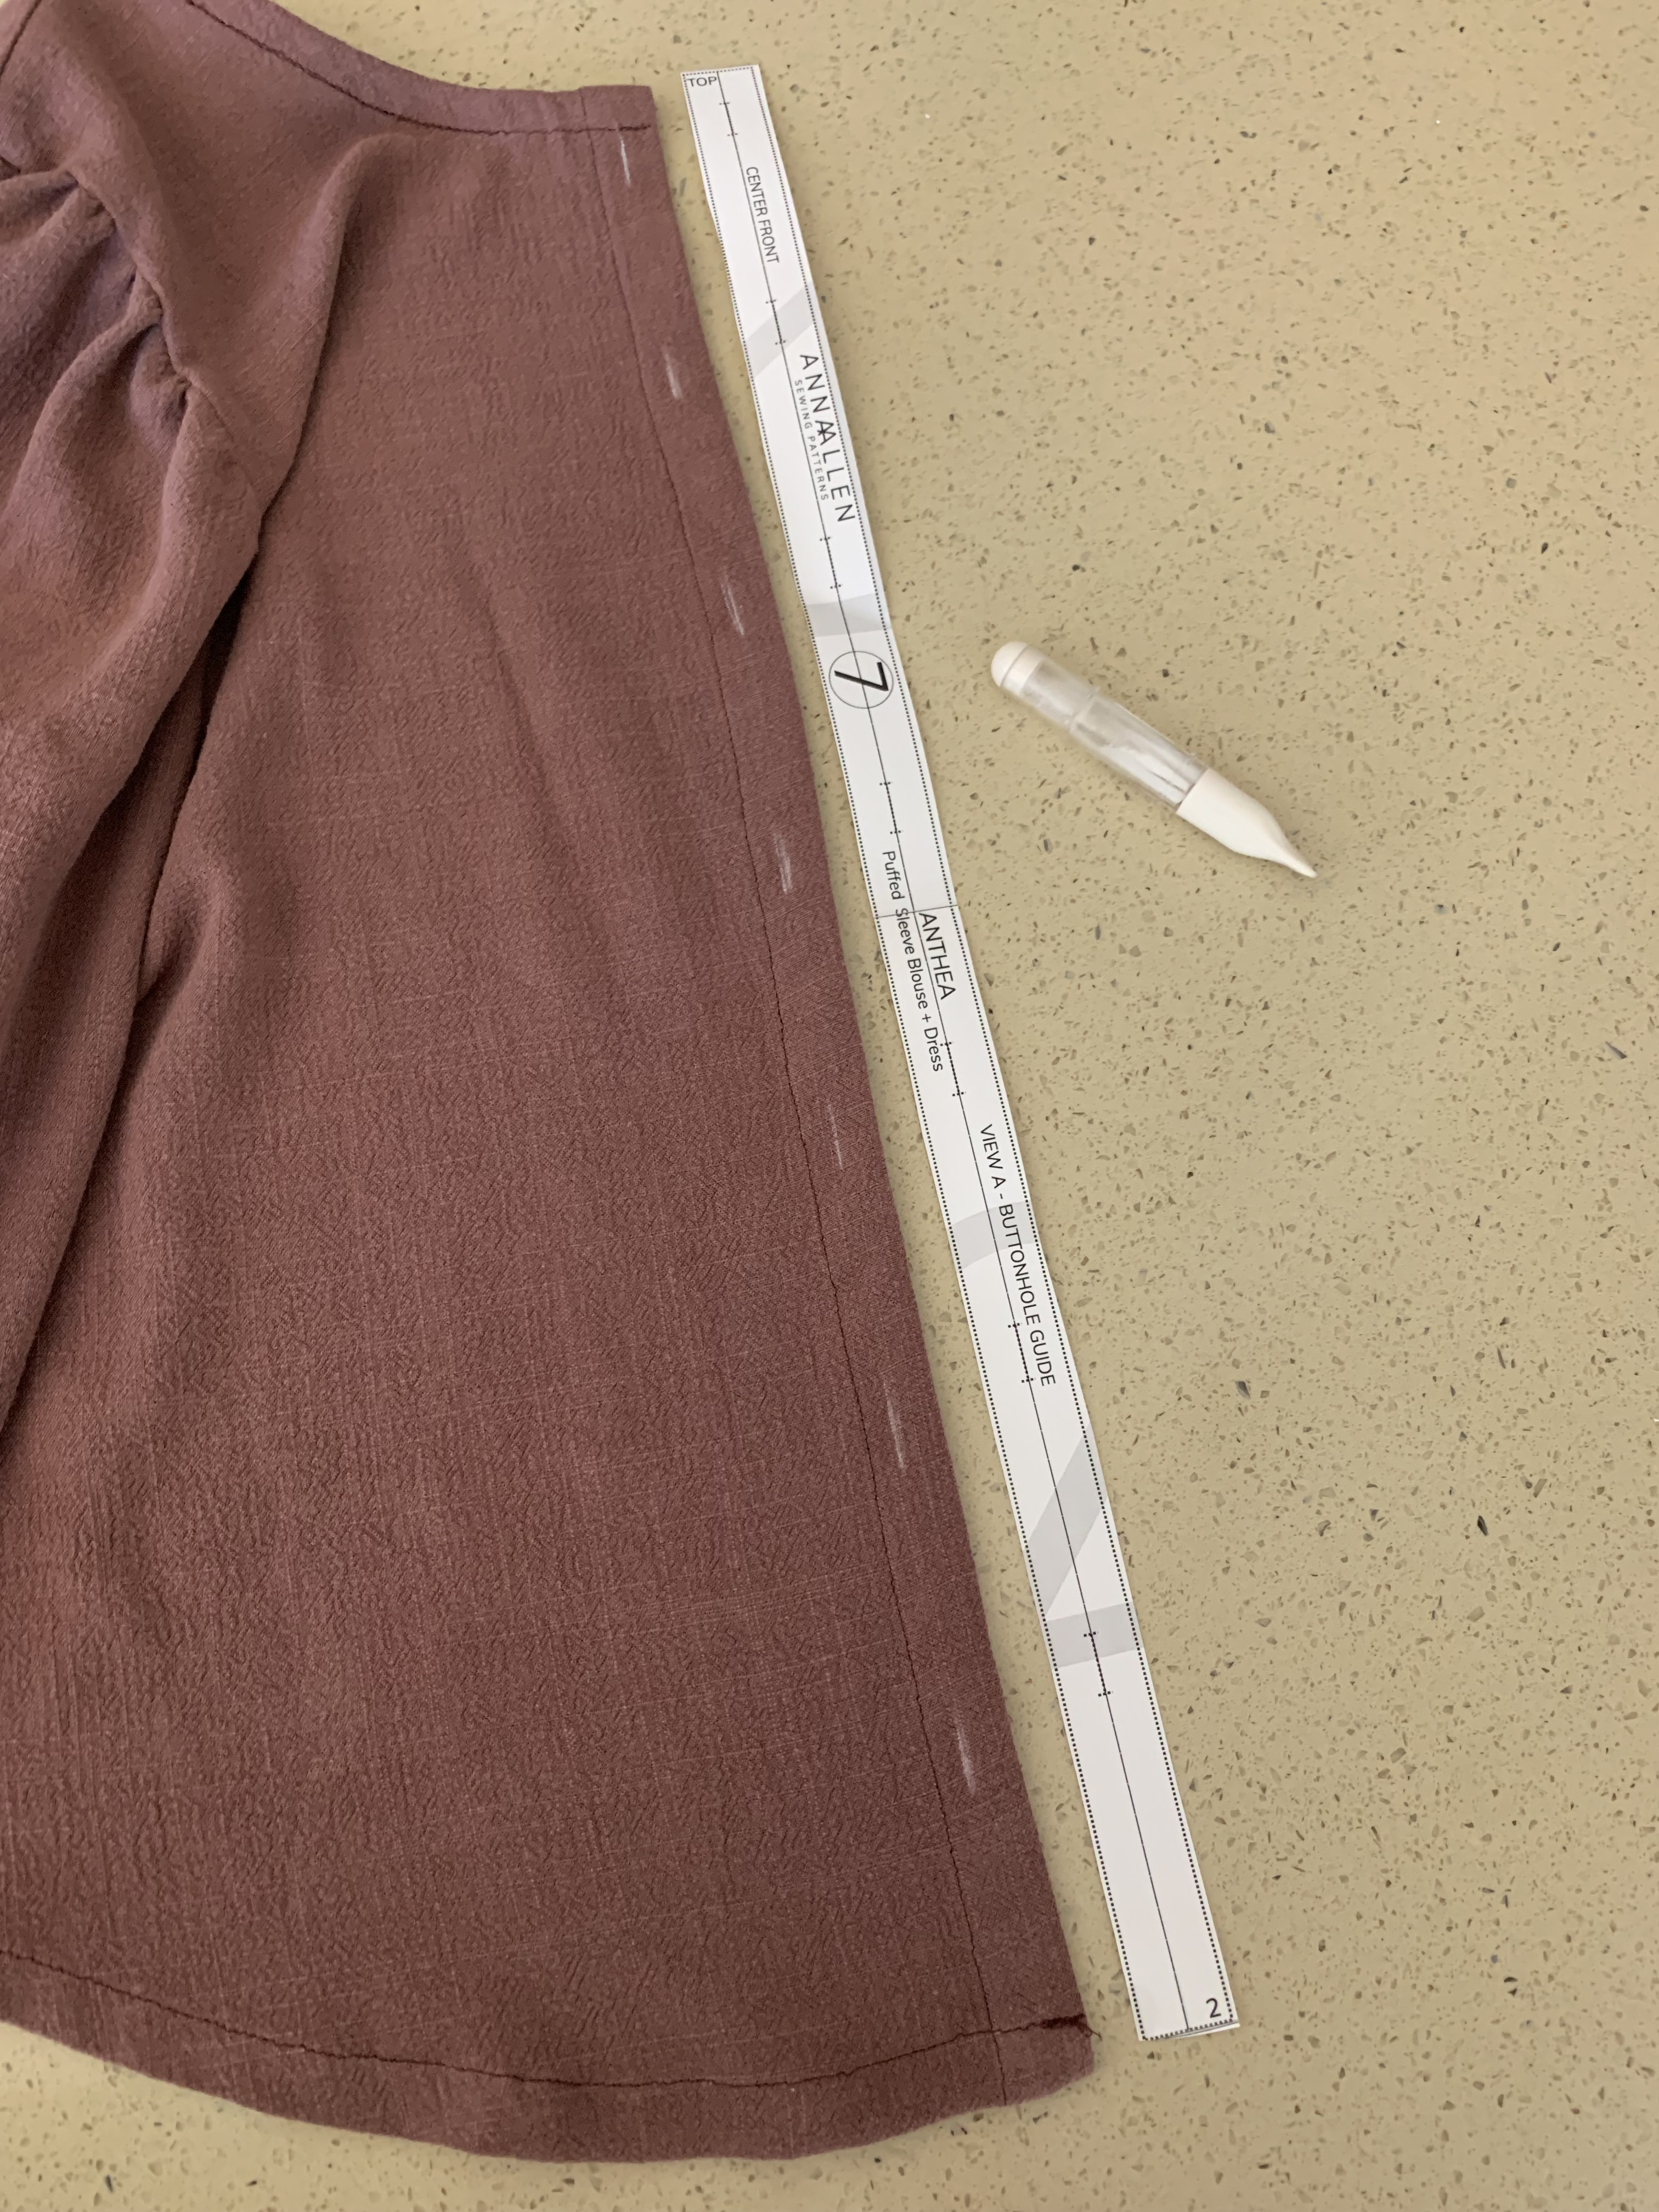
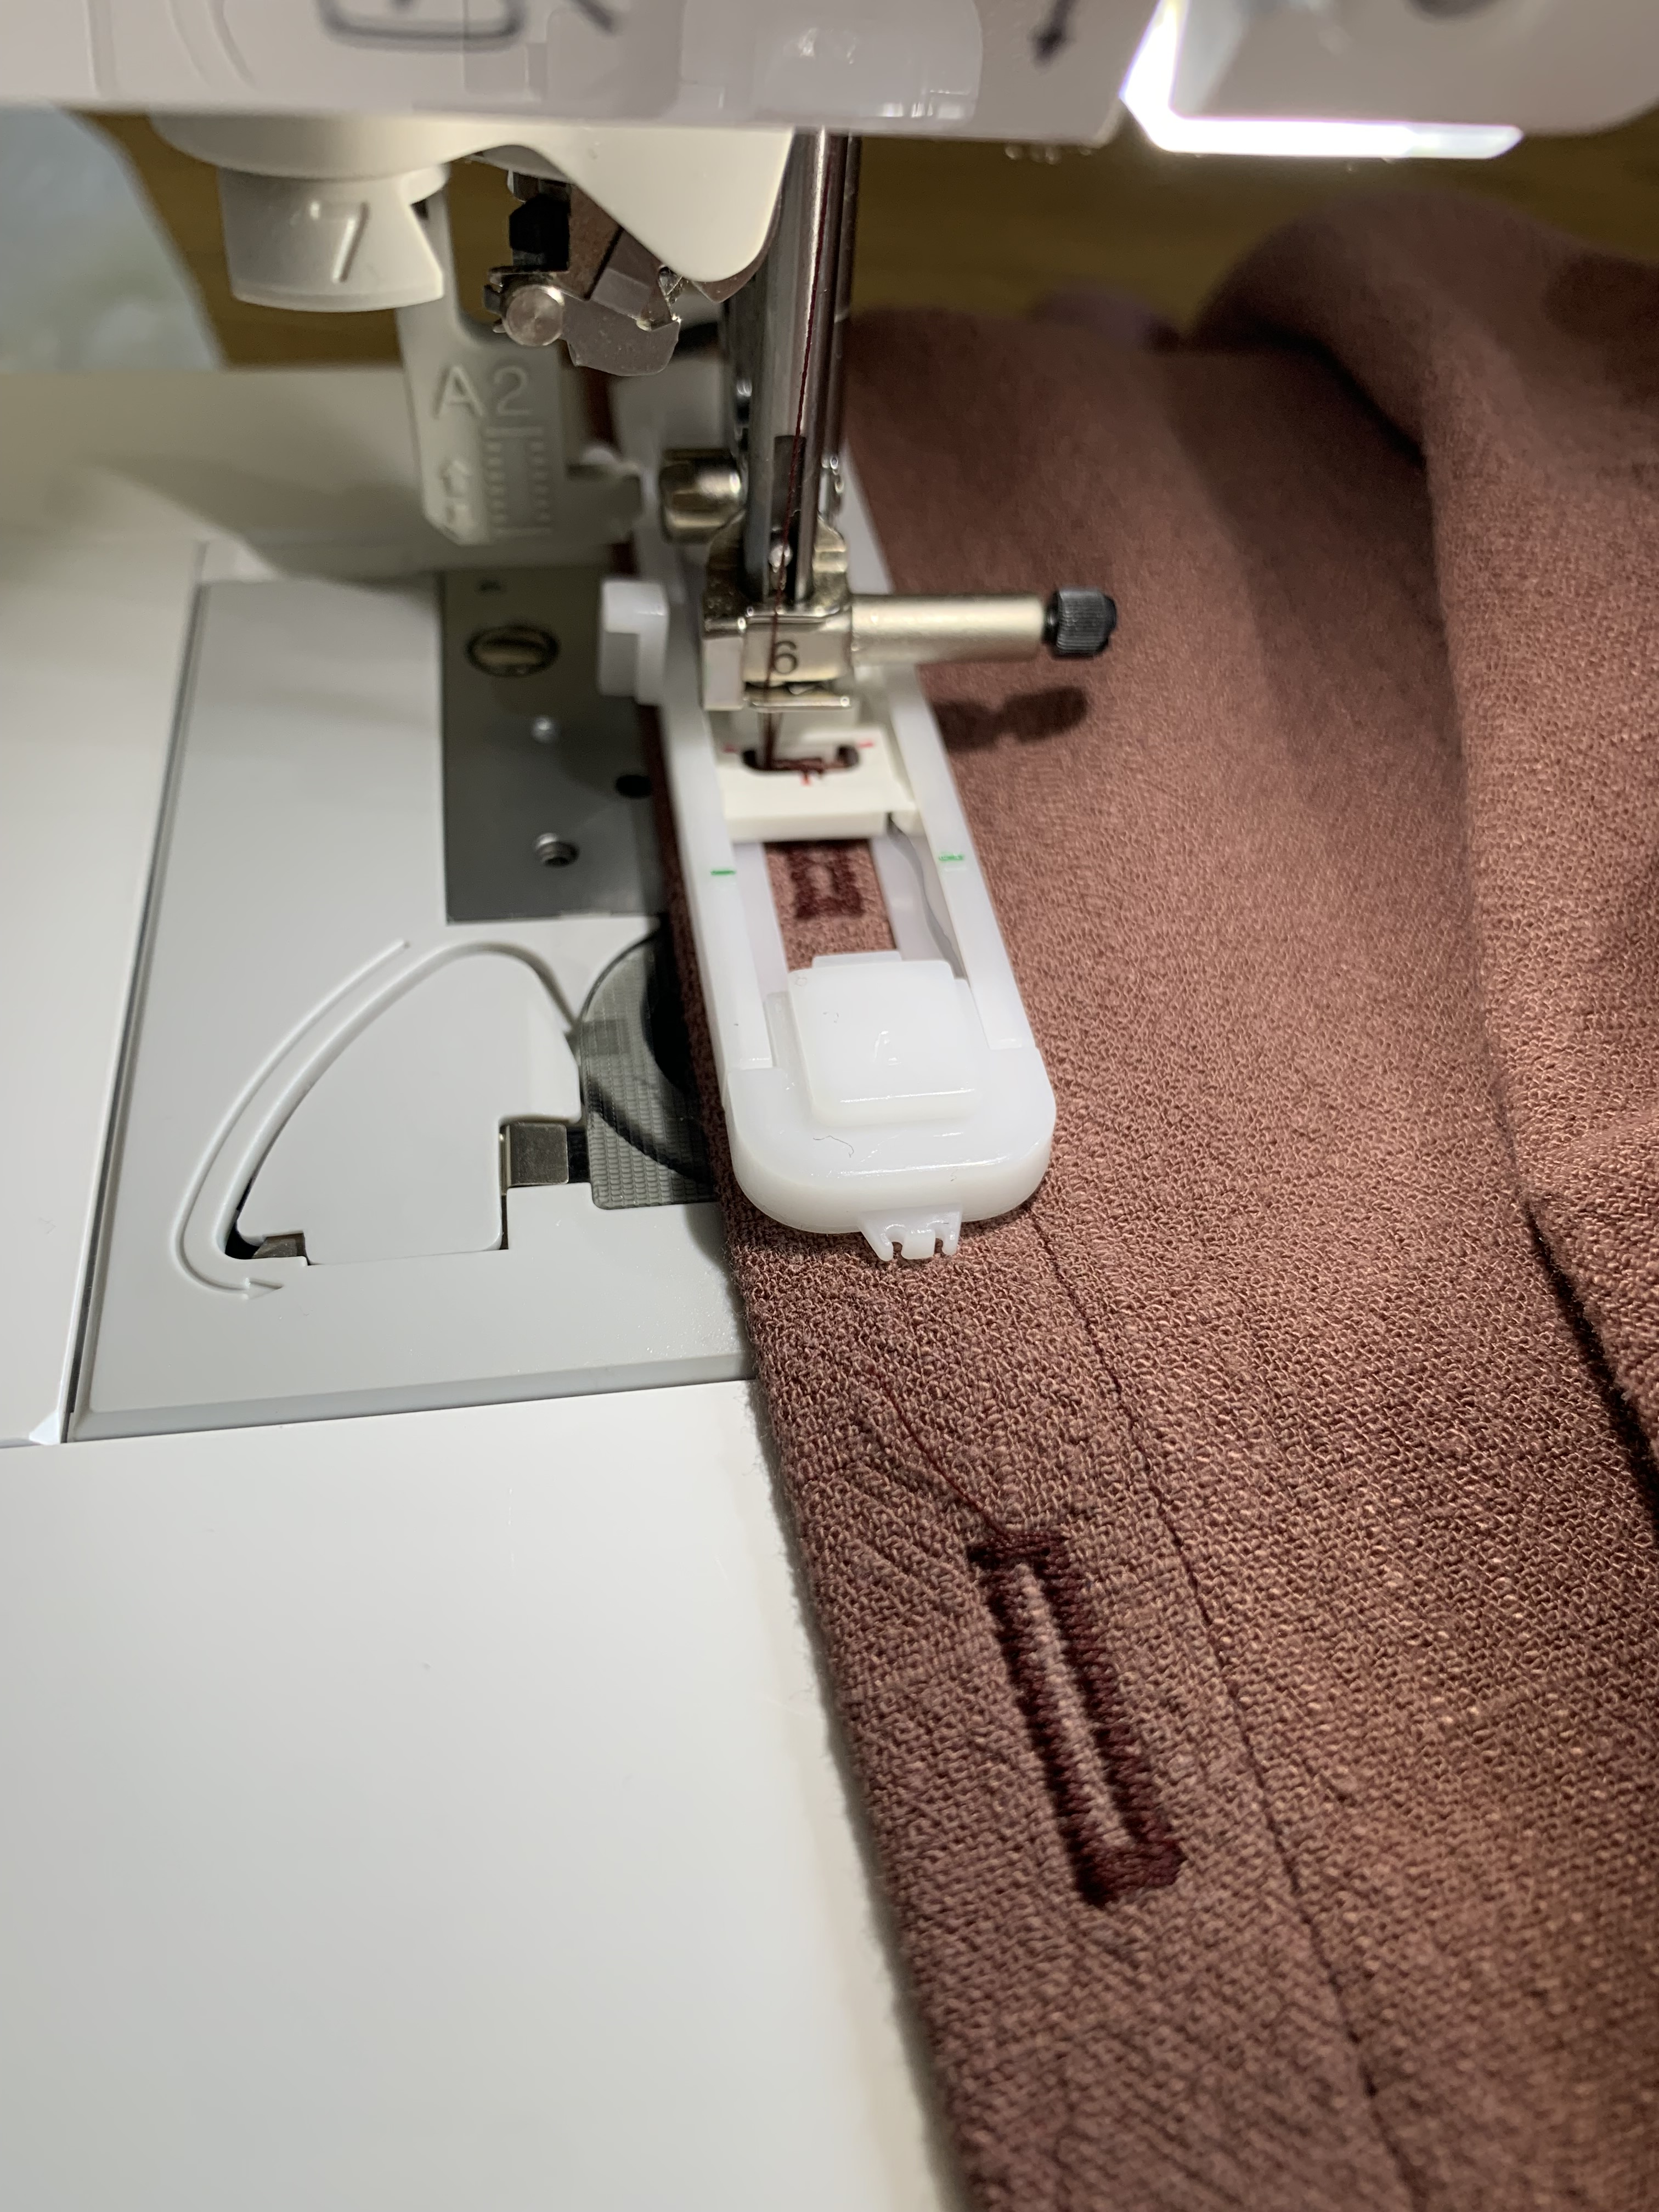
Step 12: Mark your buttons holes on the right side placket of the shirt. I used the buttonhole guide by placing is right next to the plackets and marking the buttonholes with my favorite clover chalk pen.
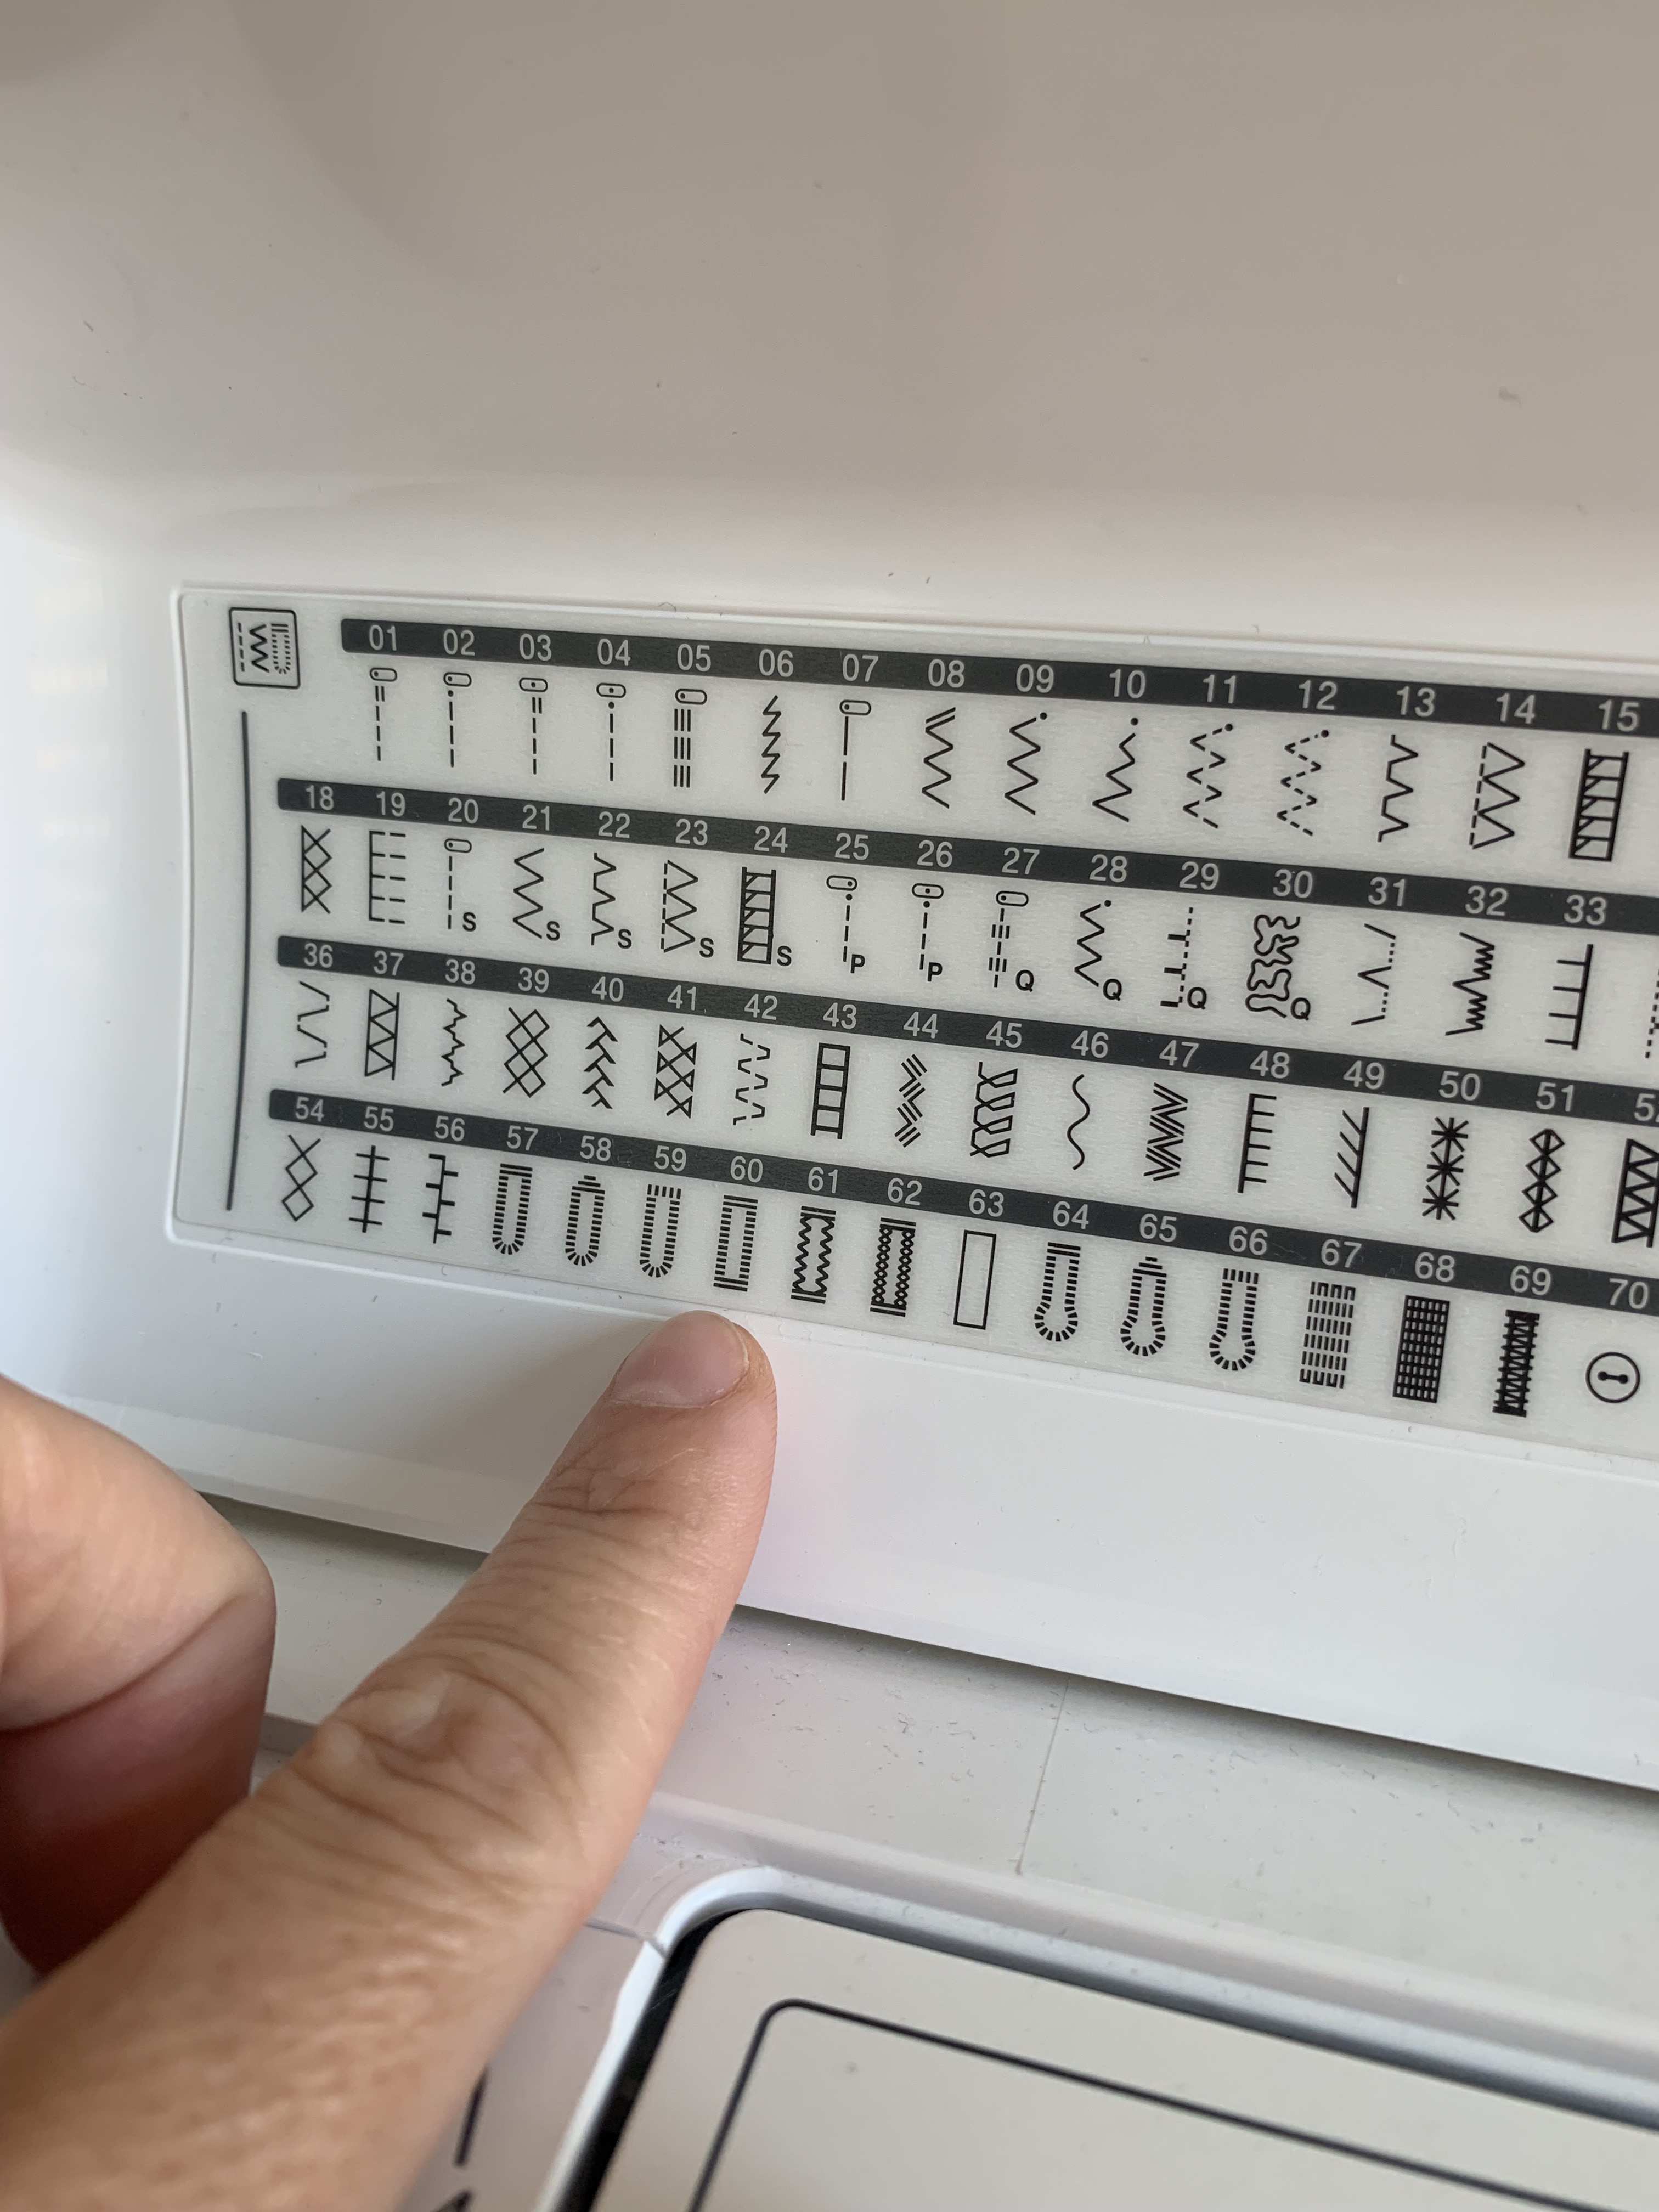
Step 13: Sew button holes using the buttonhole foot and buttonhole #60.
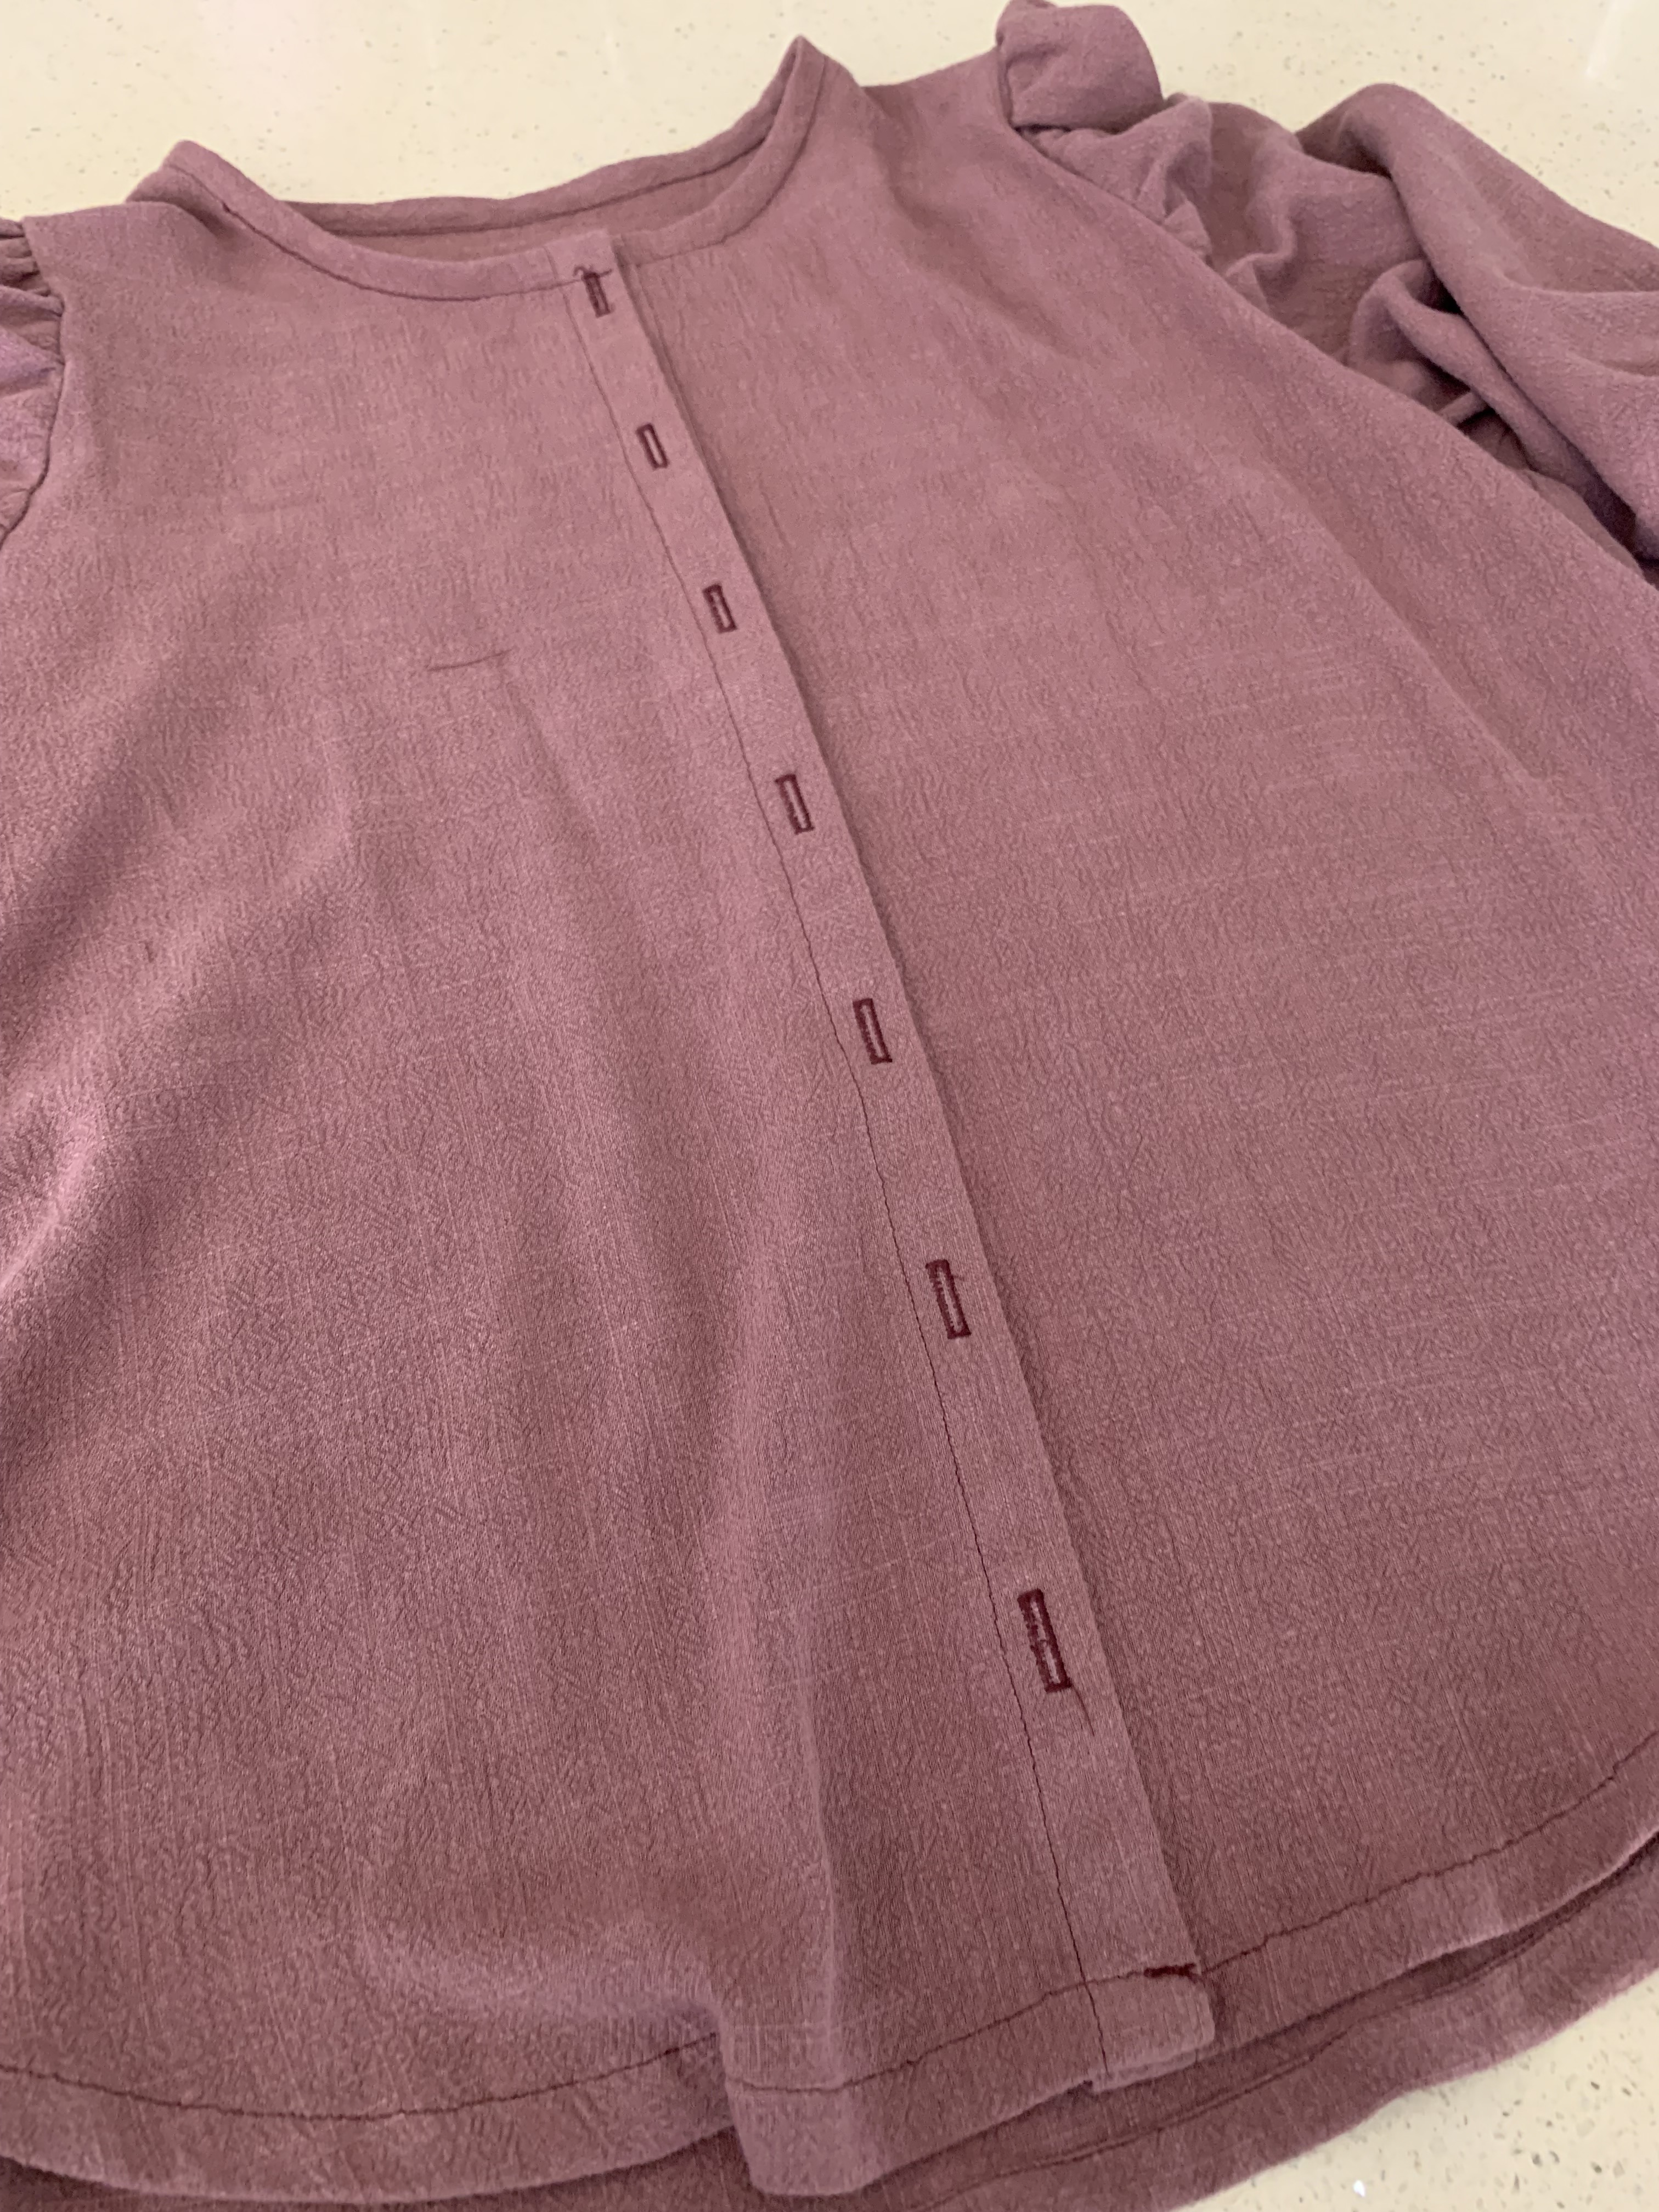
Step 14: Mark where your buttonholes meet up on the left side placket, and hand sew on buttons to your shirt. All finished!
I can’t wait to try this top again in a 100% linen to really show off these fun sleeves, and maybe even a dress version too! Don’t forget to check out the #antheablouse hashtag on instagram for loads of inspo! I always check out other versions to gather up ideas for fabric and any adjustments I might need to make. Happy sewing!
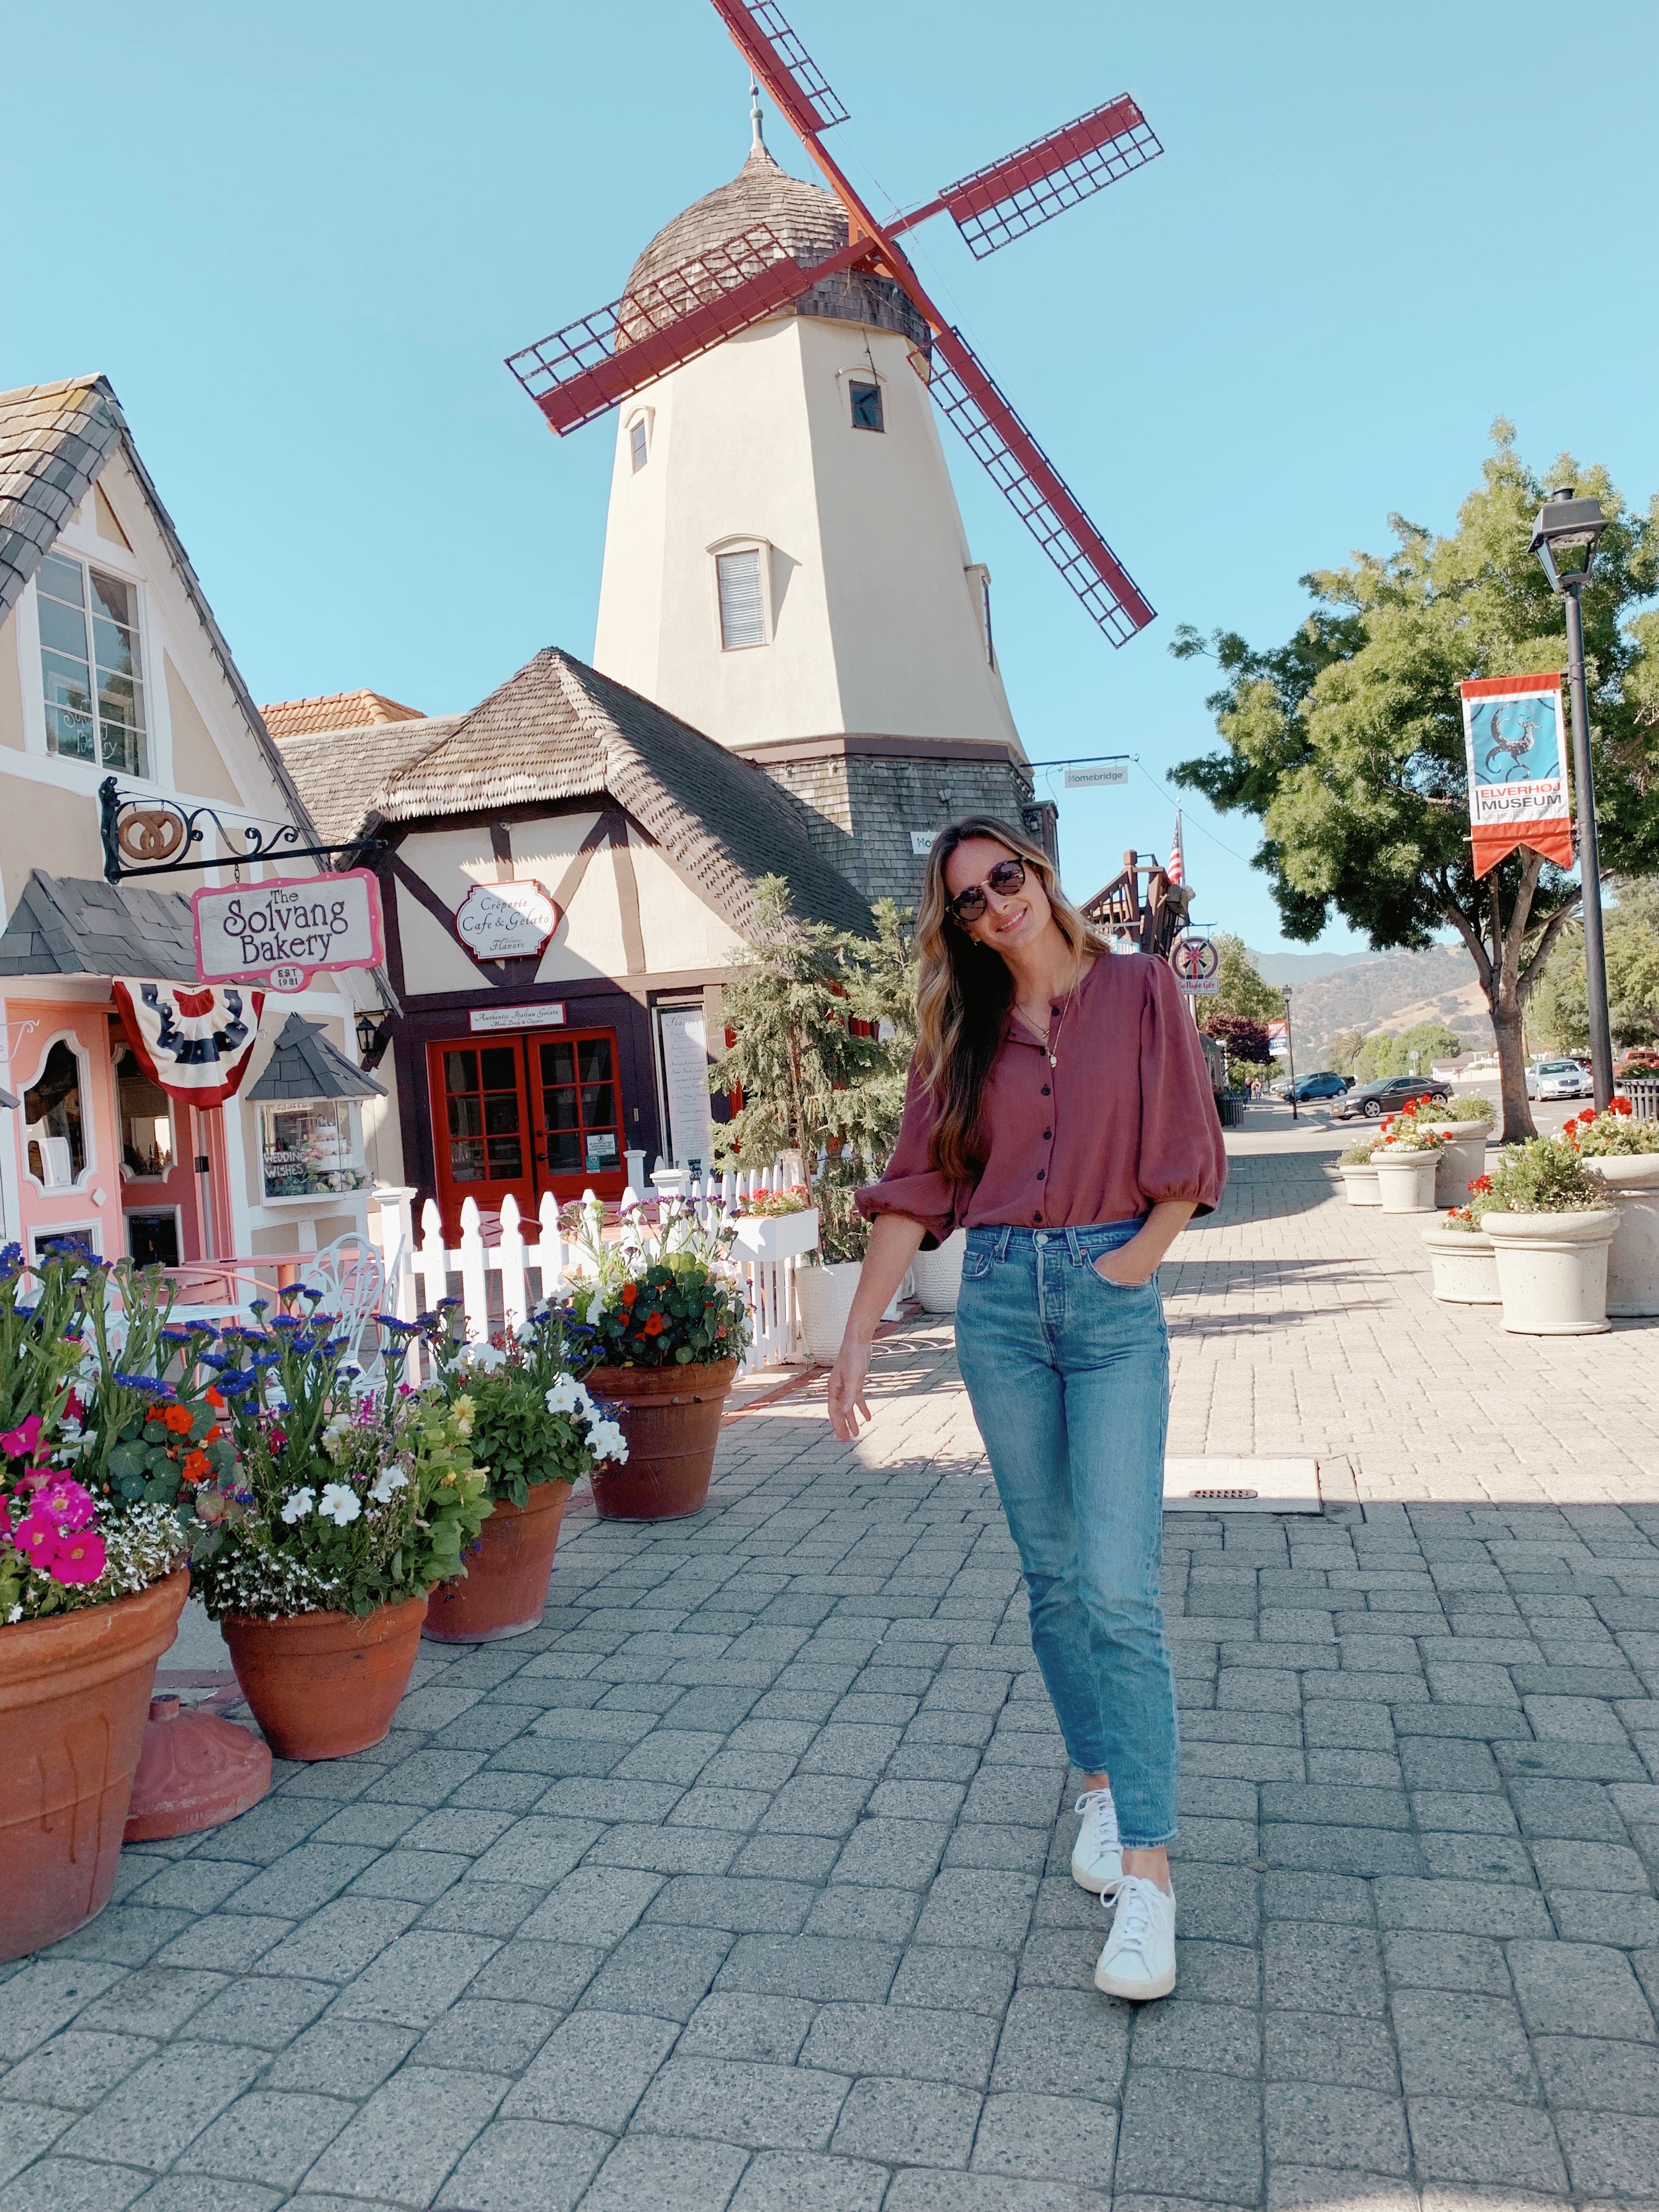
Photo taken in Solvang, California.
Links:
Shoes: Veja Esplar Sneaker Size 7
Jeans: Levi Wedgie Icon FIt


Leave a comment