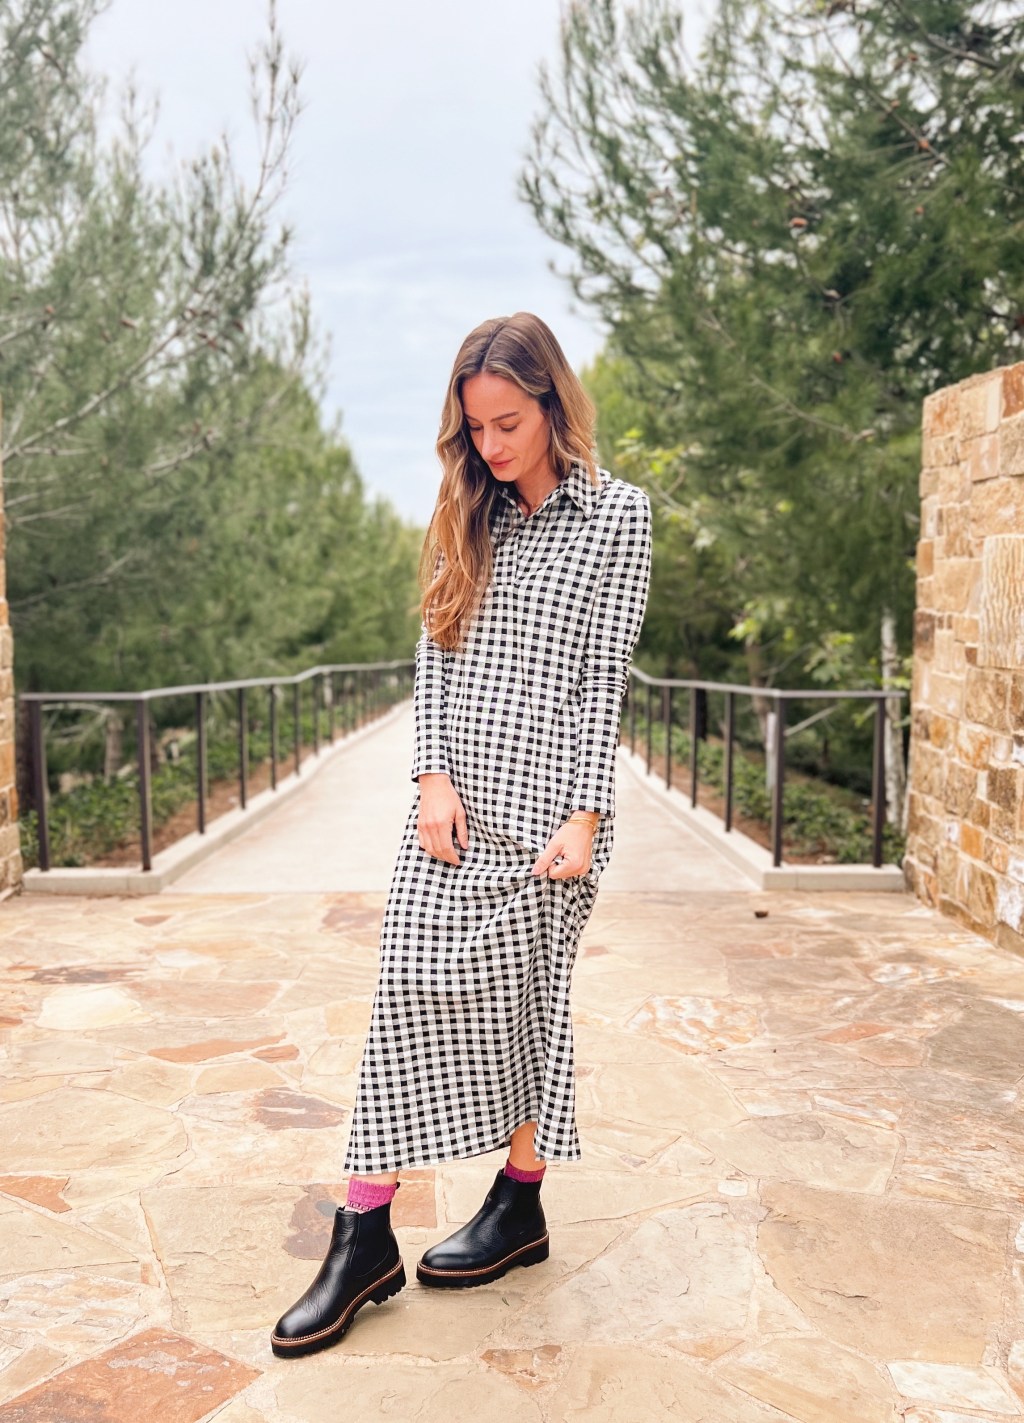


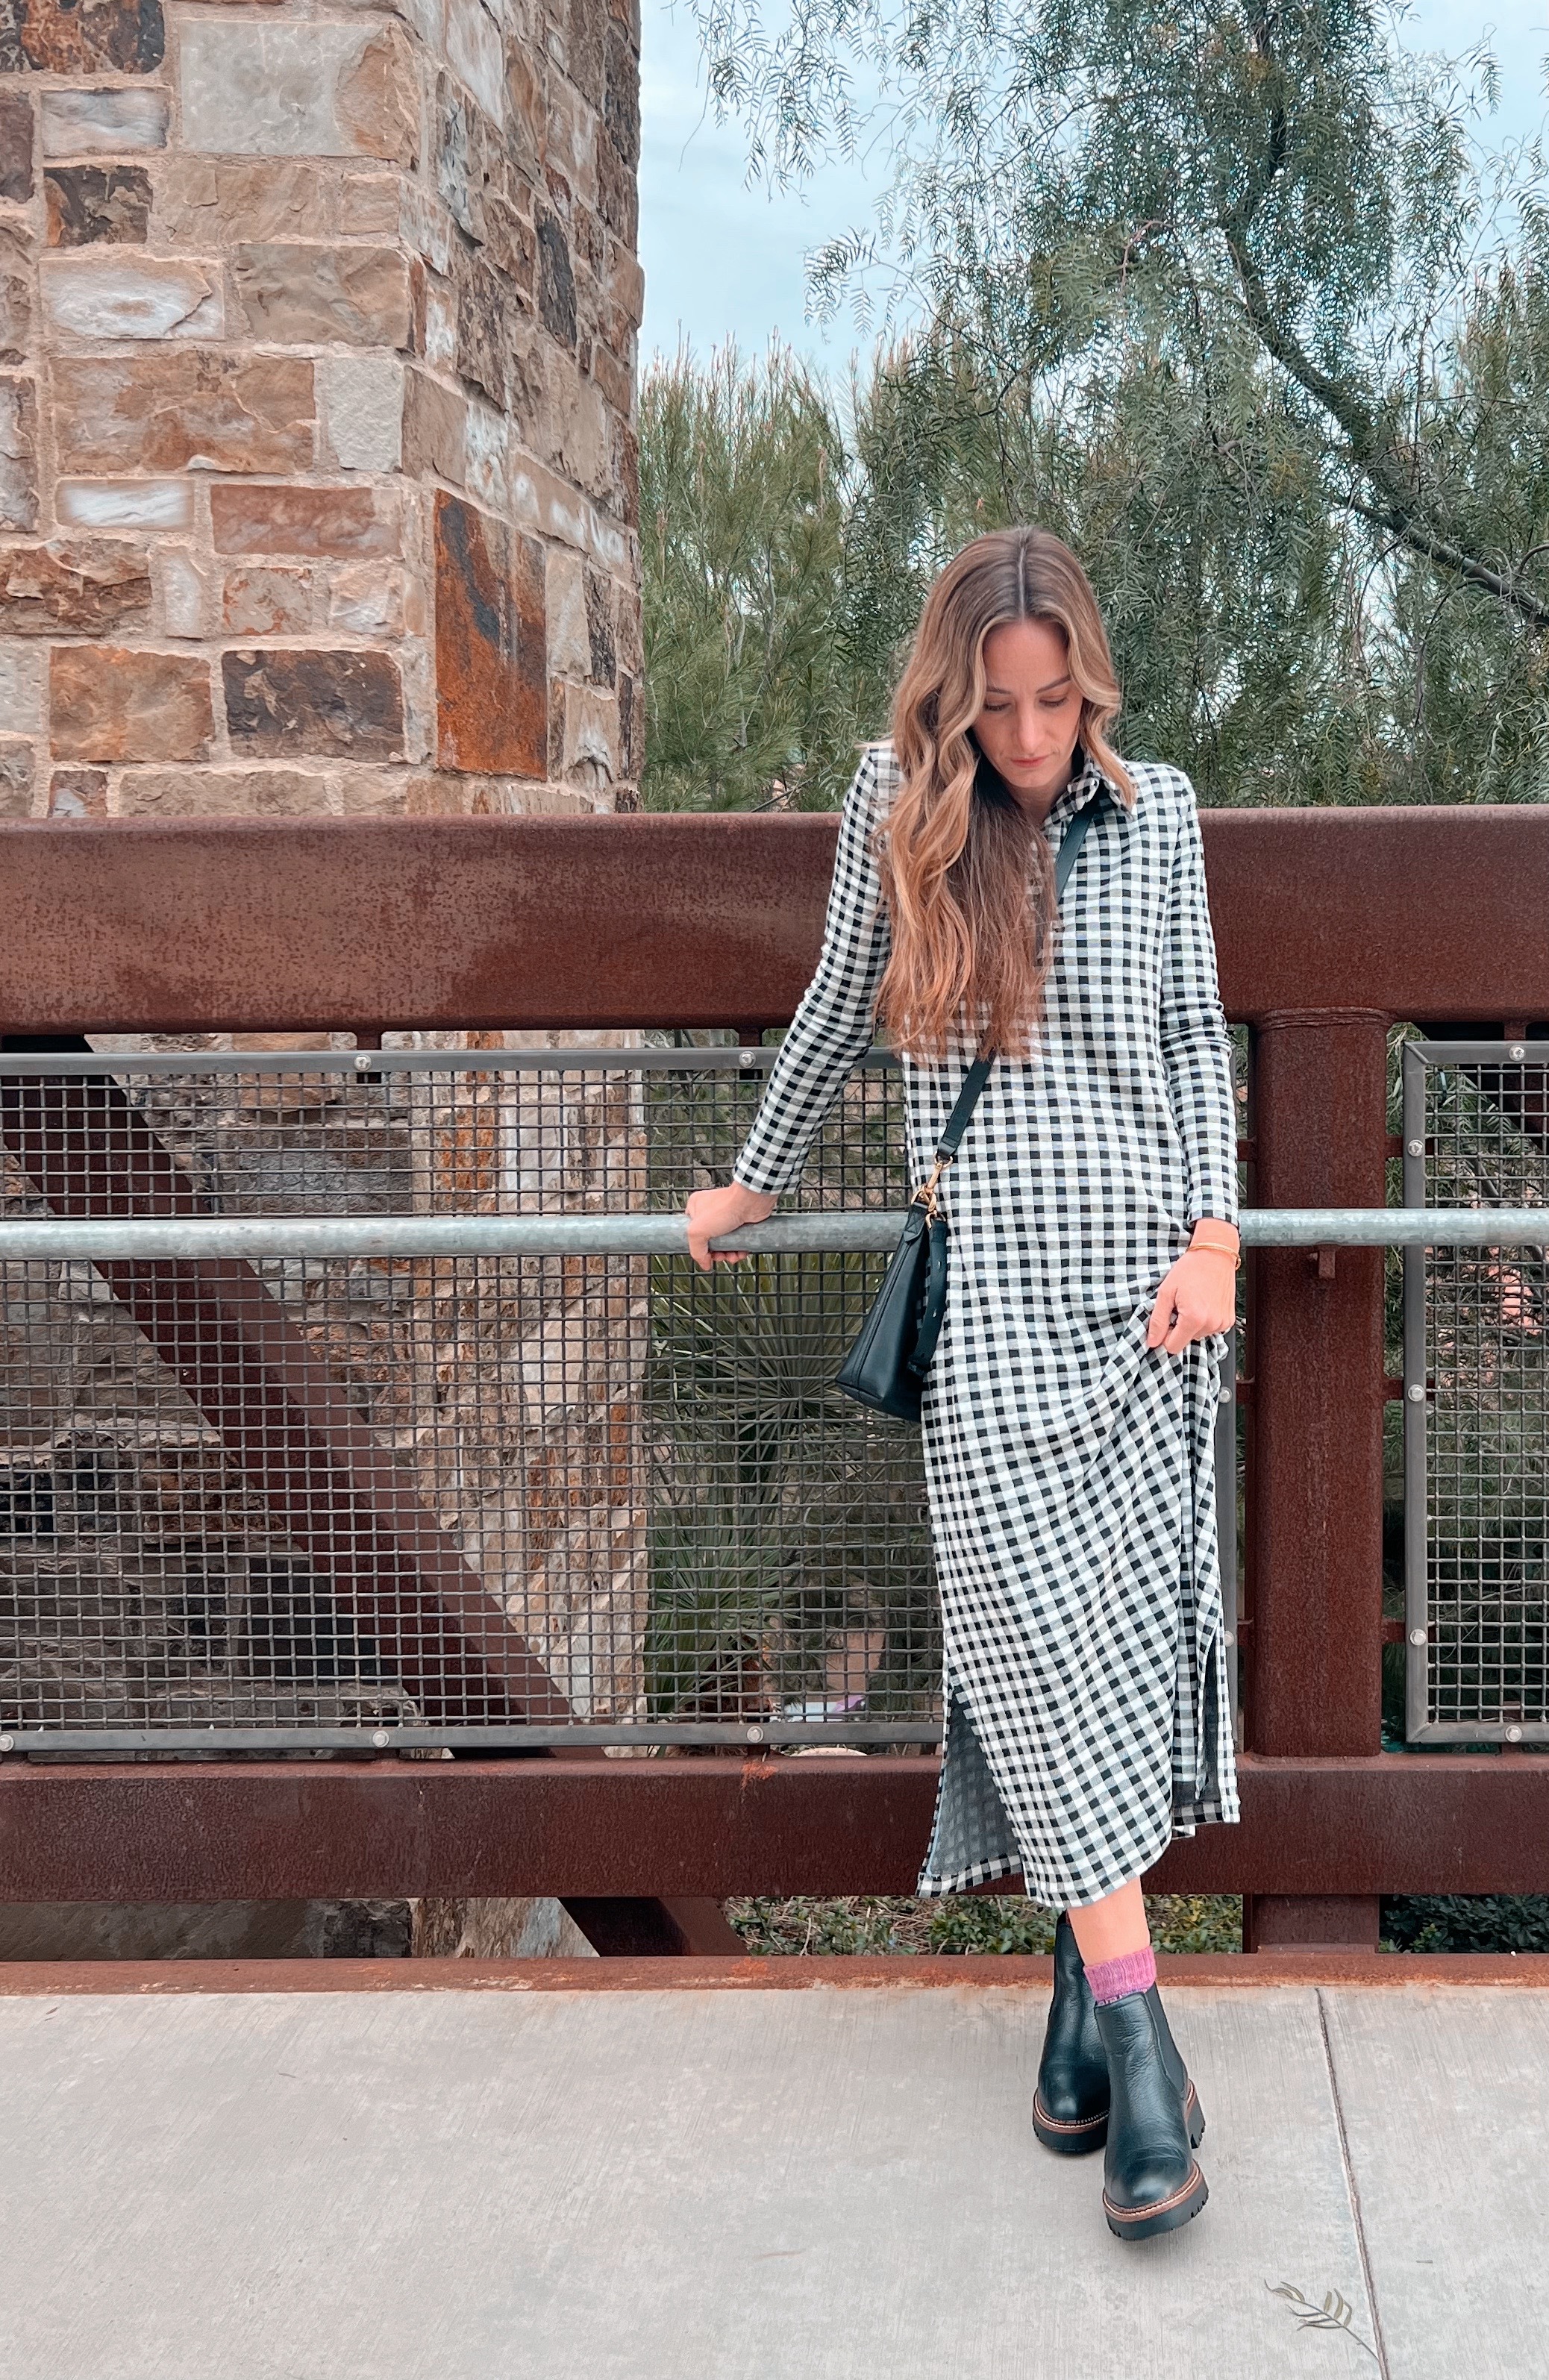
Happy 2023! I’m excited to kick off the new year with my first project! I made the Andie Dress by Viki Sews, and used a really pretty black and off-white gingham sweater knit I picked up from a little sewing shop in Provo, Utah called Harmony. (A little birdie told me they will be selling fabric on their website soon!). This pattern is one of my make nine projects. I wear dresses to church every Sunday and need some cozy options for cooler winter days. I love how easy this dress is to wear, and the collar adds a really fun detail.
I used both my Baby Lock Celebrate Serger and Brilliant sewing machine for this project. I sewed up a size 4, and didn’t adjust anything! I did not add snaps along the placket or the thumbholes in the sleeves. I also did not add the fusible stay tape. I wasn’t able to find it at my local Joann Store, and personally didn’t feel like it was needed. My knit fabric was pretty stable, and came together just fine without it. But, I did interface the suggested pieces as the pattern instructs.
We’re going to switch things up a little bit this year. I won’t be sharing full tutorials of my projects, but instead I’ll be sharing some tips of specific steps of the project I think might be helpful to you!
This pattern brand is new to me, and I found it a little different than what I am used to, but it was very informative and user friendly. They are really good at breaking things down for the beginner sewist- so much so that I found my self skipping a few steps because I didn’t find them necessary. (But they would be helpful to a beginner for sure!).
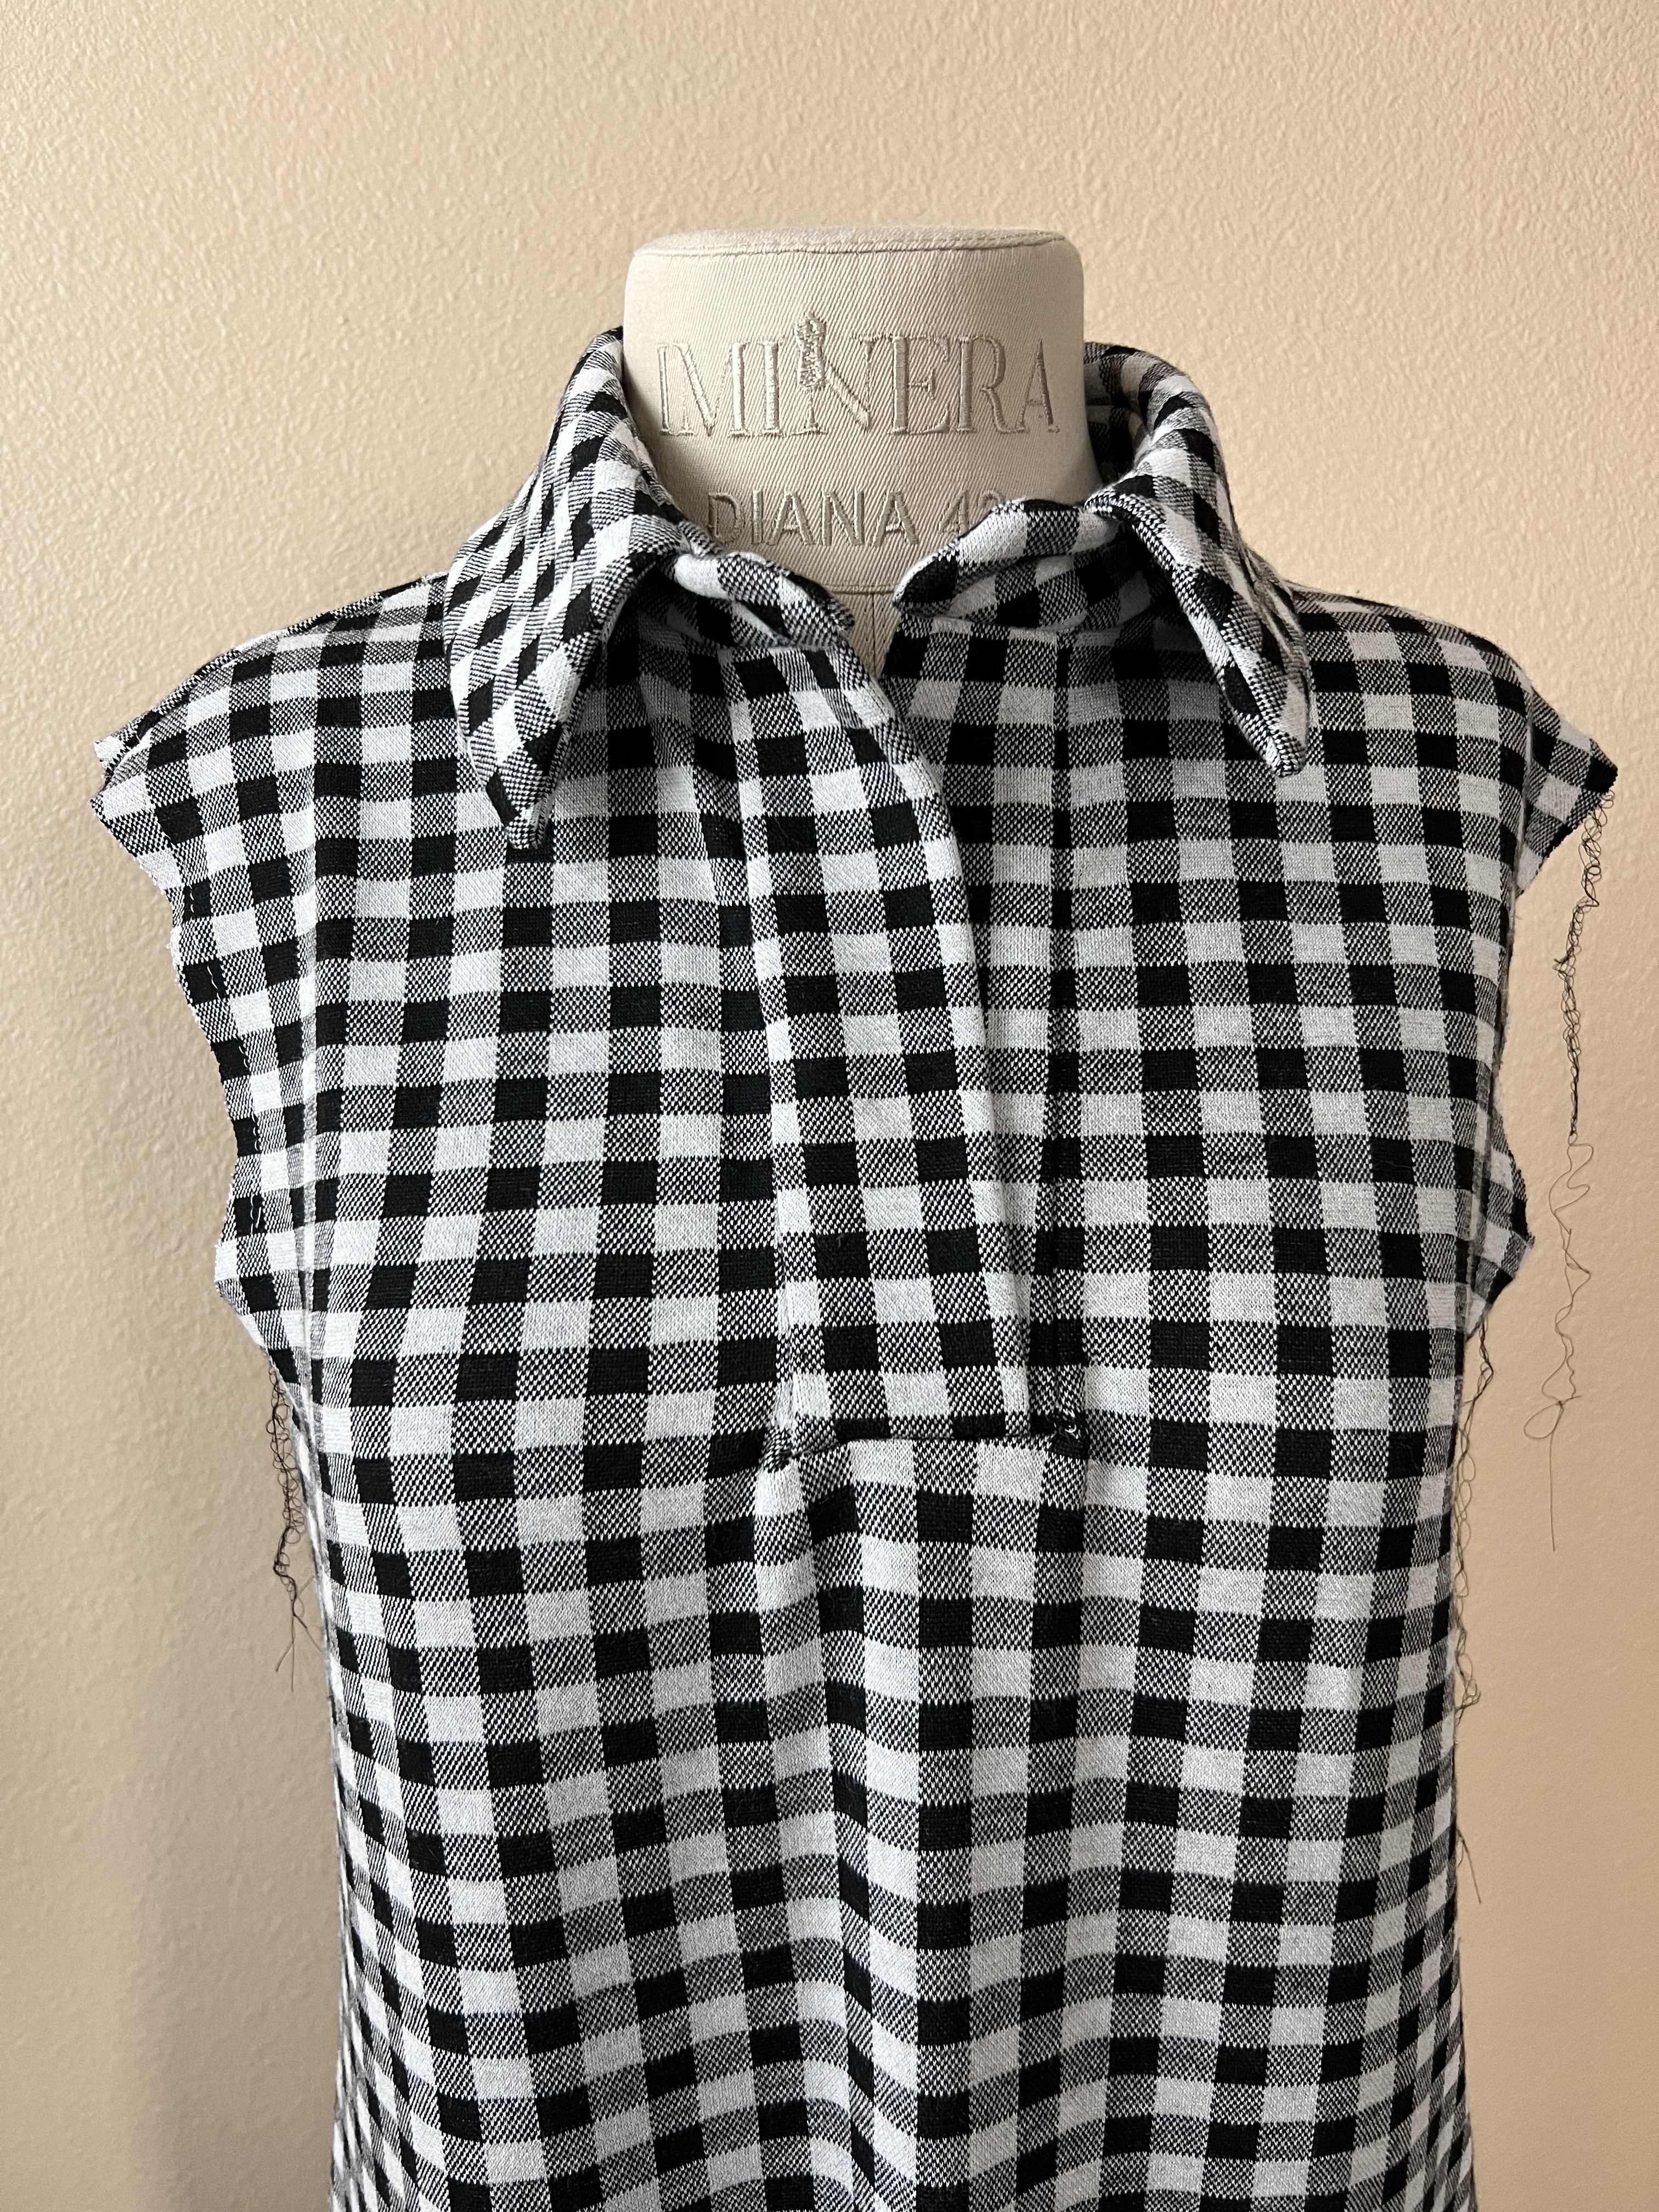
Pattern Review: I really struggled to get my partial placket just right. I sewed it in once, didn’t love the way the gingham patterns matched up so I ripped it out and tried it again. I must have stretched out the placket cutout on the bodice- or over cut it. The cutout for the placket was slightly wider than my placket pieces when I sewed them in. So, just be careful to undercut it when cutting out your pieces and have everything prepped so you don’t have to rip it out like I did. You can see how mine turned out below, luckily the pattern kind of hides my mistakes.
Other than the placket, everything went really smoothly. My collar is pretty near perfect, and the fit is just right without any adjustments. I’m not very “hippy” figure wise and usually have to take the hip area in with this style of dress but it fit perfectly from the get go for me. Really great shape from the original pattern.
A few tips I wanted to share from this project:
- Use clips when sewing things on your serger! I recently sewed over a pin with my serger and had to take it into the shop. A follower suggested using clips instead of pins to avoid it all together. Love this idea and began incorporating it with this project.

2. Using a twin needle with a Baby Lock machine!
I don’t own an overlocker machine, so I usually use a twin needle when hemming knit projects to create the same look using my sewing machine. This was my first time trying this out on my Baby Lock Brilliant machine and it was soooo easy!! I thought I would walk you through the process of setting it up and creating really great knit finishes.
- I would recommend serging the raw edge you will be hemming first for a more professional looking finish. This is not necessary, but looks nice. I forgot to do this in my hurry to get the project finished so please excuse my less professional looking hemline.
- Next, I like to apply HeatnBond Soft Stretch fusible web adhesive LITE. This gives the knit fabric a little more structure and helps prevent tunneling as your are sewing along the hemline.

To use it, first apply it to the wrong side of the hemline, right along the edge, and press using an iron. I was prepping my sleeve finish here.
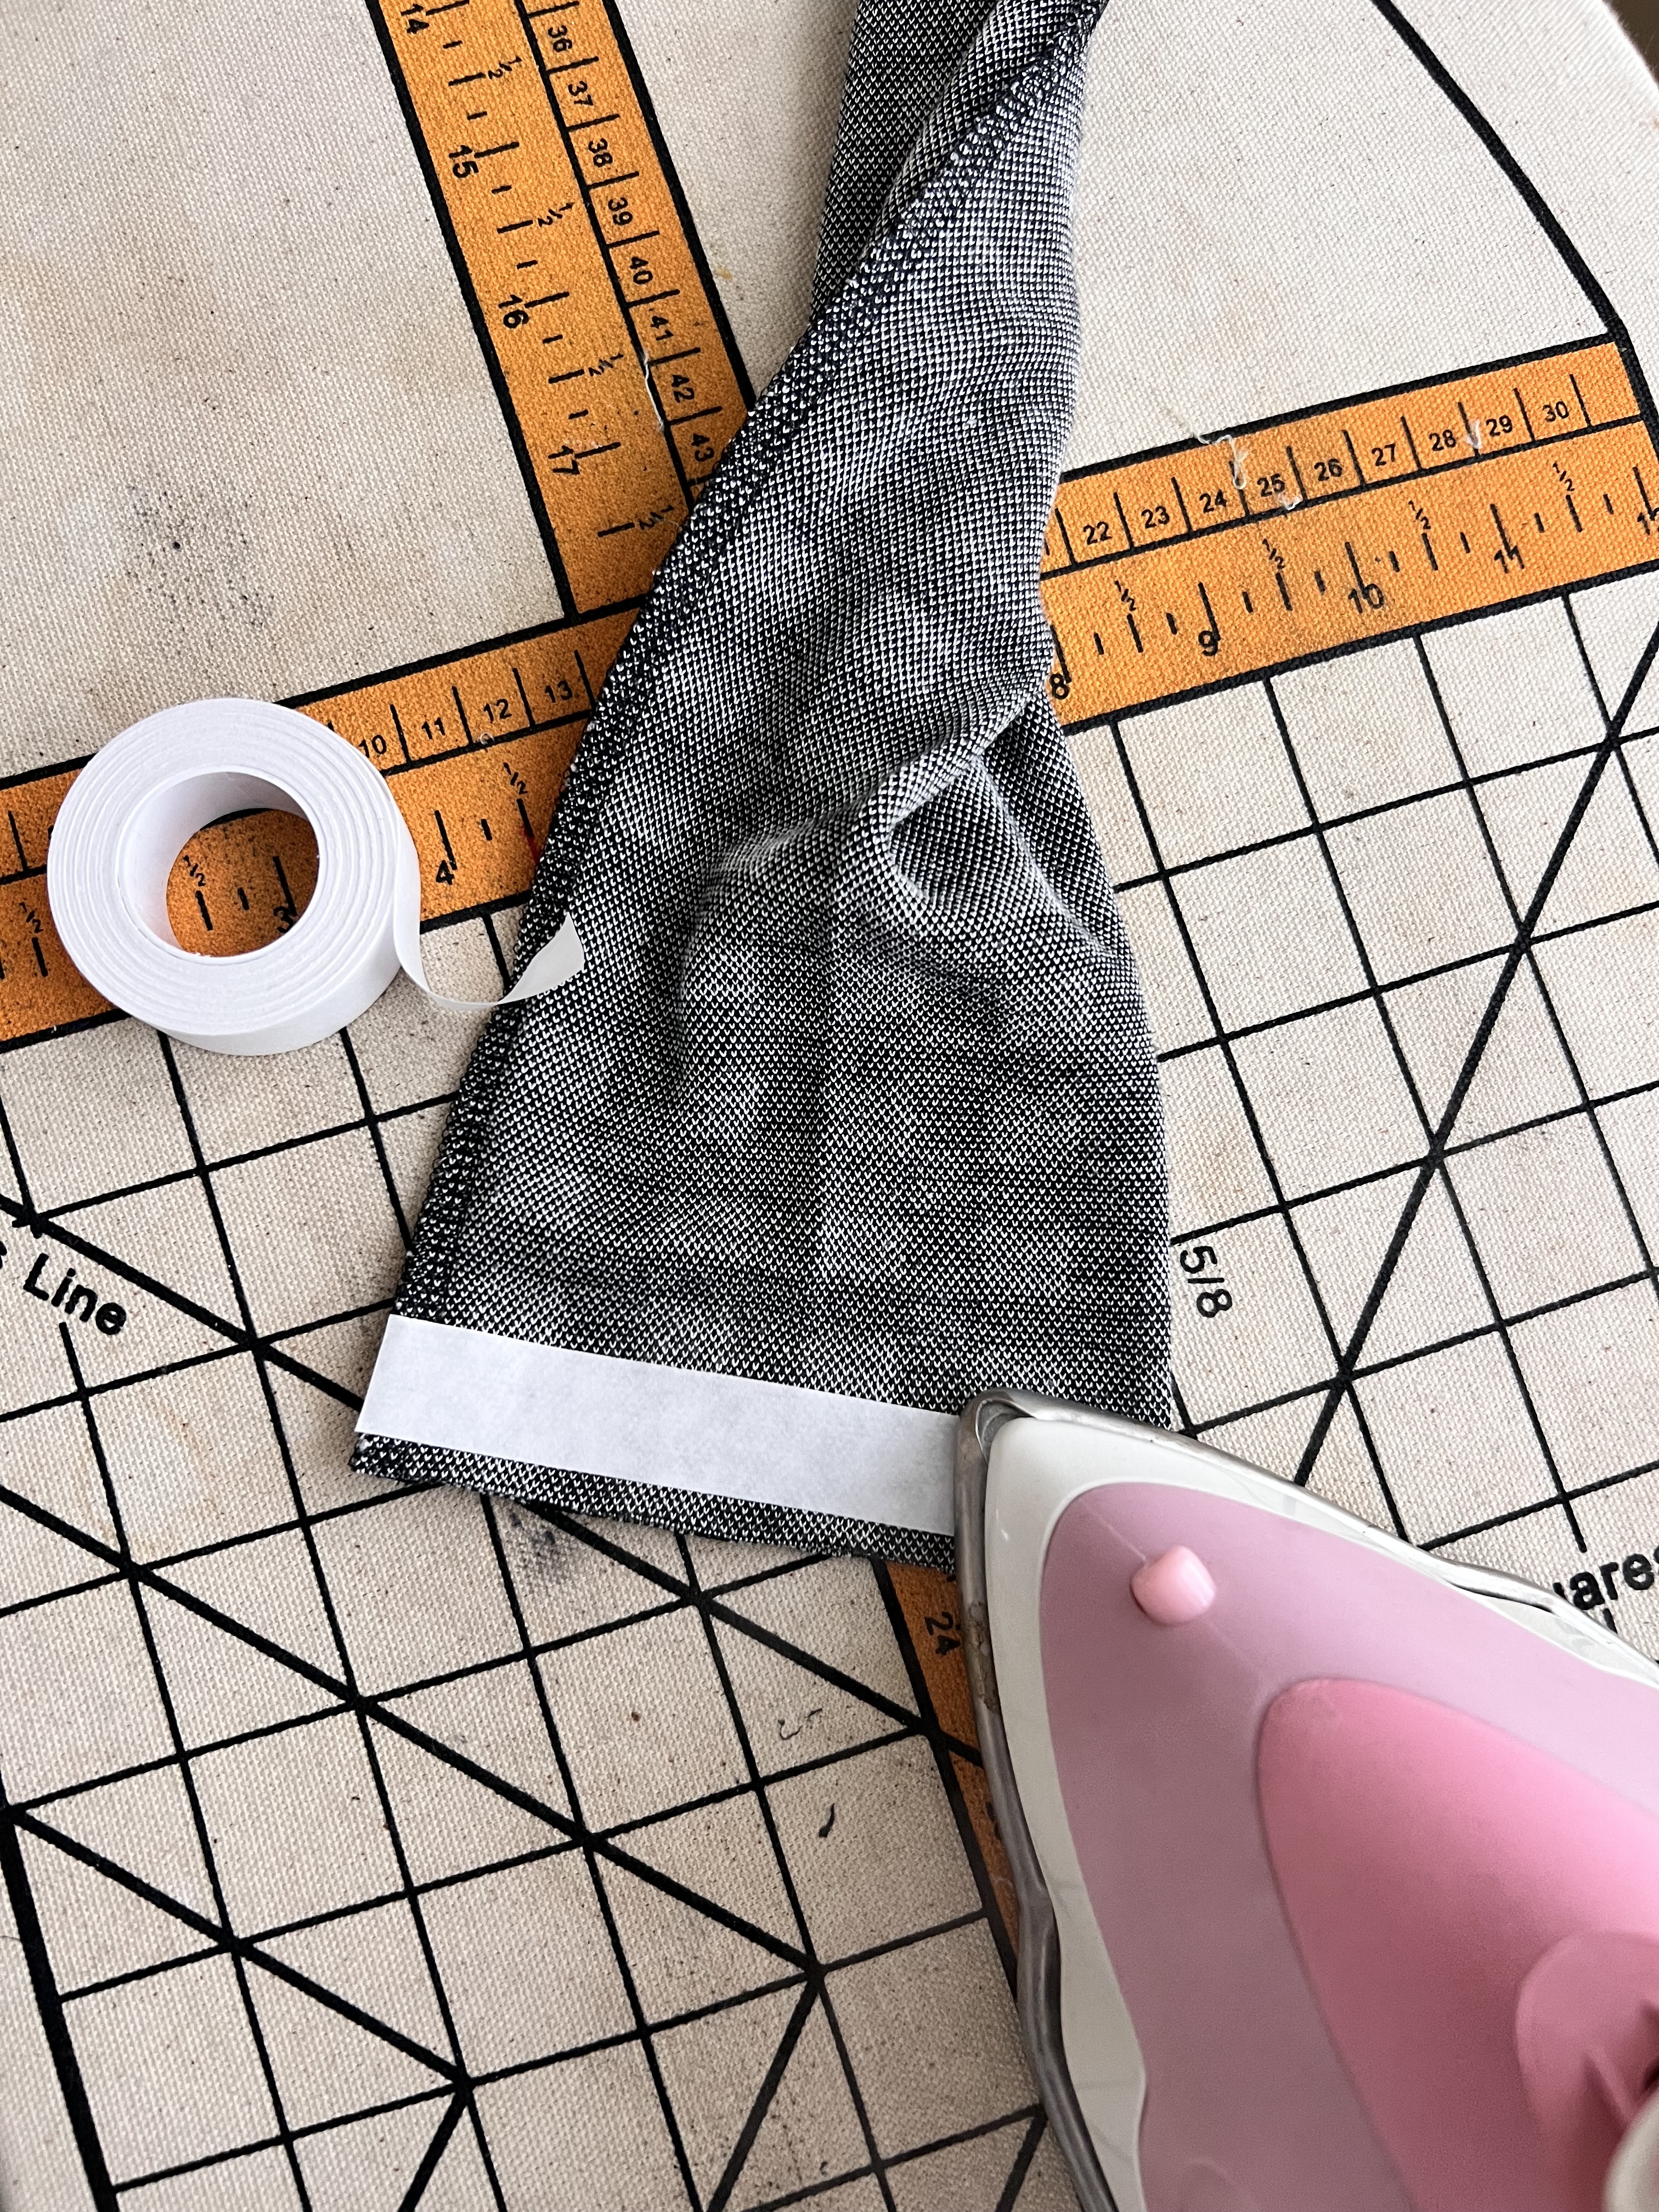
Once the heatnbond has been applied and fused to your fabric, remove the white paper by peeling it away. You will notice a webbing material has been fused to the fabric. Press the fabric edge up to your desired length, and press in place once again, fusing the hem in place. Now your hem and raw sleeve edges are prepped and ready to be finished. You can see here that if I had serged the raw edge it would look a lot more professional at this point.

3. Now we need to prep our machine to sew with a twin needle. Go ahead and insert the twin needle into your machine.
First push the settings button and turn “Twin Needle” to ON. Use the arrows right above the settings button to select twin needle and change from OFF to ON. This will let your machine know you are using a twin needle, and it will alert you if a certain stitch will not work with your twin needle while sewing.

Next, place the extra spool pin that your Brilliant machine comes with over the bobbin winder. You will need two spools of thread, one thread for each needle. I don’t always have two spools of one color, so I wind an extra bobbin with some of the thread I need and attach it to the spool pin just like I would with a spool of thread. Thread both spools of thread through the machine together at the same time, and thread each individual thread one at a time, one through each needle. It doesn’t matter which thread goes in which needle.


Now we’re ready to sew! You will need to make sure to sew along the right side of the hemline, so the parallel lines show along the front. I always suggest testing a scrap piece of the same fabric you are using for your project first to make sure everything is working properly. Once everything looks good, finish those hemlines! I was really impressed with how easy this was, no hiccups at all and the stitching looks really nice. Again, I used this technique for my hemline as well as to finish my sleeves.
Here is a video Baby Lock has made to walk you through the setup process as well.

That’s all I have for you today! Happy sewing my friends!


Leave a comment