
This post is sponsored by Baby Lock, but all opinions are my own.
My nine year old daughter has been begging me to teach her to sew lately. We have been so busy with all the sports, and life in general that I finally told her we would make it happen during Thanksgiving break. I thought I would lay out the basic process and what I involved her in throughout the project for anyone else that might be interested in sewing with their own children, grandchildren, or any kids in general you might have in your life.
We used the Baby Lock Brilliant sewing machine and Celebrate Serger. Both of these machines are beginner friendly but also grow with you as your sewing skills advance.
I’m going to take you through our process and some key points I would recommend going over with a beginning sewist!
Project Planning:
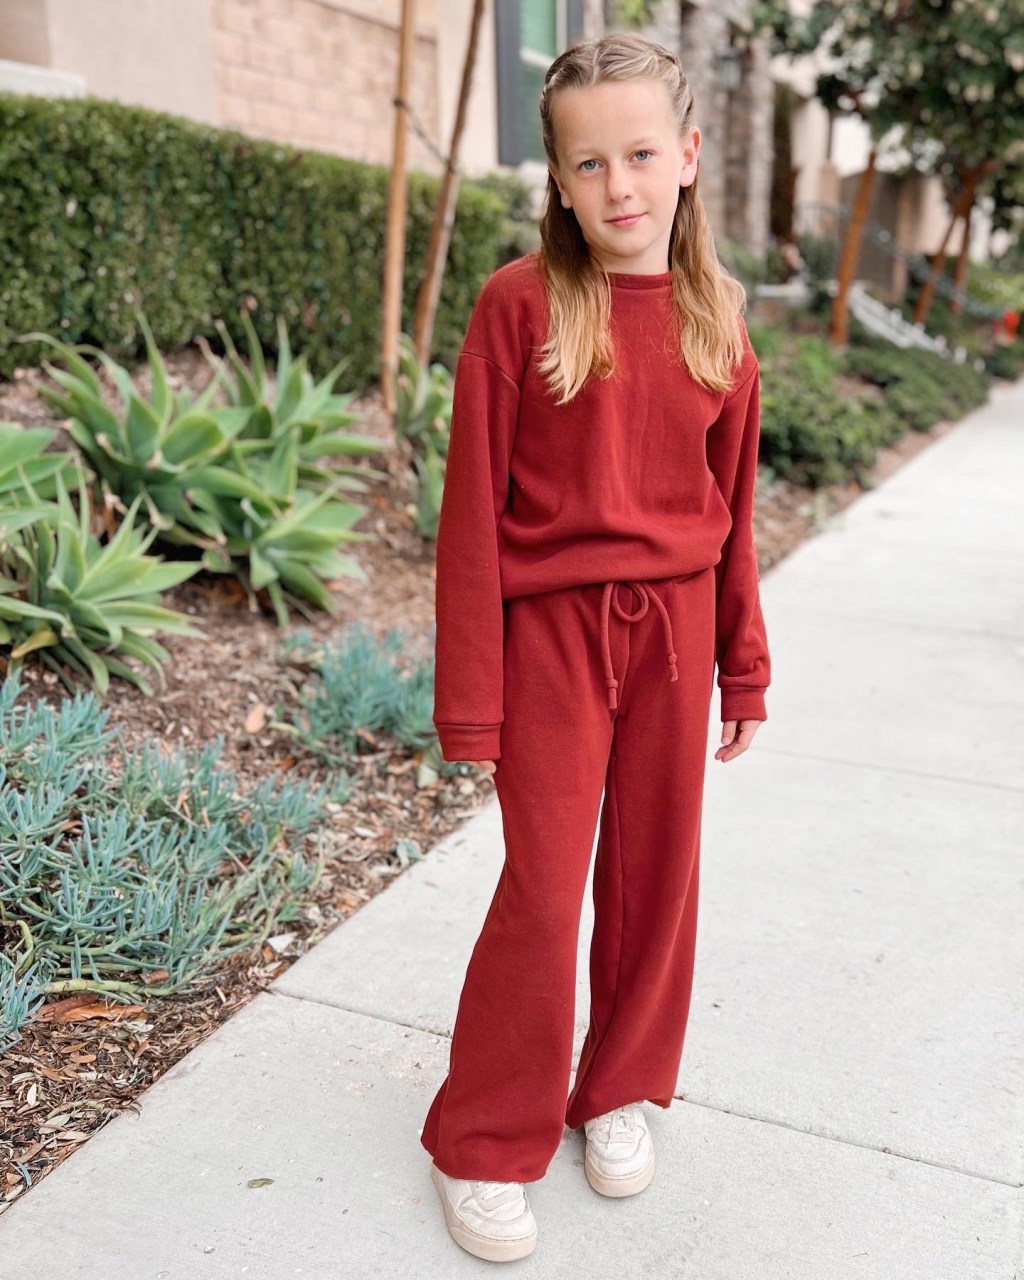
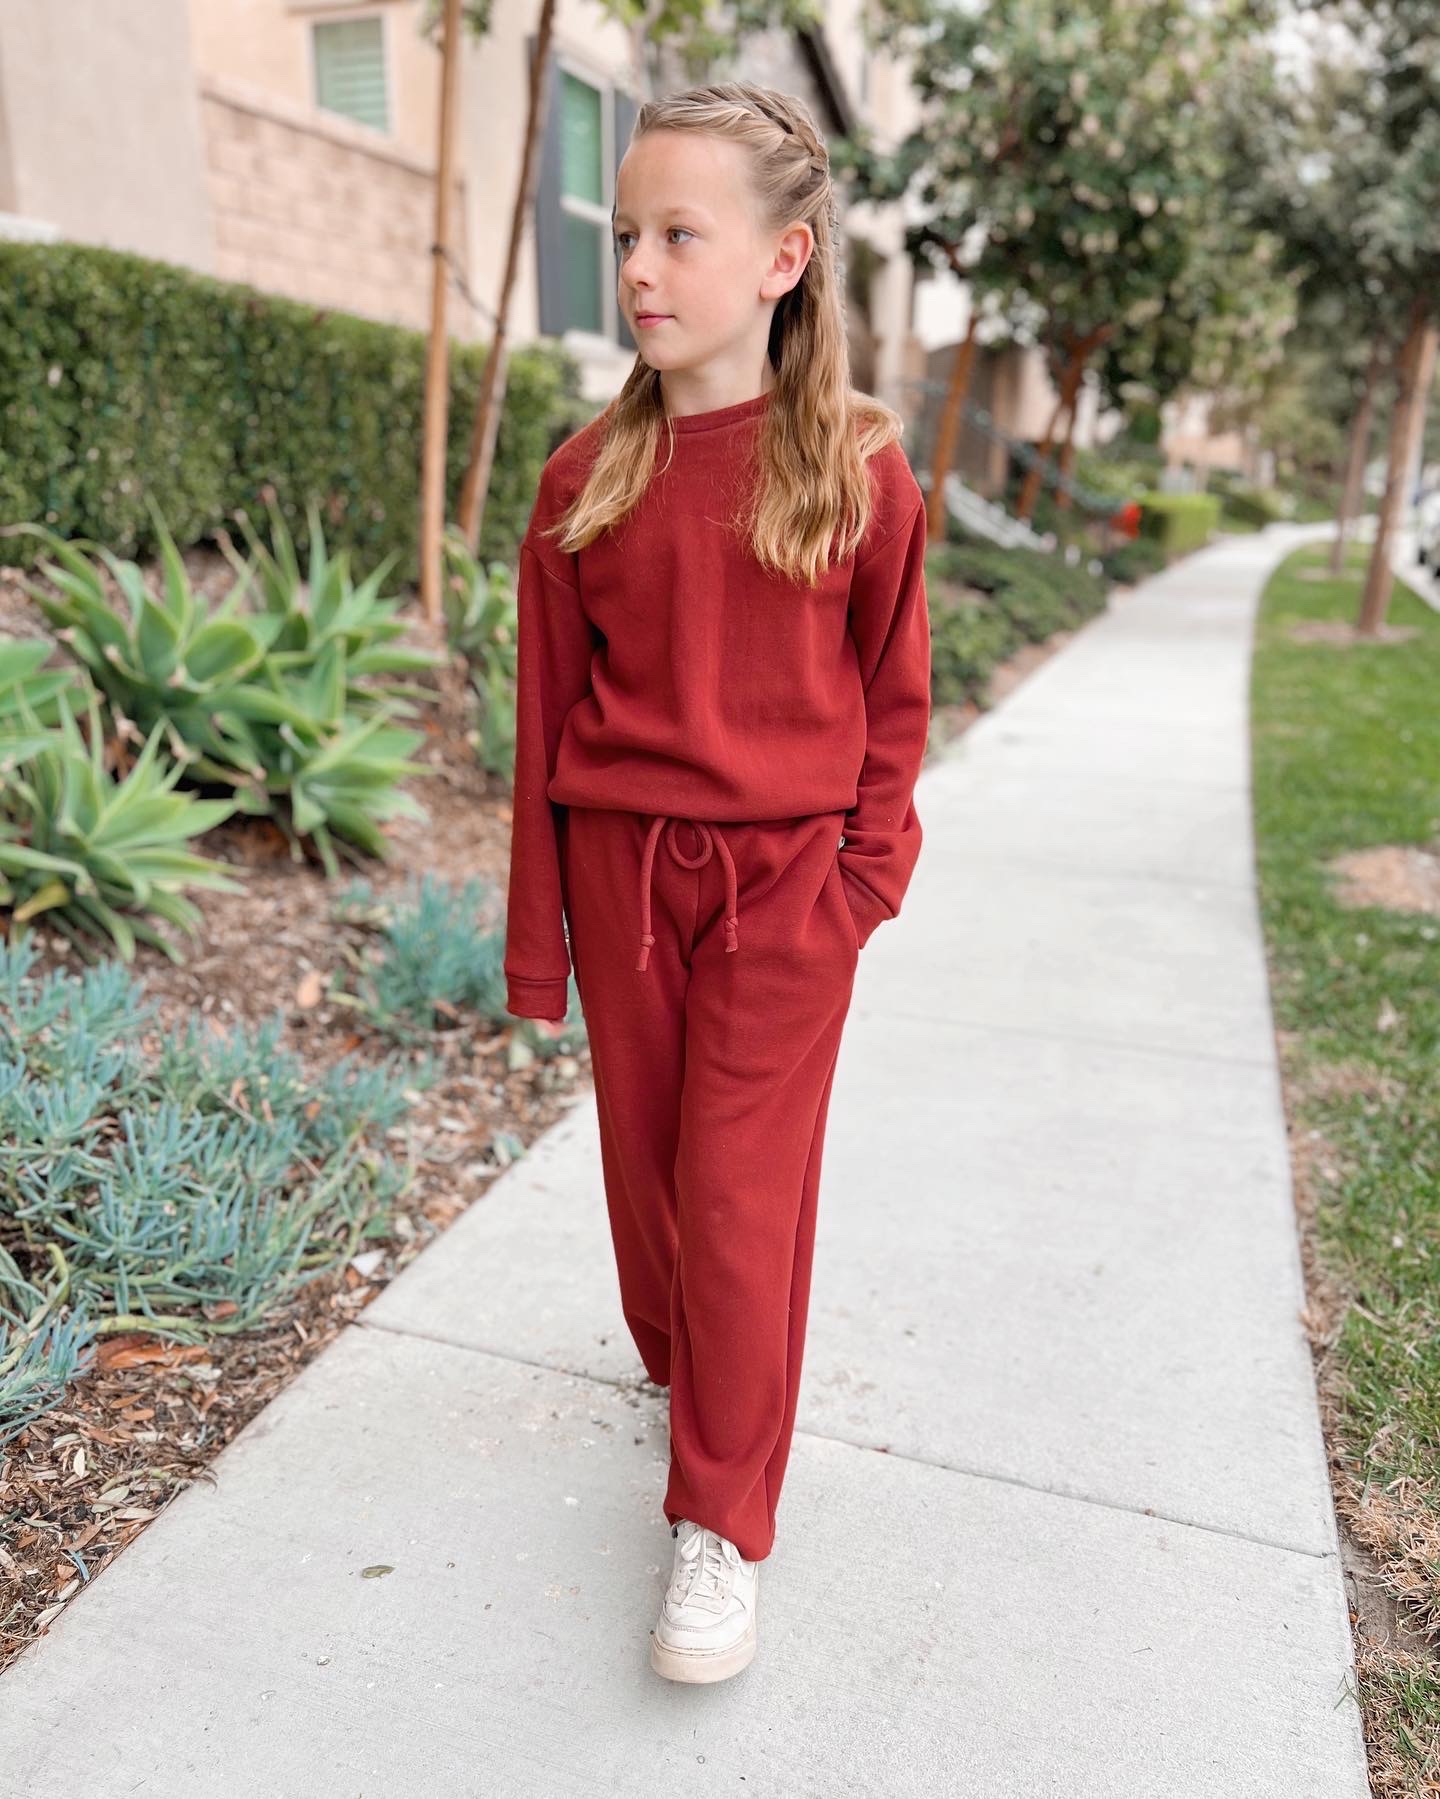
- Pick a Pattern: Papercut patterns recently dropped a new pattern line called “Papercute”- patterns for kids ages 3-12. We chose the Solar Tee Pattern and Tula Pants pattern with a matching seat set in mind for the final product. I showed my daughter the different style options the patterns have available and let her pick the look she wanted. We decided on the basic sweatshirt and wide leg sweatpants. We omitted the front fly for a more basic/simple look.
2. Gather Supplies: We hit Joann during their black Friday sale and I let her choose her fabric. I wanted her to be part of the entire process. It was really fun letting her walk through the aisles and helping her understand that you need to pick the correct fabric for specific projects, colors that work best for her skin tone, and trying to get her to picture the finished product while picking out fabric- this can be really hard to do! In the end she chose this really nice brick red sweatshirt fleece. We got three yards, I think 2 1/2 would have been perfect. Planning to make a matching sweatshirt for my baby girl to match with the leftover fabric.

Project Prep:
- Prepare Pattern Pieces: I had her tape the PDF pattern together, which she found to be a tedious process (as we all do). We took turns cutting and tapping. We also discussed cutting out the correct size, and how to find your correct size by measuring certain points on the body. Then we cut out the correct size from the PDF pattern we tapped together. I like taking a break after this step!!

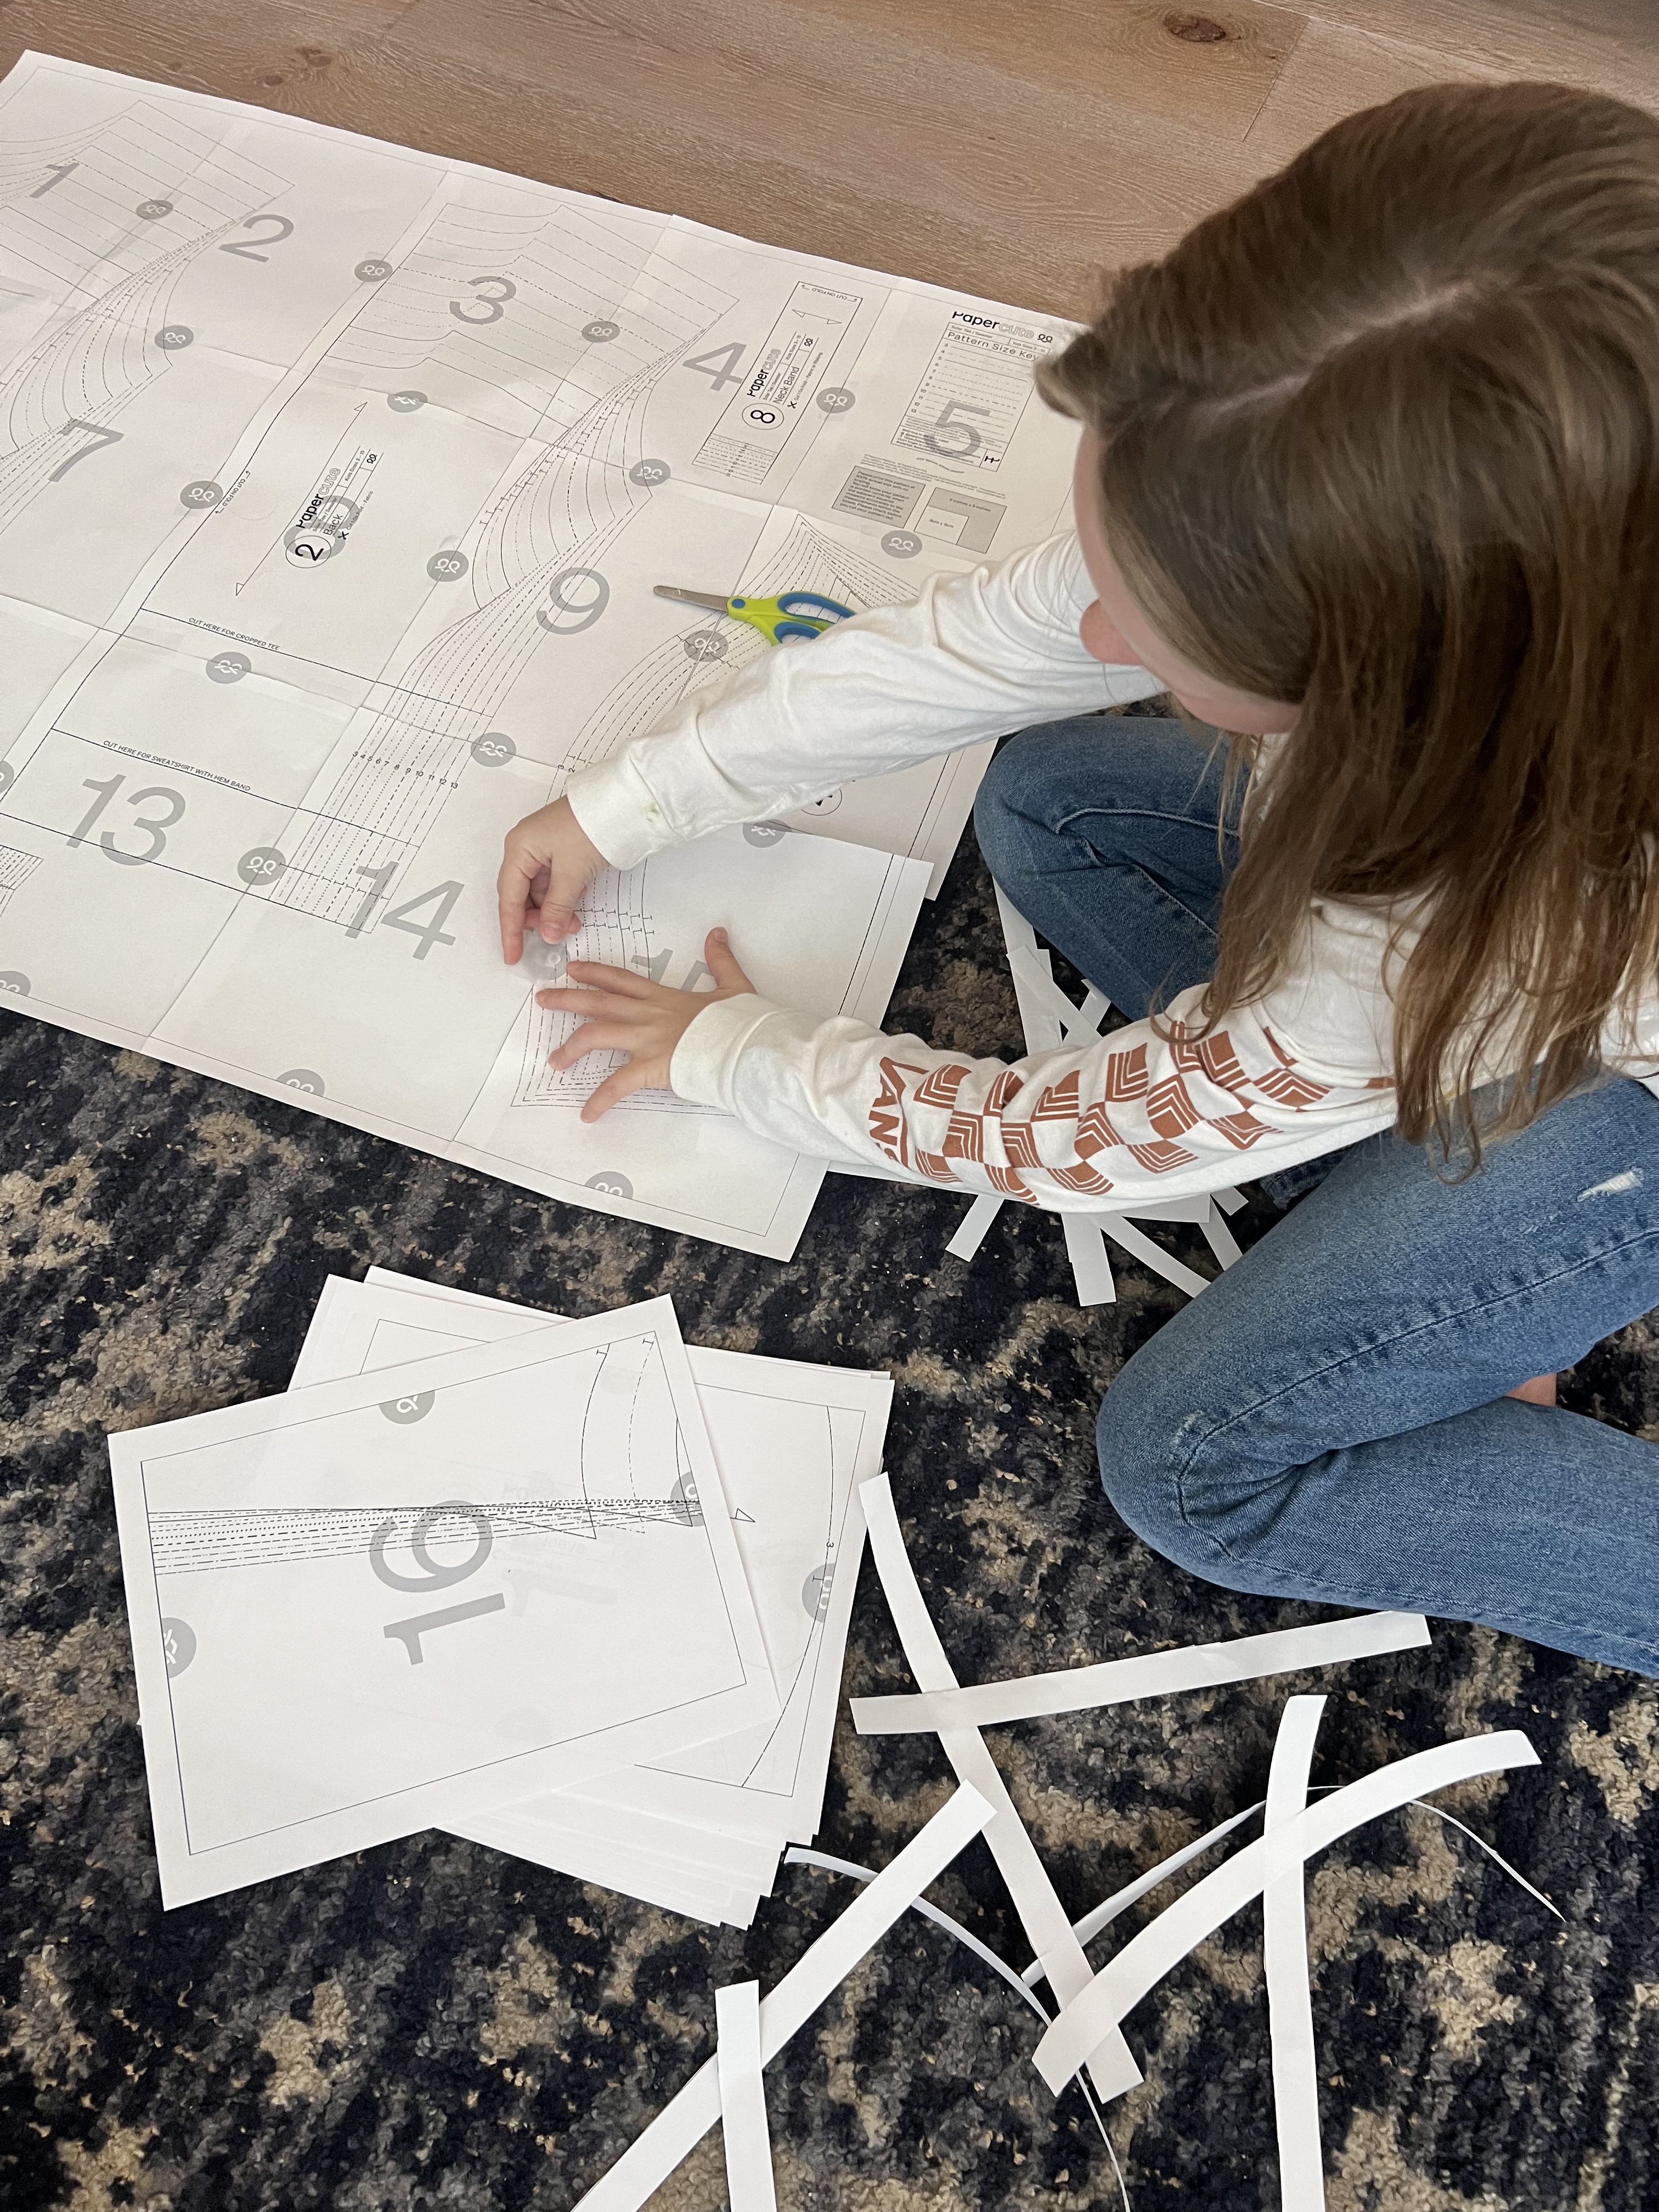
2. Feeling refreshed, the next step was cutting out the pattern pieces in the fabric. We had a quick lesson on warp vs. weft and the importance of cutting fabric out in the correct direction based off the pattern symbols. We talked about paying attention to how may patterns pieces need to be cut per piece and how to cut along the fold line. I showed her how to use pins and pattern weights to hold the pieces to the fabric while cutting. I posted a really fun time lapse reel of us cutting out the pieces together. You can find it here.
Basic Machine Knowledge:
- Before sewing, we went over basic machine knowledge. We started off on my Baby Lock Celebrate serger. I let her try sewing on a few fabric scraps to get the feel for the machine. She found the serger a little intimidating at first, as we all do I’m sure. After some practice she got the hang of it. I hovered right over her the whole time just to be safe. We also used the Baby Lock Brilliant sewing machine, and went over some basics with it as well: Starting and stopping, back stitching, automatic thread cutter, etc. We were trying to finish the project in a timely manner so we did not go over how to thread the machine, we’ll save that lesson for another time. Although, this would be a good time to introduce it if you have time!
Project Execution:
- Before beginning the project, we looked over the pattern instructions, noted the seam allowance and found where that would be on the sewing machine. I showed her how we follow the steps of the instructions to put a garment together.
- Following the step by step instructions, we began sewing the projects. I let her do all of the pinning, taught about the importance of pressing after each step where applicable, finishing seams, and checking fit throughout project. I had her try on her projects at certain points to make sure we liked the fit. We ended up shortening the sleeves a little. The pants were the perfect length unfinished so we left them with an unfinished look- gives them a cool vibe as well.
I helped her with attaching and sewing all of the sweatshirt bands, and some of the pants processes like the pockets and buttonholes. She observed most all of the steps if she wasn’t sewing. She did most of the work though and I’m so proud of her!!


Social Media:
- My daughter helps take a lot of my photos for me, so she was excited to be the one in front of the camera this time around. We did her hair, picked out shoes and snapped a few fun shots.

- We also made a fun reel to reveal the finished outfit and the making process. We found a fun sound bite from the Princess Diaries movie and had fun creating and editing a video together. You can find it here.
This was such a fun process!! To simplify it even more you could sew just a sweatshirt alone. We are excited to use these patterns to create a t-shirt and shorts for summer. I like these patterns because there is so much versatility- we will be using them a lot!! Hope this helps you get sewing with new sewists in your life!!


Leave a comment