ImageImage

For this project I used a ballpoint needle, and zig zag stitch with the knit fabric. I also used a regular sewing machine.

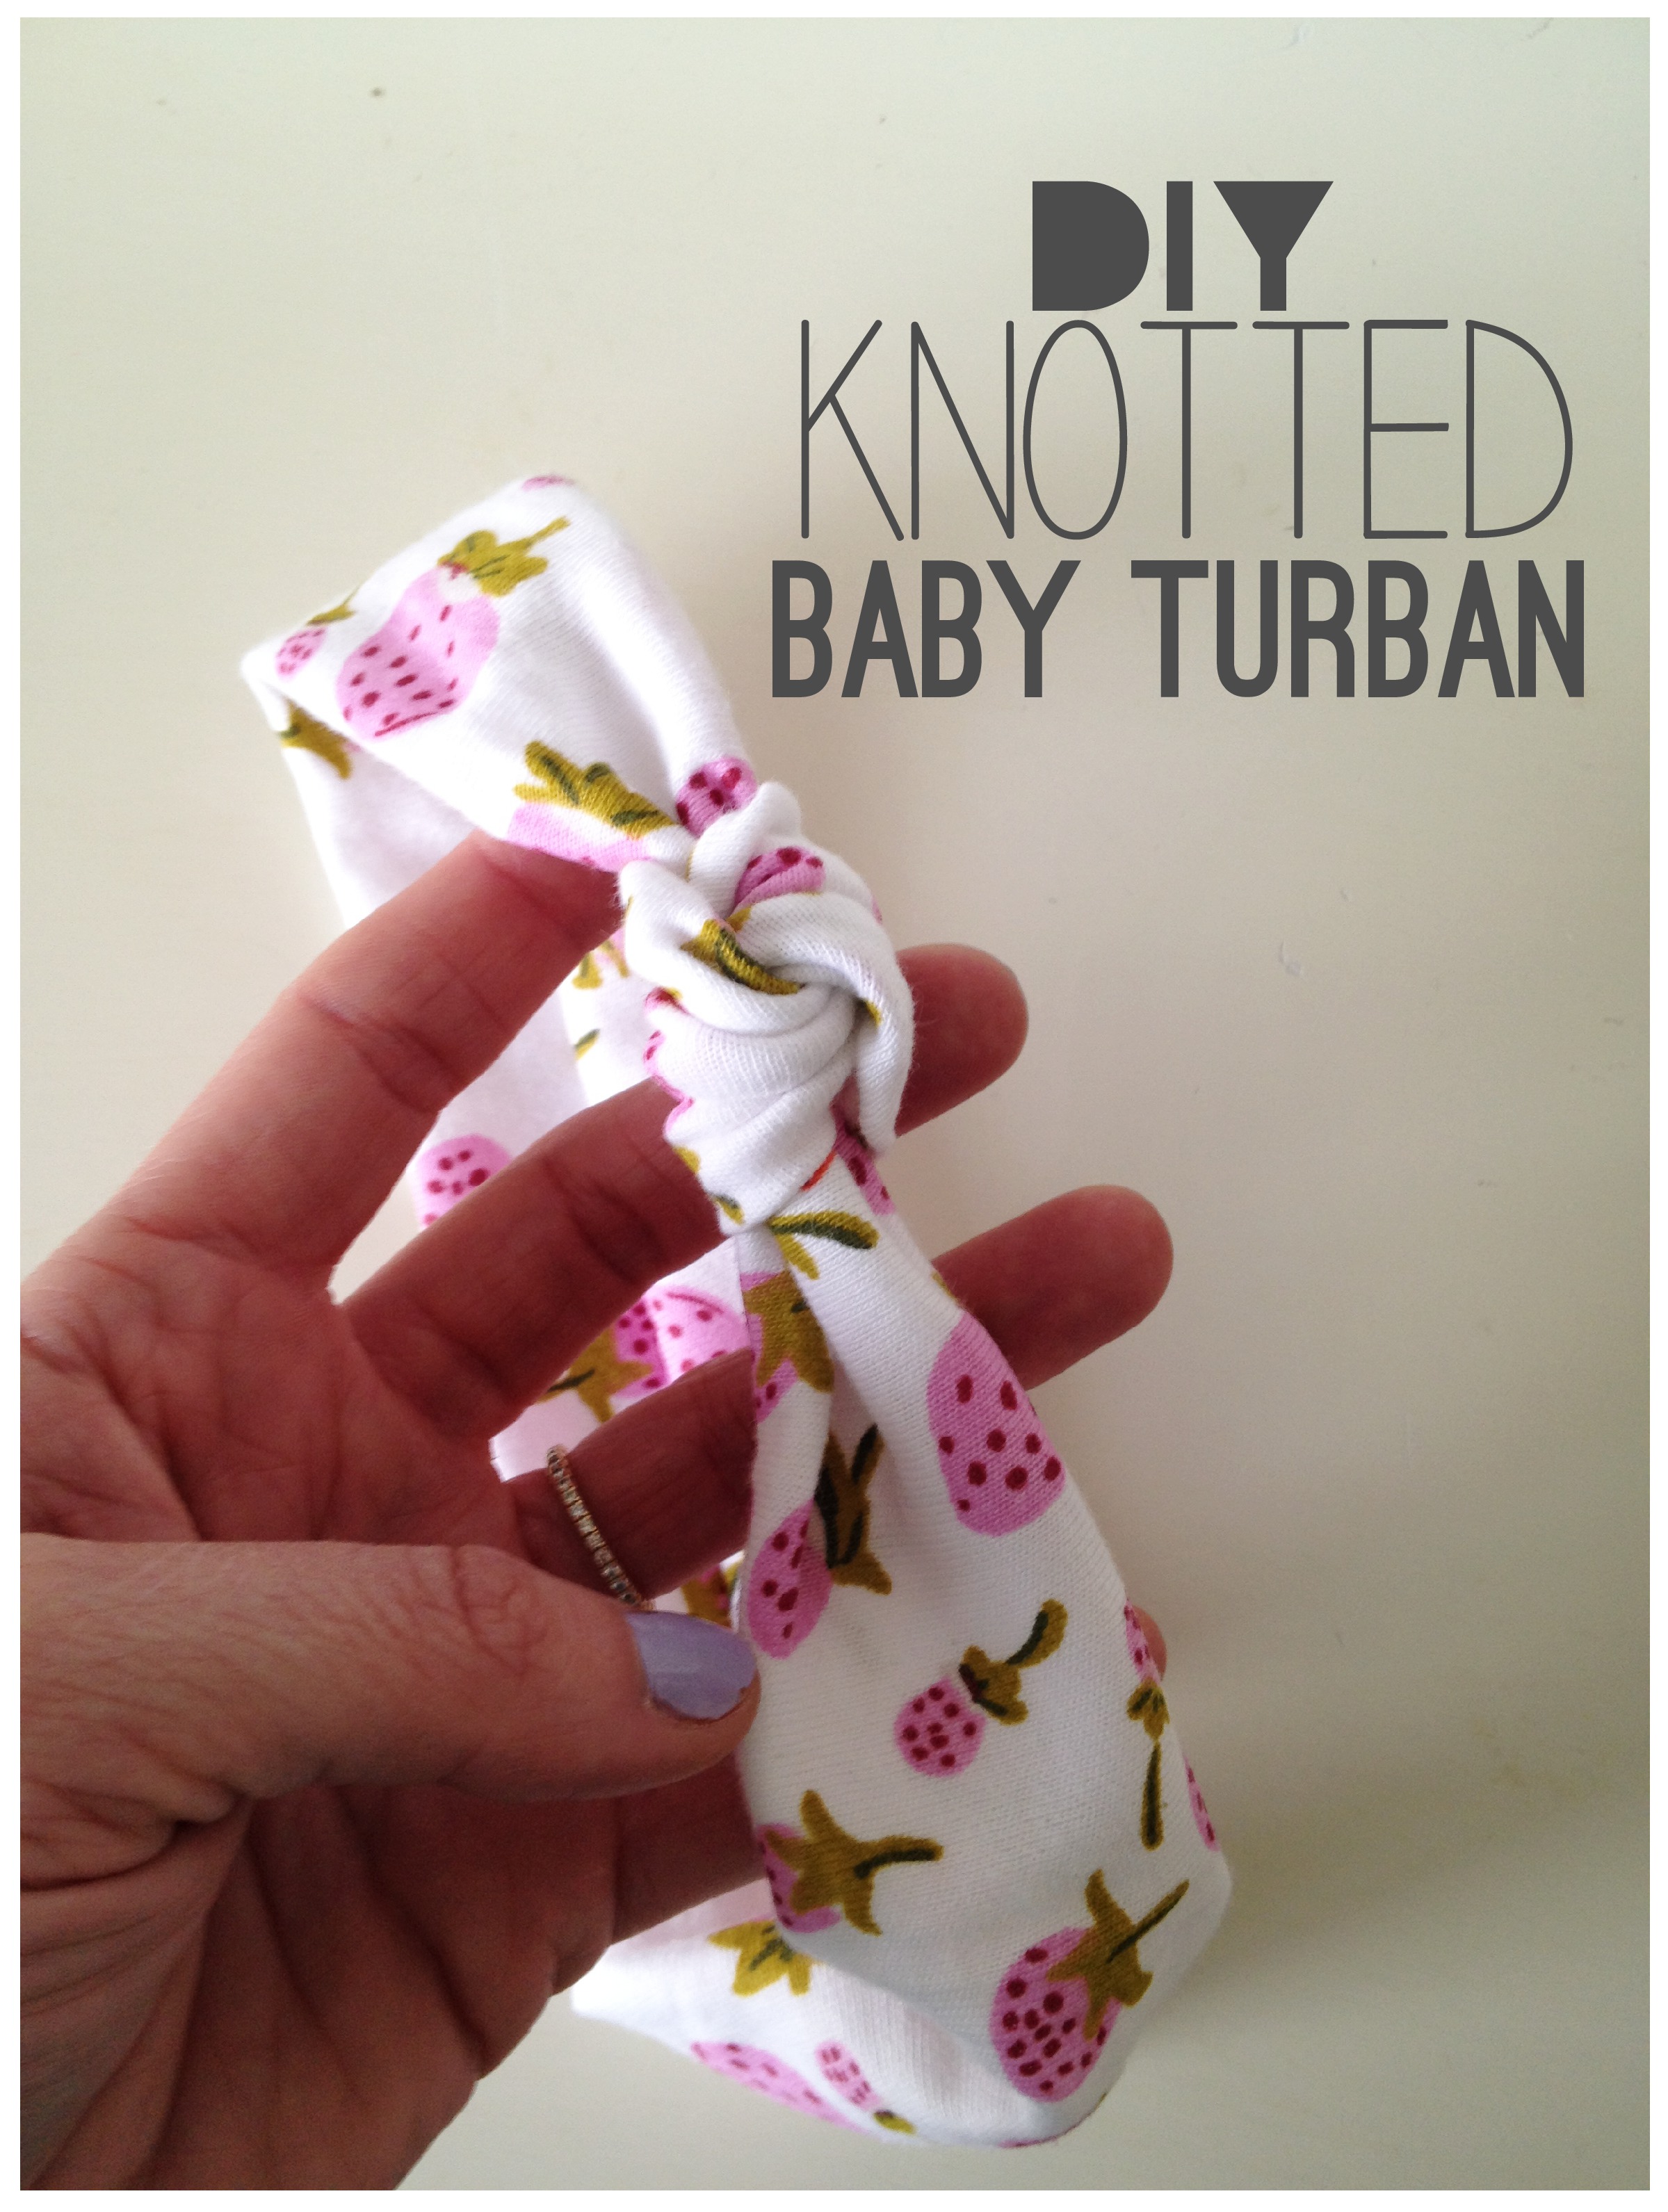
The fabric I used is called Heather Ross Briar Rose Cotton Jersey Knit Strawberry Lilac.

Image

Image

Image

Image

Image

I wasn’t able to find a free tutorial on Pinterest for these, so I thought I would share mine. Another easy project, and very cute with matching pants! This is a quick project- 20 minutes tops. Enjoy!

I would love to see your finished knotted baby turbans! Please share using hashtag:

#knottedbabyturban

Can’t wait to see yours!!

57 responses to “Knotted Baby Turban Tutorial”

  1. pintestsisters Avatar

    I love that fabric and turban! So cute, Sara!

    Like

  2. shelly Avatar

    super cute with the matching little leggings : )

    Like

  3. Nicki Avatar
    Nicki

    Where did you find your legging pattern?!

    Like

    1. The Sara Project Avatar

      Are you referring to the fabric? It’s Briar Rose by Heather Ross, you can find it on fabric.com and other stores online 🙂

      Like

  4. brandi Avatar
    brandi

    why am i finding this not so easy hahaha

    Like

    1. The Sara Project Avatar

      Oh no! How can I help?

      Like

  5. brandi Avatar
    brandi

    i think i got it 🙂 haha made a couple yesterday!! so excited! thank you for this!

    Like

  6. Chris Avatar

    So you don’t sew elastic into the headband, you just use a stretchy knit material?

    Like

    1. The Sara Project Avatar

      Exactly! Any knit should work. The fabric I used was a cotton knit. No elastic required.

      Like

  7. Vanessa Avatar
    Vanessa

    Do you have a tutorial or the matching pants? Thanks! I’m going to try these bands tomorrow!!

    Like

    1. The Sara Project Avatar

      Yes I do! It’s the post right before the headbands. You can find them in the sew category featured at the top of the page 🙂 Good luck making the knotted turban, you will love em!! 🙂

      Like

  8. Marie Hartman Lindahl Avatar

    What kind of stitch did you use for the headband so that the knit could still stretch? And did you cut with the stretch?

    Like

    1. The Sara Project Avatar

      I used a zig zag stitch with a ball point needle! This way the stitches stretch with the fabric. And make sure to cut your fabric on the grain line.. With the stretch. Hope this helps! 🙂

      Like

  9. tristian Avatar
    tristian

    I’m not finding the joining of the ends very easy. Any advice?

    Like

    1. The Sara Project Avatar

      Basically you’ll fold the headband in half so the end edges are front sides together, you’ll see the seam going down the middle backside facing out as shown in the picture. (With the seam in the middle of the back side you won’t see it at all when worn).Then just sew the ends together at 1/4″ seam with a zig zag stitch and trim off seam allowance. Let me know if this is still confusing!! 🙂

      Like

  10. Mia's Mommy Avatar
    Mia’s Mommy

    I would like to try this, but I don’t understand the last step. How do you sew the ends together?

    Like

    1. The Sara Project Avatar

      Basically you’ll fold the headband in half so the end edges are front sides together, you’ll see the seam going down the middle backside facing out as shown in the picture. (With the seam in the middle of the back side you won’t see it at all when worn).Then just sew the ends together at 1/4″ seam with a zig zag stitch and trim off seam allowance. Let me know if this is still confusing!! 🙂

      Like

  11. Nonna M Avatar
    Nonna M

    Thank you! I LOVE it!!!

    Like

  12. iamgirl1 Avatar

    OMG HOW CUTE! Great job girl. I LOVE your blog too! It is so pretty and simple!

    Like

    1. The Sara Project Avatar

      Thank you! That means so much!! 😊

      Liked by 1 person

  13. Carolyn Plants Avatar

    how much material does this require for an infant? Is 1/4 yd enough?

    Like

    1. The Sara Project Avatar

      1/4 yd is plenty! You could probably get two-four headbands out of that.

      Like

  14. Annette Ross Avatar
    Annette Ross

    This is probably a silly question. I was sorta playing around with a couple pieces of stretchy knits and when I tied a knot they got real short. Is it really head measurement minus 2-3? I’m afraid to cut lol.

    Like

    1. The Sara Project Avatar

      Because the knit fabric is so stretchy, you need to subtract a few inches so the headband fits snugly around your baby’s head. You can always play it safe and only subtract an inch or even less if you’re worried- and then measure it on your baby’s head and take away more if you need. Hope this helps! 🙂

      Like

  15. […] This easy, knotted turban is a perfect fit on your little baby girl. And you can use so many different fabrics and prints when creating these cuties. {found on The Sara Project} […]

    Like

  16. Laura Hager Avatar

    This is so cute! Thanks for sharing! I’m going to make some for the little girl I baby sit!

    Laura
    http://laurahager.blogspot.com/

    Like

  17. Lourdes owen Avatar
    Lourdes owen

    This is so cute! Matching headbands & leggings! Going Tito make one for my granddaughter! Thank you.

    Like

  18. Carla Avatar
    Carla

    Let me start by saying I am a beginner. This headband is adorable and very easy to make. I did have to add 3 inches to the length to accomodate my daughters head. Once the thread goes in you lose the elasticity. Am I doing something wrong?

    Like

    1. The Sara Project Avatar

      Make sure you are using a ball point needle and a zig zag stitch, than it should still stretch for you!

      Like

      1. Carla Avatar
        Carla

        Thanks! I figured it out. Apparently the fabric only stretches one way and not both.

        Like

      2. The Sara Project Avatar

        Oh yay! I’m glad you were able to figure it out 🙂

        Like

  19. Lindsey Avatar
    Lindsey

    Silly question but I can’t figure out how to tie the knot?

    Like

    1. The Sara Project Avatar

      Hi Lindsey! ll I did was tie a regular knot (half of a square knot), and manipulated it so the top of the knot is on the top of the headband, and I pulled it a apart a little to get the look I wanted of a bigger, chunkier knot).Hope this helps!

      Like

      1. lackids Avatar

        I am also confused about the last step. Did you tie the pieces together to make the knot or sew it together and use a different piece of fabric to create the knot?

        Like

      2. The Sara Project Avatar

        I just tied the one long head band piece together in a knot, and centered the knot to the side where I wanted it 😀 And then sewed the two end pieces of the headband together to finish it off.

        Like

  20. megan Avatar
    megan

    Thanks for the awesome tutorial! I just whipped one up in about 8 min! And I’m a beginner! I wish I could post a pic, it came out so good! I have a boy so this was fun and exciting to make, my first girl project, I made it for his cousin so she matches his diaper and shirt I made for my son when we go to the aquarium this weekend! 🙂

    Like

    1. The Sara Project Avatar

      This makes me so happy!! I would love to see a picture of it! I’ll have to start a hashtag or something! 😊

      Like

  21. […] 6. A Pretty Knotted Baby Turban Tutorial Image via: thesaraproject […]

    Like

  22. […] headwrap, that is. This tutorial is for a knotted baby-sized turban, but you are probably going to want to make one for […]

    Like

  23. […] It’s very cute to see a newborn baby rocking a giant headband. Check out this fun and easy tutorial to make one via thesaraproject. […]

    Like

  24. Winter Blues? | mommyeats Avatar

    […] You can find out how to make them here Bow top knot and Knotted baby turban. […]

    Like

  25. Jess Avatar
    Jess

    Could another type of fabric work for this project? For example, I sewed a swaddler blanket as a gift for someone that is made out of the baby/soft flannel. I was going to try this using the same material in a complementing color. Thanks!

    Like

    1. The Sara Project Avatar

      Hi Jess! You could use a flannel but keep in mind it does not stretch as much as a knit, so the measurements need to be pretty exact. You could do something like this instead: cut two pieces of flannel (front and back, add a few inched to each end from exact head measurement (and curve or point the ends), sew together RST, flip out right side and you could just tie the headband on the head in a knot or bow instead. Just an idea! That might work better for a growing child. Using a knit lets the headband stretch over the child’s head and also grow with the child, while fitting snugly to stay on. Hope this helps! I also did a tutorial for a wired head wrap thats really cute too: https://thesaraproject.com/2014/09/18/diy-wired-head-wraps/

      Like

  26. Ashlee Avatar
    Ashlee

    I am not a person to comment on anything but this is toooo cute and the matching pants I love it

    Like

  27. […] a twist, literally, on a little girl’s headband, make the Knotted Baby Turban as seen on “The Sara Project.” This quick project uses knit fabric with a good amount […]

    Like

  28. Kyla Avatar
    Kyla

    Could I hand sew the part that you use the sewing machine for? I don’t have a sewing machine, or skills.

    Like

    1. The Sara Project Avatar

      You would probably need to use a sewing machine or serger for these headbands unfortunately. Sorry!

      Like

  29. […] Nothing goes wrong with turbans and this knotted turban is trendy enough to flaunt . You can find the link Here […]

    Like

  30. […] Knotted Baby Turban is a cute variation on a little girl’s headband. It’s made from a wide length of stretchy knit […]

    Like

  31. […] This easy, knotted turban is a perfect fit on your little baby girl. And you can use so many different fabrics and prints when creating these cuties. {found on The Sara Project} […]

    Like

  32. […] Knotted Baby Turban by The Sara Project […]

    Like

Leave a reply to Handmade Baby Gifts You Can Make | Billy Bibs Cancel reply

Welcome to The Sara Project! This is my space for sharing all things sewing. I primarily focus on garment sewing in this space, with a few other fun things popping up here and there. Join me in pattern reviews and sewing tips! Happy sewing!

I’m Sara

Let’s connect