
This post is sponsored by Baby Lock but all opinions are my own.
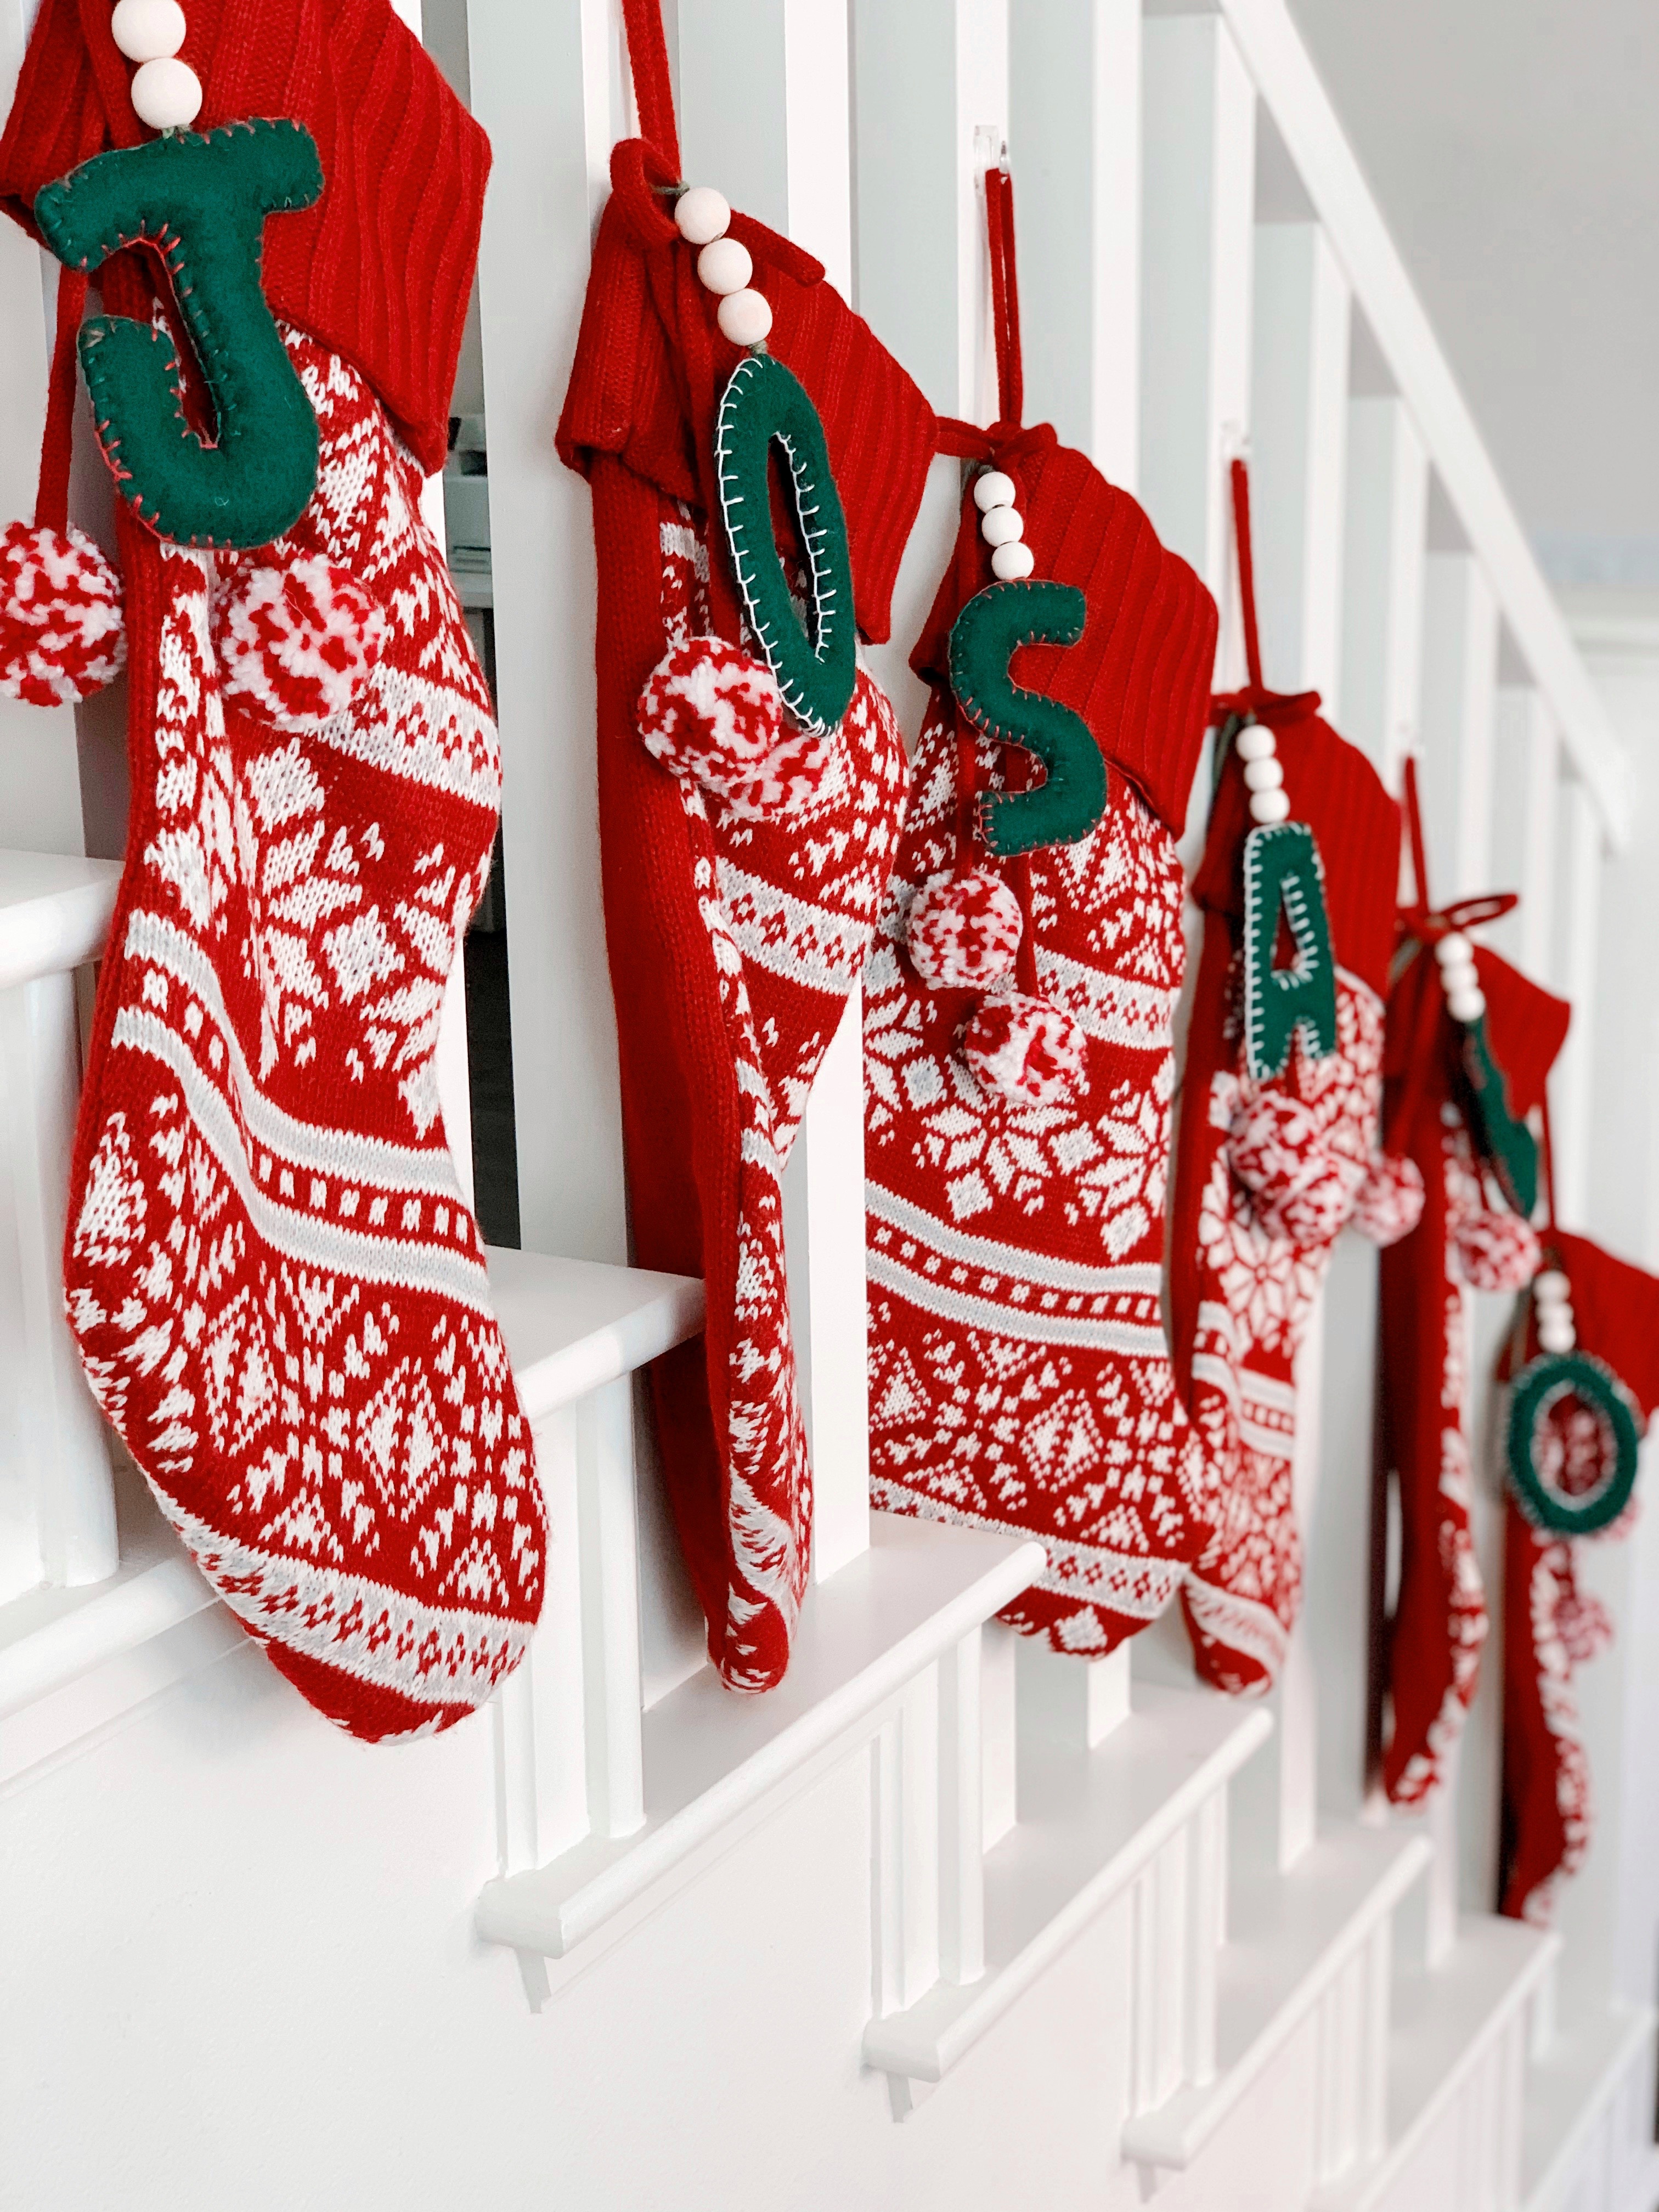
Hi everyone! It’s time for Christmas crafting and I have a fun tutorial for you today! I’ve been needing a way to differentiate and label our family’s stockings and I came up with a super easy and cute way to do it. I created simple felt letters to tie onto each stocking starting with each person’s first letter of their name. They look really cute and they are super easy to customize to match with your Christmas scheme.
I used my Babylock Brilliant sewing machine along with some hand sewing techniques to create these cute tags. Let’s get started!
What you need:
-Felt or Wool
-Embroidery Floss
-Stuffing
-Yarn
-Wooden Beads
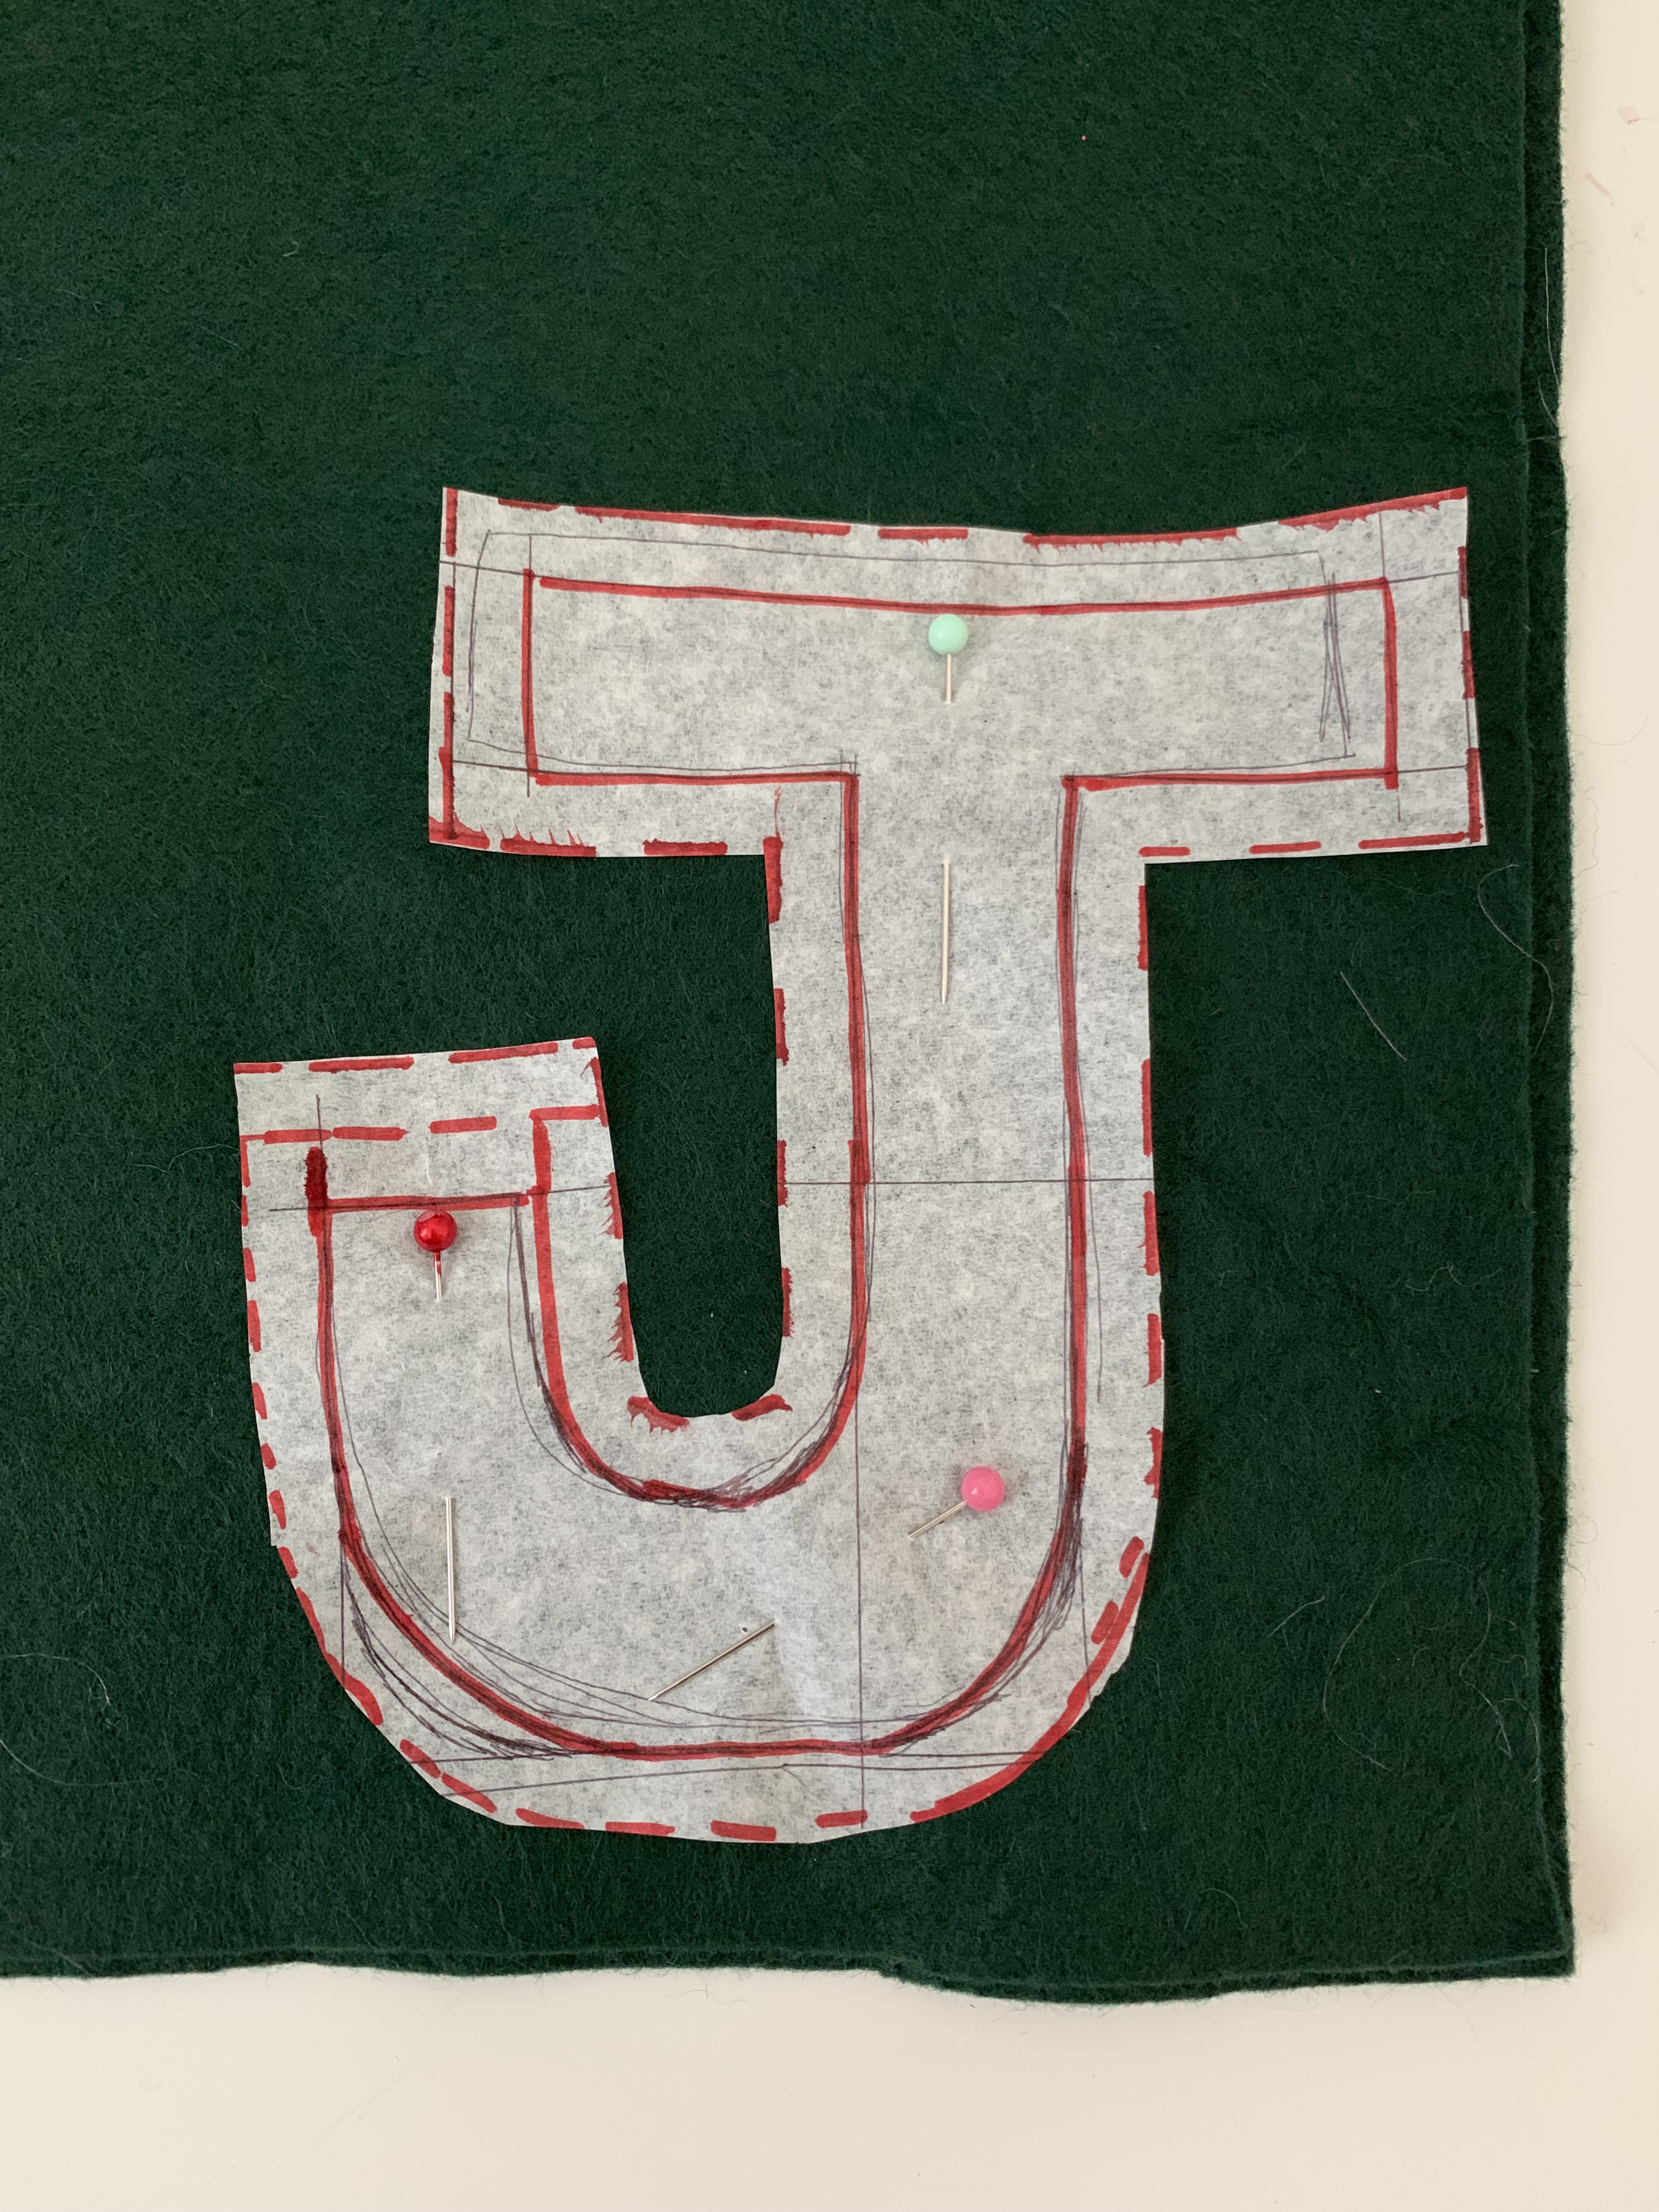
Step One: Create your Pattern
I made 6 different letters for my tags. I started by drawing out my letter (A ruler is very handy here), adding a 1/4″ seam allowance, and testing it out. I then based all of my other letters off of the first letter to keep the size consistent. The following steps are for letters that do not have a cut out in the middle of them (ex: S, J, T). For letters with a cut out (ex: A, O, B) skip down to step six. After your patterns are created, cut two out of the felt.
Step Two: Pin the letter right sides together. Sew around the outside of the letter leaving a 2″ opening along the seam, don’t forget to backstitch as you begin and finish sewing. Clip the corners.


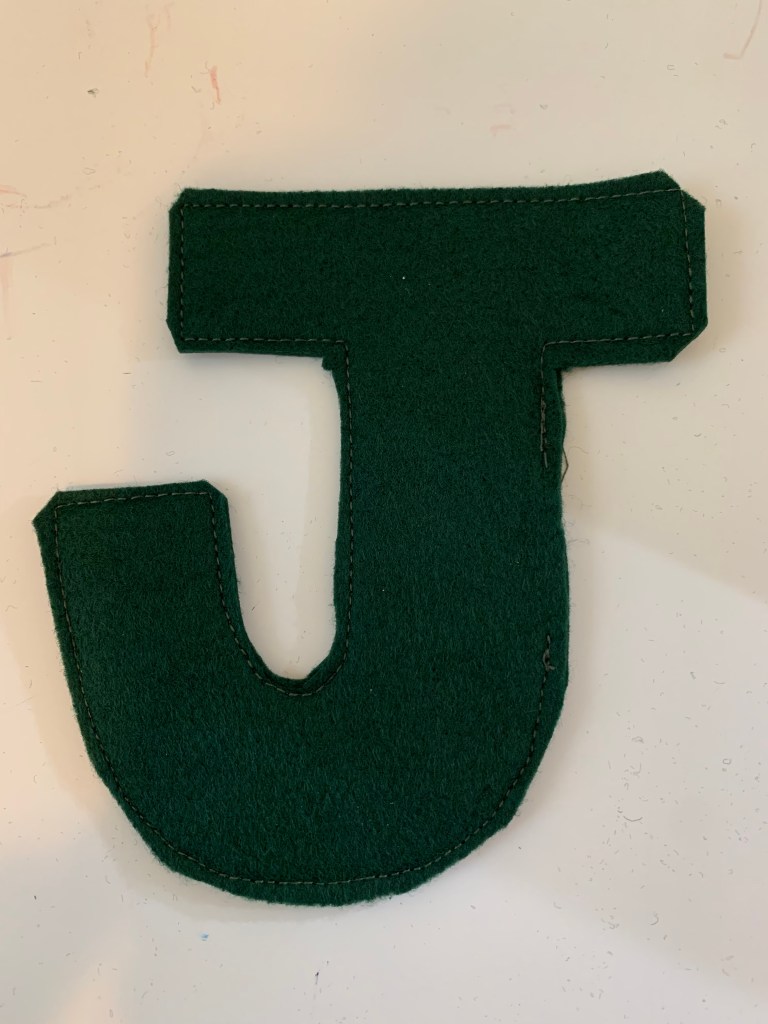
Step Three: Flip the letter right side out. Felt is stiff but holds it shape pretty well, so you may have to finagle it a little bit to turn it right side out, but it will be just fine. I also used a corner pointer tool to help push out my corners really nicely. Once right side out, insert stuffing evenly into the letter. I used the back of a pen to help push the stuffing in to harder to reach spots.

Step Four: Using matching thread and a hand sewing needle, stitch up the opening of the letter. We will be covering up the stitching with a decorative stitch so it doesn’t need to be perfect!

Step Five: Using any color of embroidery floss you like, sew a blanket stitch around the letter. Youtube has lots of great tutorials for a blanket stitch if you need some help.


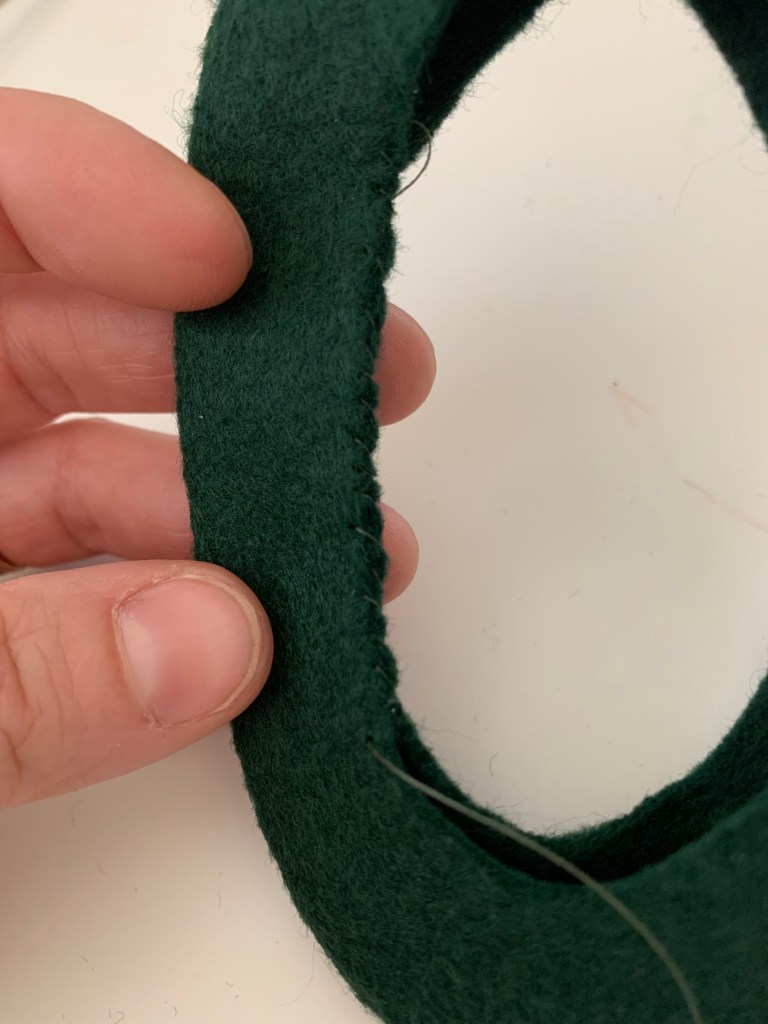
Step Six: For letters that have an enclosed cut out such as B or O, pin the letter right sides together and sew along the outer edges of the letter. Flip it right sides out.

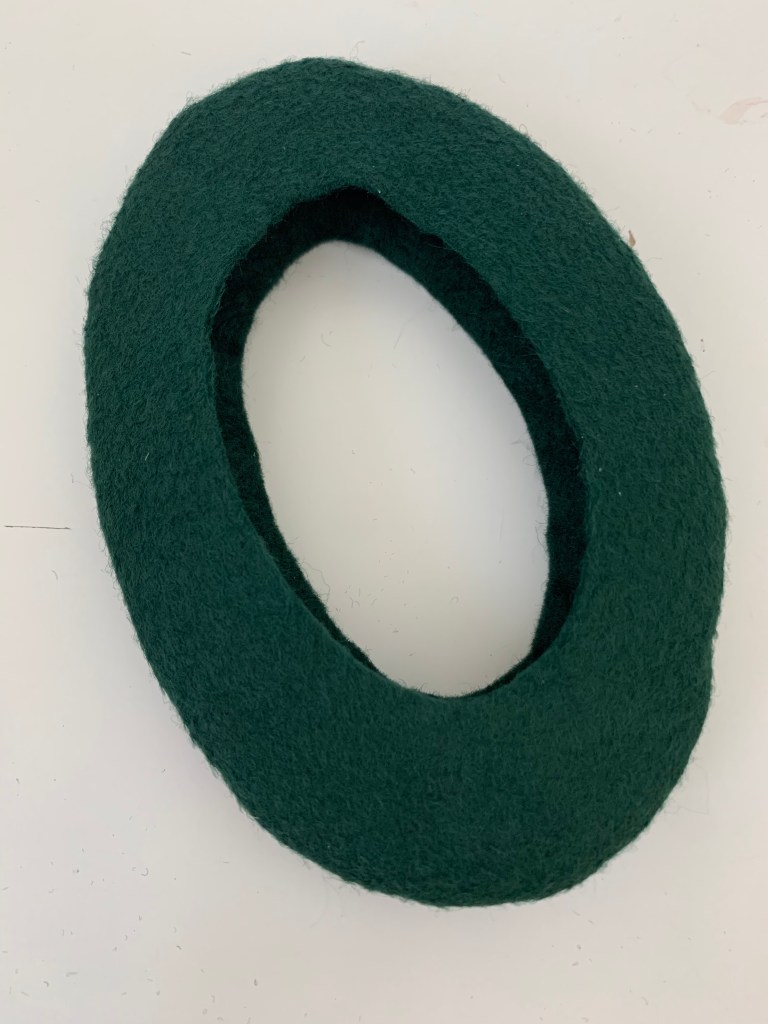
Step 7: Begin hand sewing the center cut out closed, stuffing the letter as you go. I found it helpful to use the back of a pen to stuff the letters in harder to reach areas.
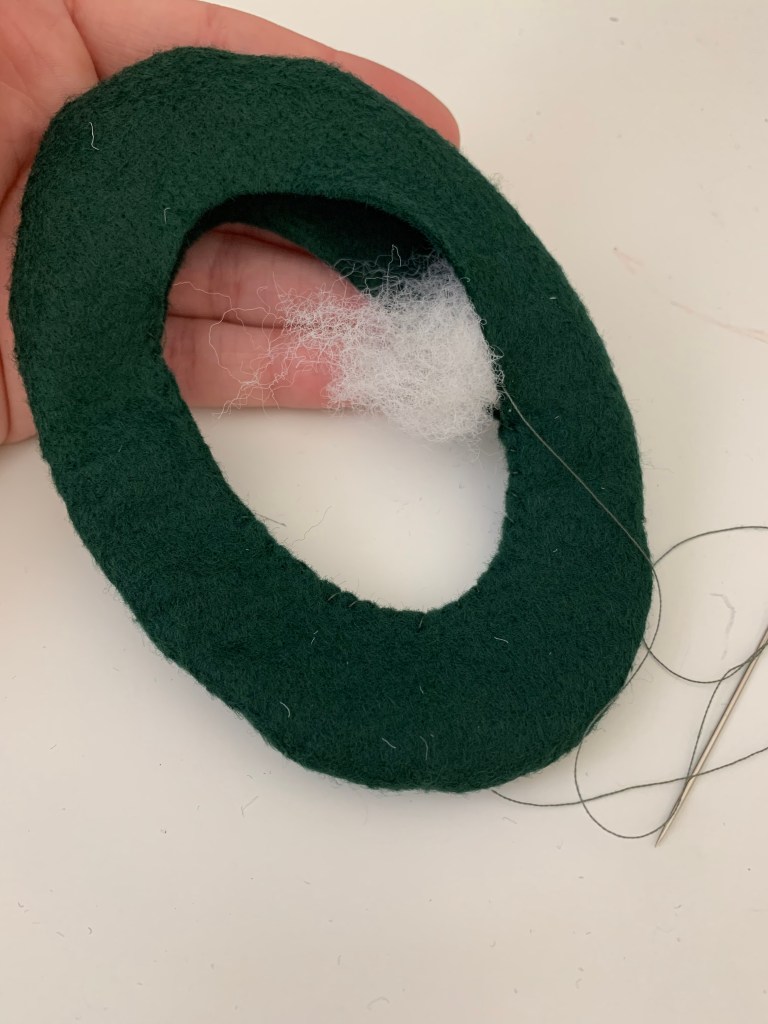

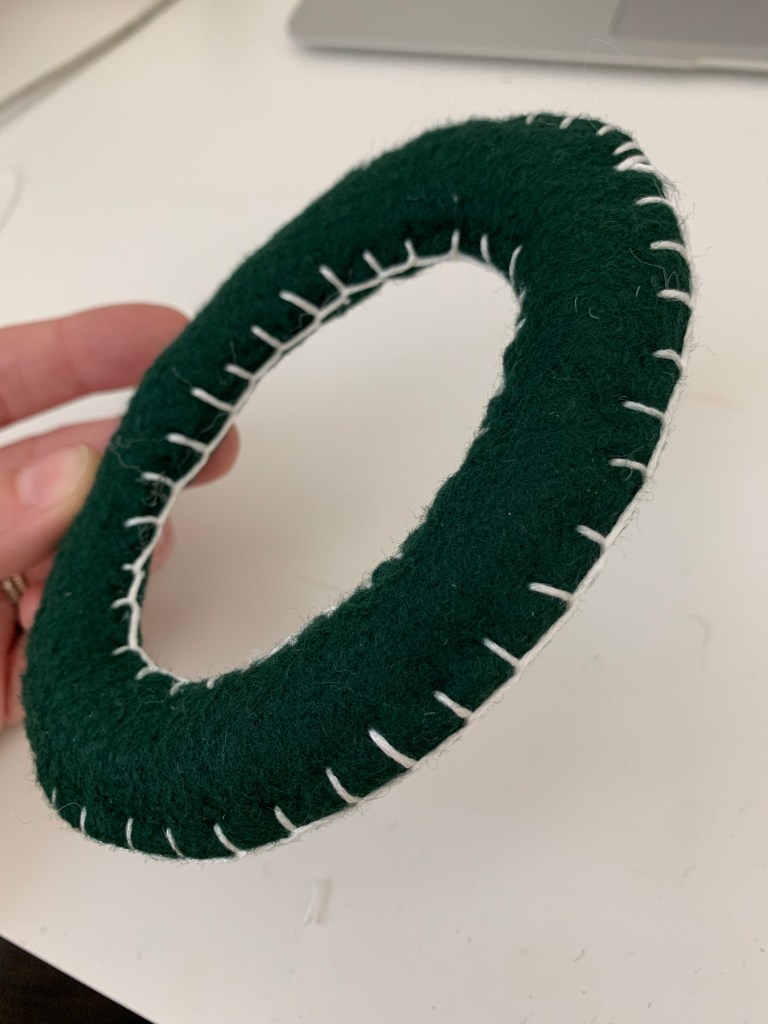
Step 7: Continue hand sewing and stuffing until the letter is all sewn up. Add a blanket stitch around all of the edges.


Step 8: Grab some yarn and thread it through a needle. Insert the yarn through the top of the letter, and pull through.


Step: Tie a knot at the top of the letter, thread a few beads, and knot again.
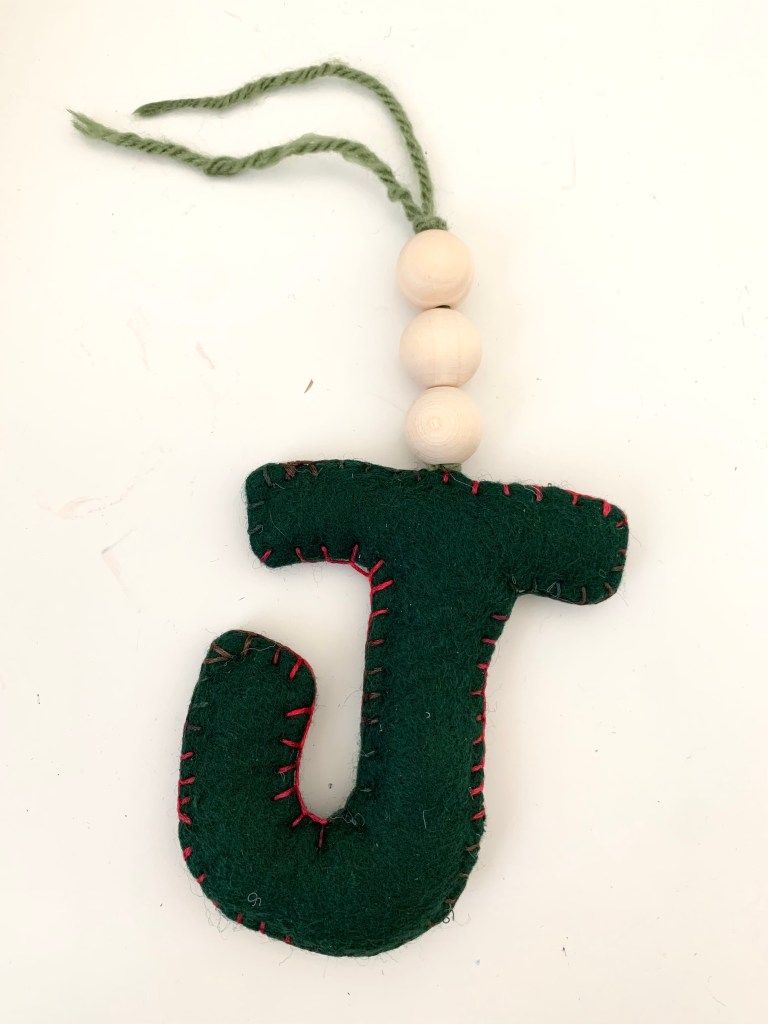
All finished!! I love these cute handmade felt letters, and my kids love their newly personalized stockings! These felt letters would make cute ornaments or gifts tie add-ons, too! I hope you enjoyed this post, thanks so much for being here!


-Sara


Leave a comment